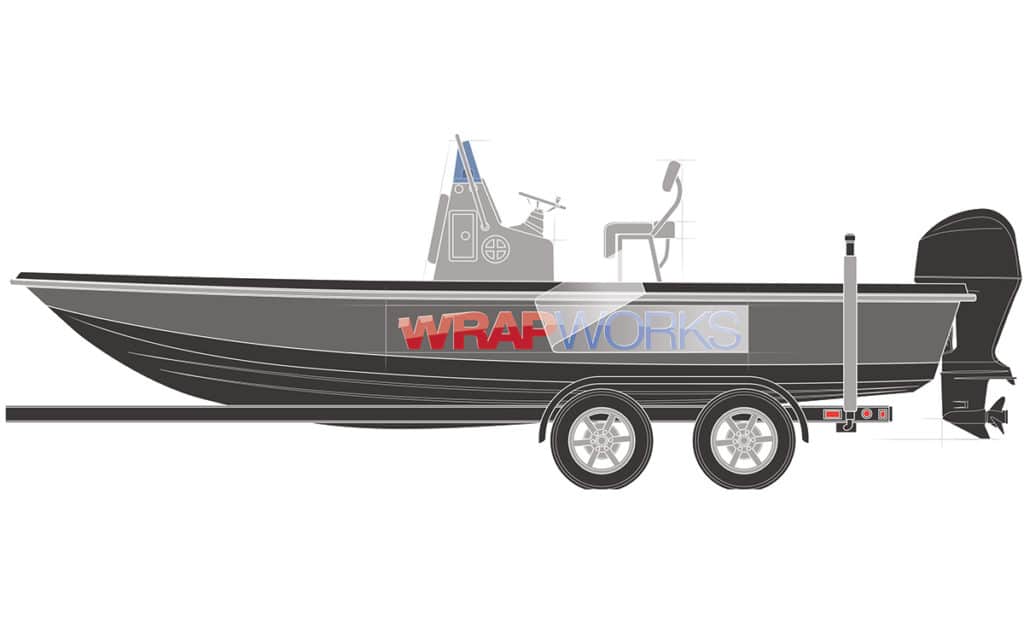
Applying vinyl graphics as boat decals ranks as a methodical do-it-yourself project. To learn more, we sought guidance from Chris Youngash, owner of Wrap Works (wrapworks.com) in Costa Mesa, California, and a 15-year industry veteran. We followed along as he installed a boat name on a Pathfinder Tournament 2200 bay boat while it sat on a trailer.
In ordering a graphic, make sure the shop utilizes high-performance cast-vinyl material, Youngash says. It is less likely to shrink than the vinyl used at a neighborhood sign shop, and it’s UV stabilized. Both parameters are critical in a marine environment.
Cost depends on the size, colors and complexity. The 11-by-72-inch digital print we installed cost $125. Most vinyl-graphic shops also offer design services (minimum $75 at Wrap Works) to guide you, either in person or via email, in creating a graphic that meets your desires, fits the space and complements your boat. Today’s digital print technology allows you to integrate vivid images and create virtually any concept you wish.
Getting Started
Skill Level: 4/5
Time to Completion: 1.5 Hours
Tools and Supplies
* 11-by-72-inch vinyl boat name ready to apply ($125 per side; wrapworks.com)
* Flexible plastic squeegee (included with decal)
* 70-percent isopropyl alcohol ($2.27/16-ounce bottle; cvs.com)
* Spray bottle
* Microfiber towels
* Tape measure
* Grease pencil
* Masking tape
* Scissors
* X-Acto knife
* Seal-It-Pen ($11.60; image1impact.com)
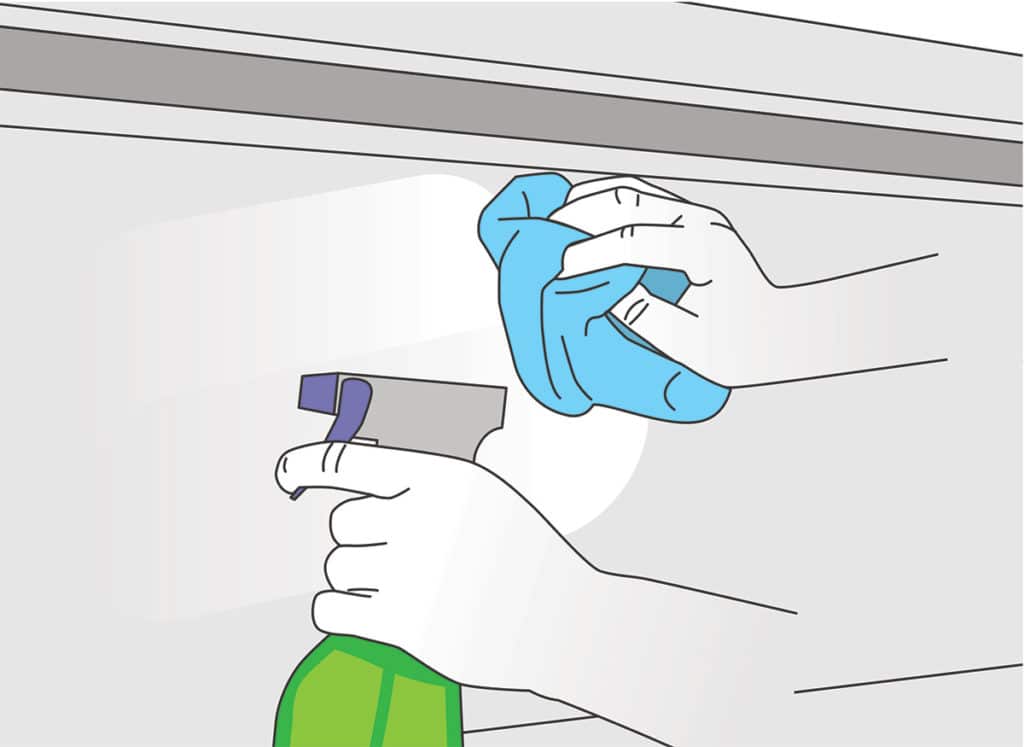
Choose a calm, windless day with air temperatures above 65 degrees Fahrenheit to apply the decal. Start your project by washing the application surface with soap and water to remove any salt or scum, rinse liberally with water, and dry with a clean towel to avoid water spots. Next, spray a 70-percent isopropyl alcohol solution across the entire area and wipe it down with a clean microfiber towel to remove any residual wax, grease or oil from the application surface. Tim Barker
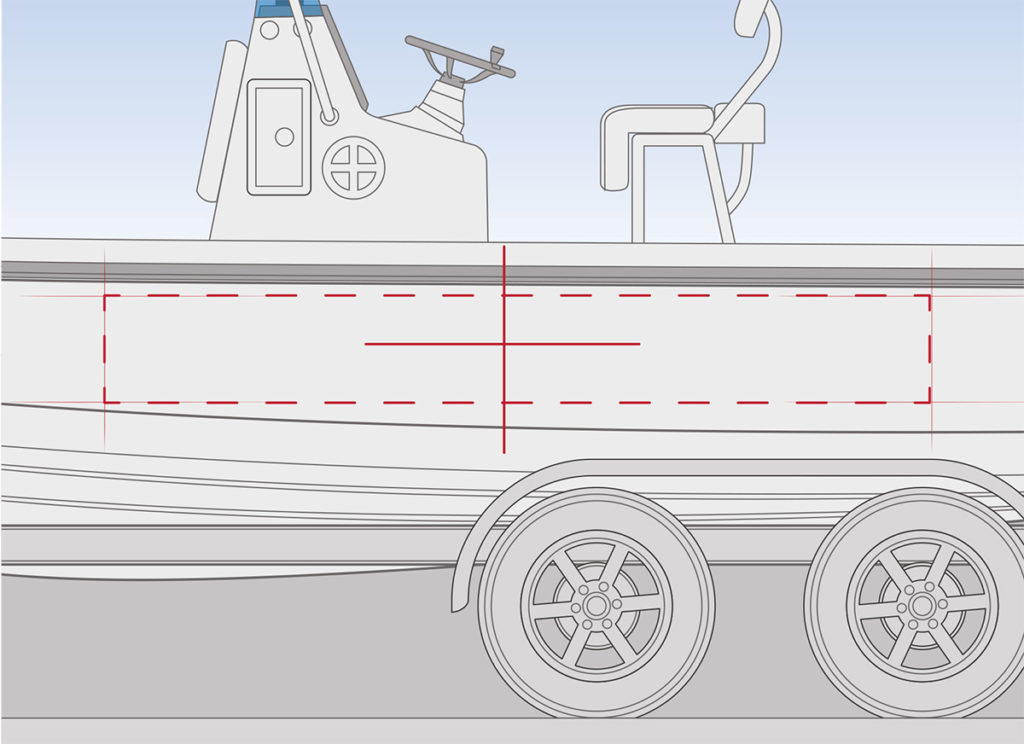
Use a tape measure or yard stick to find the vertical center of the area where you want to apply the decal and mark it with a grease pencil above the application area. The vinyl graphic you ordered will come sandwiched between backing paper and semi-transparent transfer paper. Lightly fold it in half lengthwise; the crease will indicate the vertical center of the decal. Align the crease with the mark on the hull and roughly position the decal with pieces of masking tape. Tim Barker

Align the top of the decal (not the paper) to a horizontal reference line, such as the rub rail underside, to create pleasing and consistent spacing between the reference line and the top of the graphic from front to back. Once happy with the positioning, run a long piece of masking tape across the top edge of the graphic’s paper carrier and remove any small pieces of tape. This serves as a temporary “hinge” at the top of the decal. Leave it in place until step 5. Tim Barker
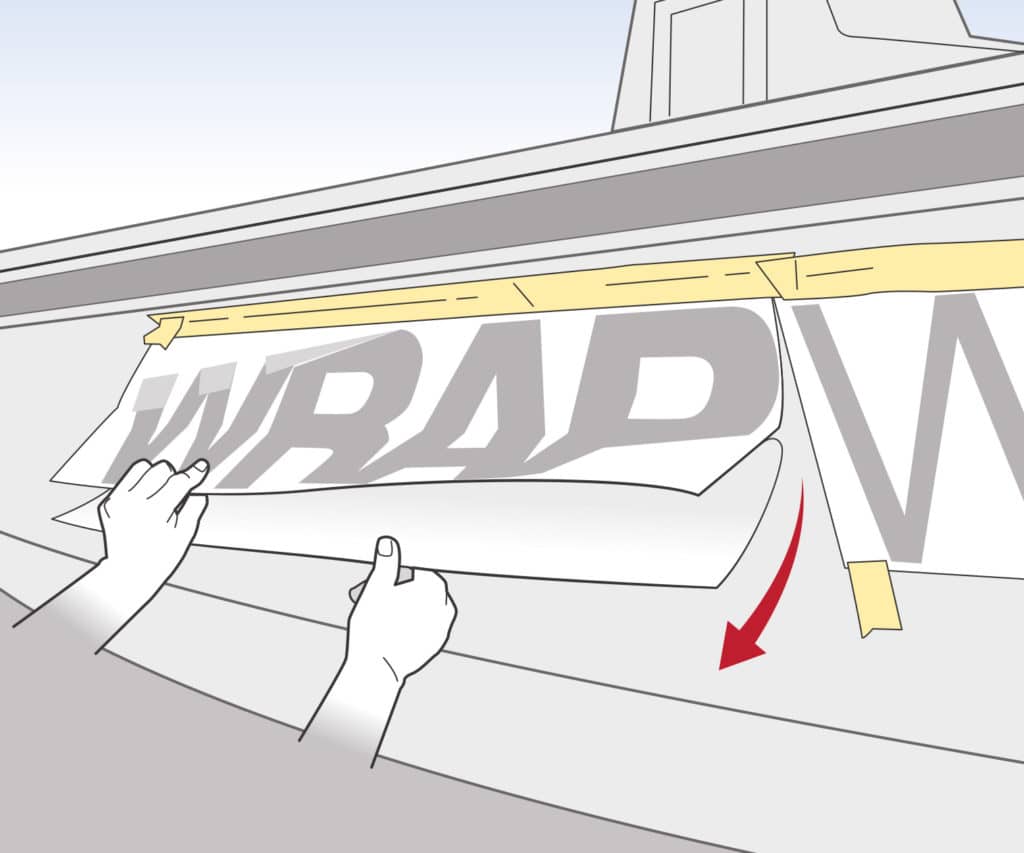
With individual letters or elements, use scissors to cut between them to make this process more manageable. Or you can leave the decal intact. In either case, peel away the backing paper from the top, allowing the decal to lightly adhere as you pull down on the backing. If the decal wrinkles anywhere, quickly pull it away with the transfer paper and smoothly put it back down. Press out air bubbles with the squeegee, working firmly from the center outward. Tim Barker
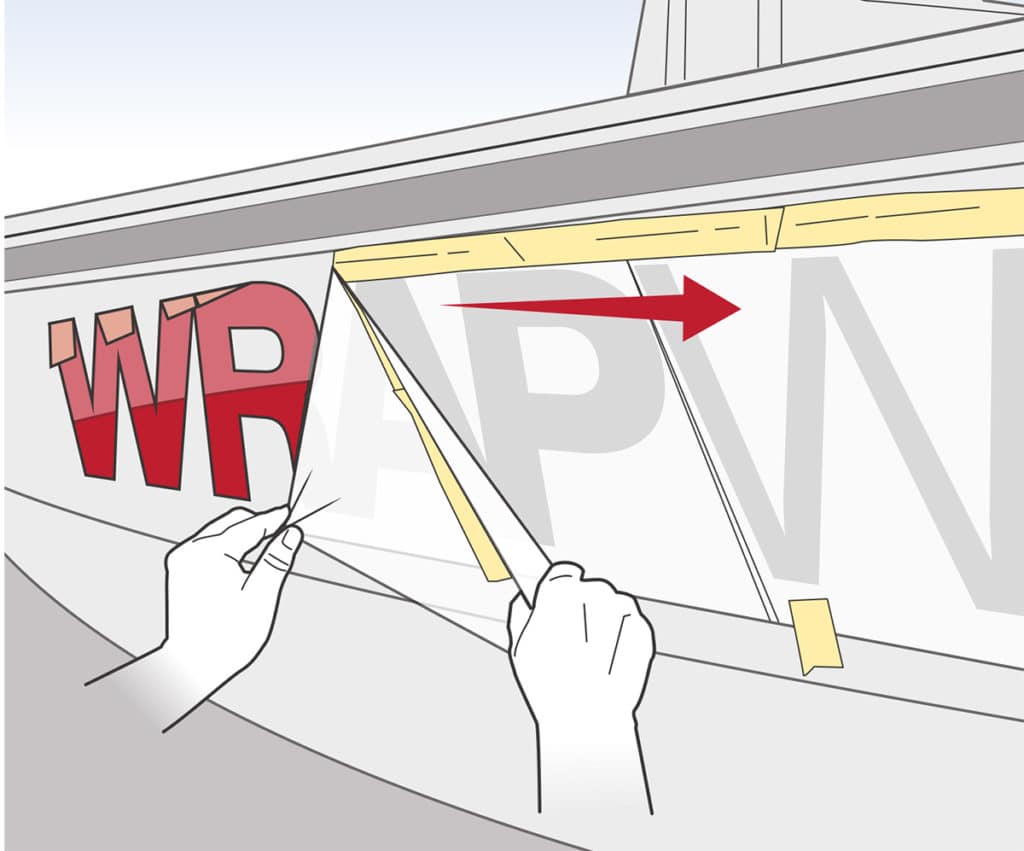
Remove the strip of masking tape at the top, then peel off the transfer paper, beginning at the upper left corner, pulling gently at a 45-degree downward angle but nearly parallel to the hull surface. The paper might tear; if it does, resume at the upper left corner. With the transfer paper removed, the centers of letters, such as D, O or P, might still contain backing paper. Carefully peel these sections away; an X-Acto knife can help get this started. Tim Barker
Quick Tip
Using a Seal-It-Pen along the edges of a decal helps prevent the vinyl from peeling or lifting. While this colorless adhesive dries in 15 minutes, it is best to wait 48 hours for the adhesive in the vinyl decal to fully cure before you go boating again.