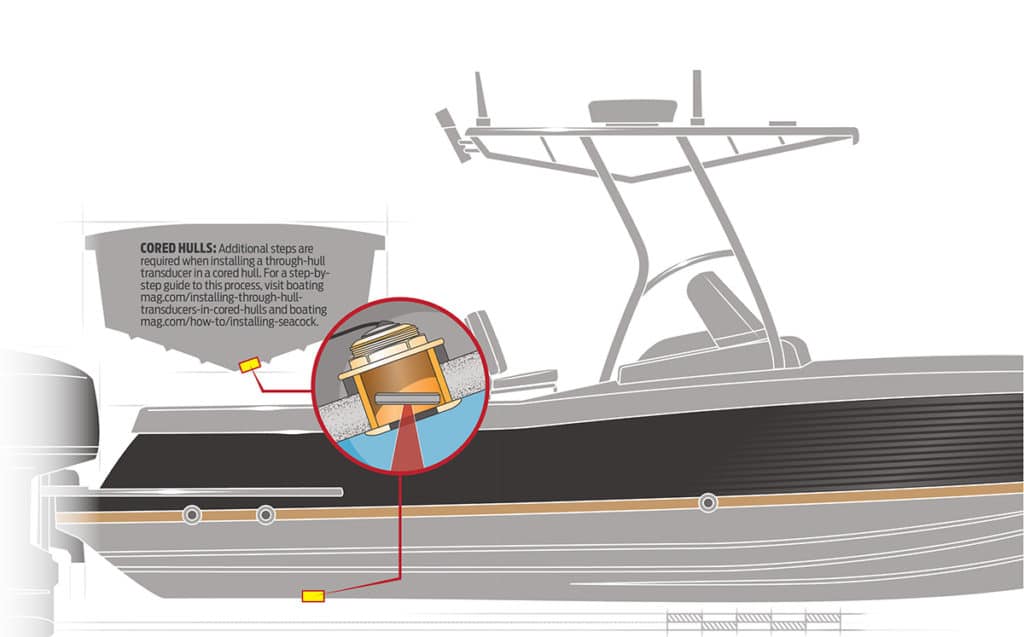
A properly installed through-hull transducer can maximize the performance of down-looking sonar in two ways. First, it has direct contact with the water, so there’s no signal loss as you might experience with an in-hull transducer that sends and receives sonar through a layer of fiberglass. Second, a through-hull is less likely to suffer from interference due to aeration unlike a transom-mount transducer that gets bathed in foam as water exits the stern and mixes with air.
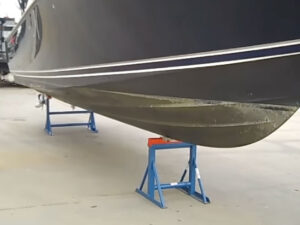
Through-hull transducers that mount flush against the hull create little drag and do not interfere with trailer bunks or rollers as a bulky old-school through-hull might. Here are the details on how to install a flush-mount model on a solid fiberglass hull using the Airmar B175HW bronze through-hull transducer, a 1 kW ’ducer that offers a 25-degree beam and a CHIRP frequency band of 150 to 250 kHz, used with a Lowrance HDS-12 Gen3 sonar. If you keep your boat in the water, you will need to haul it for this project.
Getting Started
Skill Level: 3.5/5
Time to Complete: 5 Hours
Tools and Supplies
* Airmar B175HW transducer ($1,321.25, thegpsstore.com)
* Angle finder ($4.99, harborfreight.com)
* Electric drill with ½-inch chuck
* 1/8-inch drill bit
* 3 3/4-inch hole saw
* Rat-tail file or rotary grinder (some installations)
* Miter saw
* 600-grit sandpaper
* Denatured alcohol
* Marine sealant for use below the waterline (such as 3M 4000)
* Slip-joint pliers
* 3/16-inch Allen wrench
* Dust mask and safety goggles
* Shop rags (to clean up sealant around transducer face)
1. Choose the Location
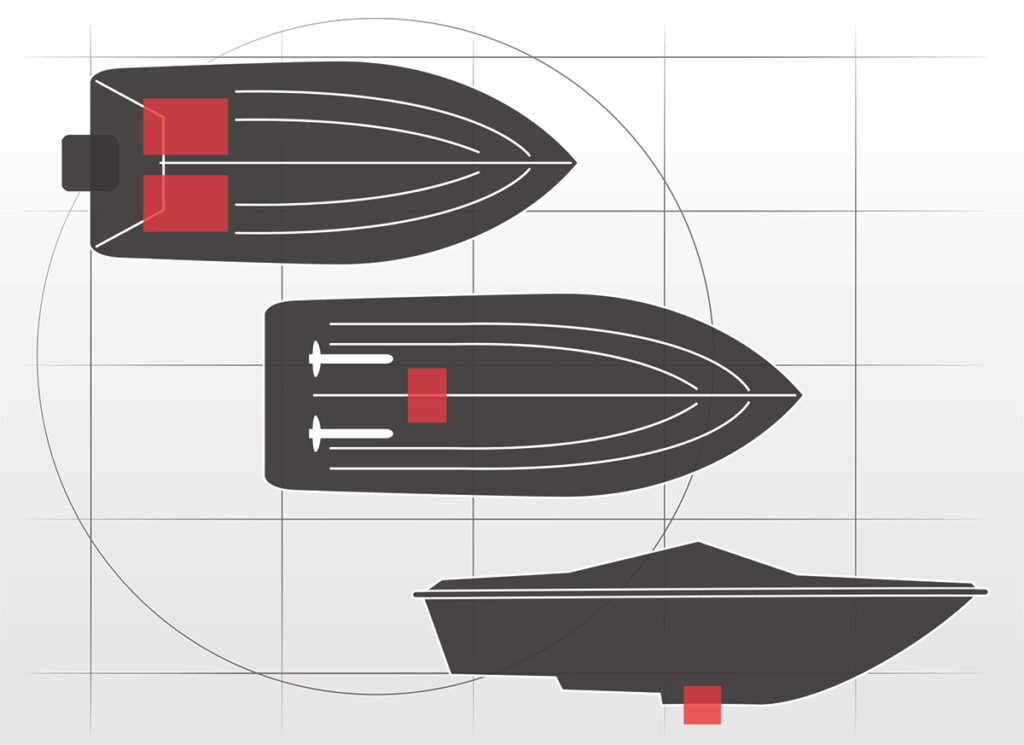
Look for a flat location as far aft and as close to the centerline as possible that allows enough room on the outside for the transducer face (5.26 inches in diameter in this case). Avoid areas directly abaft strakes, through-hull pickups or struts that might cause aerated water to flow across the face of the transducer. The face should not rest on a trailer bunk. Check inside the hull to ensure the area is clear of items, like stringers and bulkheads. On a step-hull, pick a spot just forward of the first step.
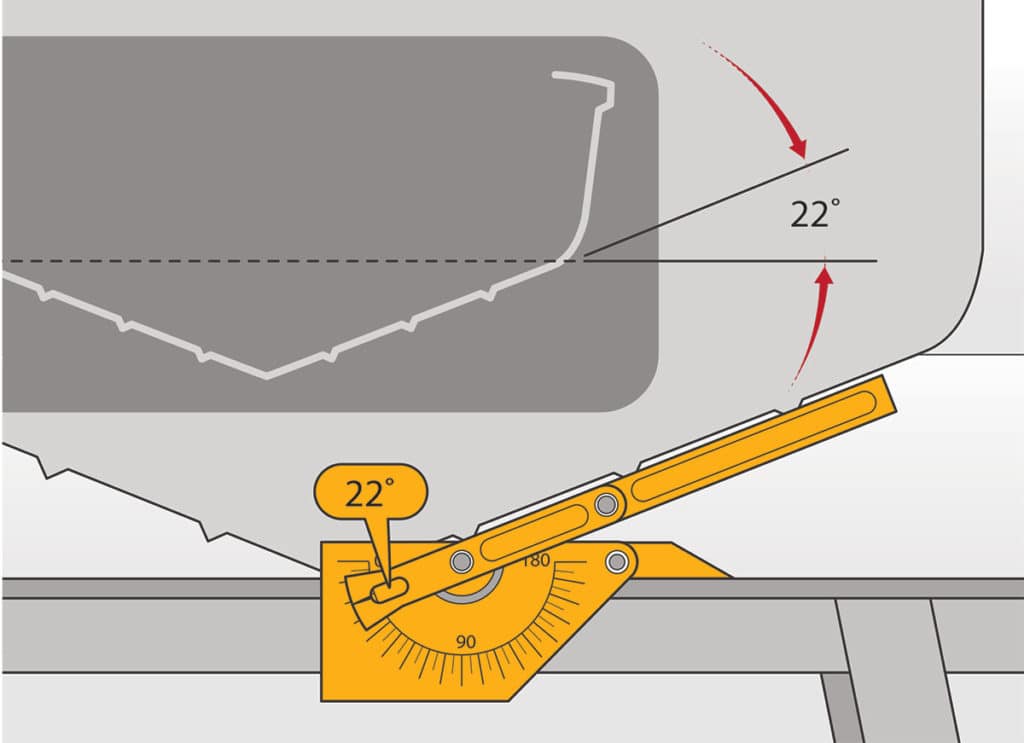
2. Select the Angle
Use a bevel gauge to confirm the angle of the V-hull at the mounting location, then choose the transducer tilt angle that most closely matches so that the sonar beam is transmitting as vertically as possible. The Airmar B175HW, for example, is available in three angles: zero tilt (for zero- to 7-degree deadrise), 12-degree tilt (for 8- to 15-degree V-hulls) and 20-degree tilt (for 16 to 24 degrees). Our V-hull has 22 degrees of deadrise, so we chose the 20-degree-tilt version.
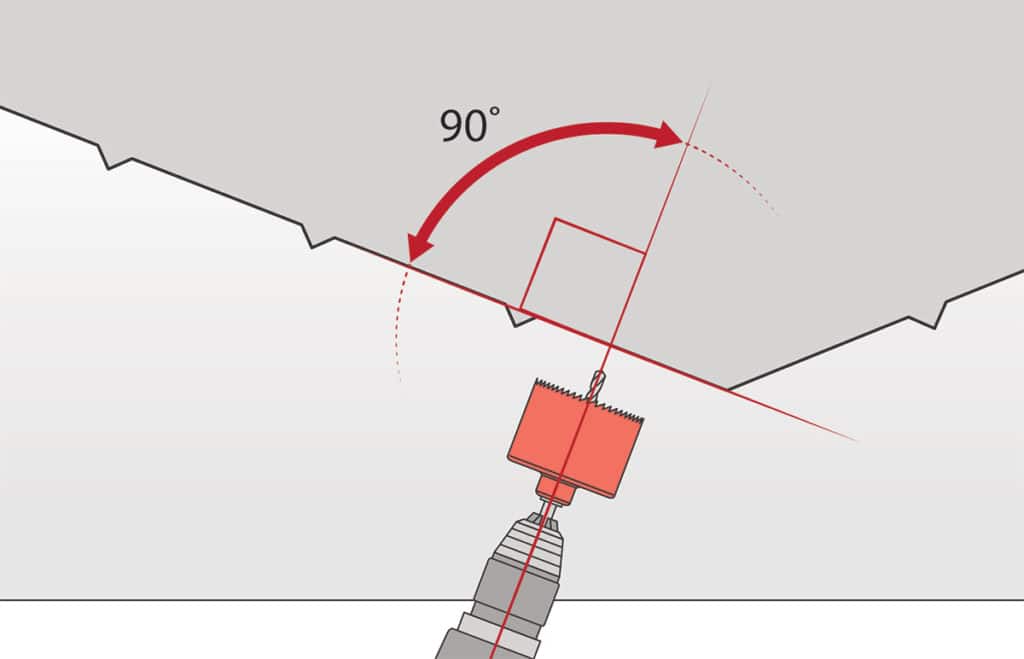
3. Cut the Hole
From inside the hull, use the mounting nut to test for clearance space, then mark the center point and drill a 1/8-inch pilot hole through the hull. Utilizing the pilot hole as a guide, use a 3¾-inch hole saw to cut a hole from the outside perpendicular to the hull surface. It might be necessary to enlarge the hole slightly using a grinder or rat-tail file. Lightly sand around the hole, inside and out, to ensure the sealant will adhere properly. Clean both surfaces with denatured alcohol.
Sealant Savvy
Prior to installing, apply a 1/8-inch layer of marine sealant, such as 3M 4000, to the flange, sidewall and stem threads so that the sealant extends 1/8 inch higher than the combined thickness of the hull, spacer and nut. Also apply a 1/8-inch layer of sealant to the inside surface of the spacer.
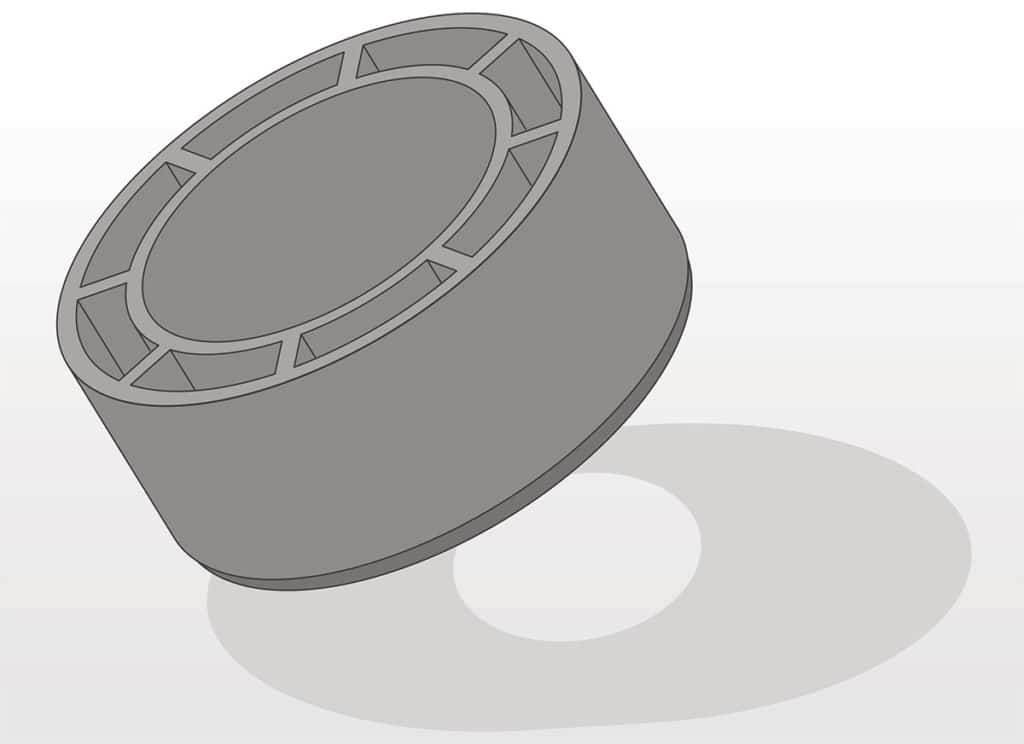
4. Fit the Spacer
With the transducer in position (ask someone to hold it firmly against the outside of the hull), slide one of the washers over the cable and the stem, followed by the spacer and second washer. There should be at least three threads showing above the second washer without the nut. If not, shorten the spacer by cutting the open end squarely with a miter saw. Dry fit again to ensure the space is the appropriate height, and then remove the transducer.
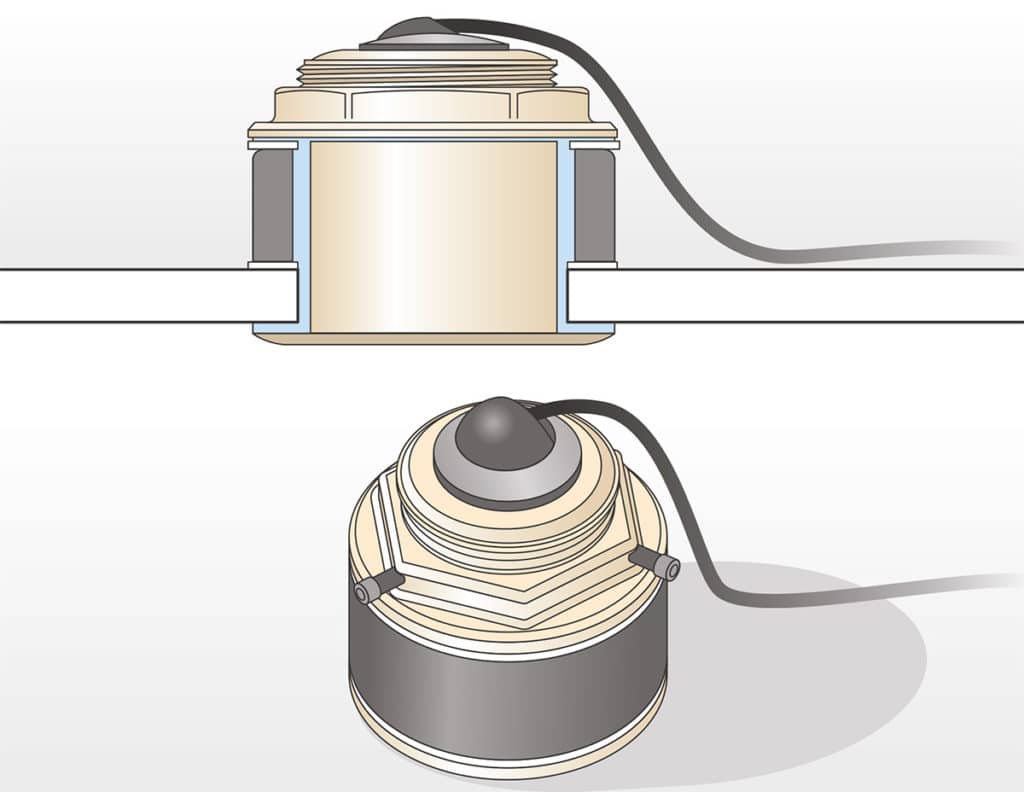
5. Install the Transducer
After applying sealant, reinsert the transducer stem from under the boat. From inside, rotate the stem so that the arrow on top points perpendicular to the centerline to align the beam angle. Slide on a washer, the spacer (open side down), the second washer and the nut. Tighten the nut with slip-joint pliers, then apply sealant to the set screws on the nut and tighten until each makes contact with the threads; continue to tighten one-quarter turn. Clean up any excess sealant.

Specialty Wrenches
While we suggest large slip-lock pliers for installing the B175HW, Airmar Technology Corp. makes two special wrenches for doing this. One is the 175WR-4 ($25.95, blueheronmarine.com) to hold the transducer stem in position while you tighten the 4½-inch-wide transducer nut with an Airmar 164WR-3 wrench ($34.95, blueheronmarine.com). While you might only use them once, the precise fit and shorter handles make these tools easier to use than slip-lock pliers in the cramped confines of a bilge compartment.