Nearly every appliance you plug into an outlet operates on solid-state “brains,” which are sensitive to power fluctuations and current frequency. True sine-wave inverters are particularly important today for running computers, smart TVs, refrigerators, and even coffee makers and microwaves due to their sensitive electronic components. Even if your old modified sine-wave inverter is still cranking out 110 voltage, it might be killing your flat-panel TV or microwave. For this installation, we’re assuming you already have an inverter, already know your load and have adequate direct-current power on board to power the load in the absence of shore power or a genset. But keep in mind, a coffee maker will likely need 200 watts of power, a blender 1,000 watts and a microwave 1,200 watts. You might need to run these while the fridge is running, so the 3,000-watt Xantrex Freedom SW 3012 true sine-wave inverter is a likely choice for cruisers with such demands.
Skill Level: 5/5
Finish Time: Approx. 3 hours
Tools and Supplies
*Drill
*Jigsaw
*Flat-blade screwdriver
*Phillips screwdriver
*Adjustable wrench
*Wire cutters
*Wire stripper
*Long-nose pliers
*Masking tape
Position the Inverter
First, disconnect shore power and turn off the onboard generator. Identify and label alternating current (AC) input and output cables before disconnecting the old inverter. Install the new inverter as close to the boat batteries as possible so the power line runs are short, minimizing resistance and the power loss experienced with longer cables. We installed our inverter behind a bulkhead separating our battery compartment using only 2 feet of battery cable.
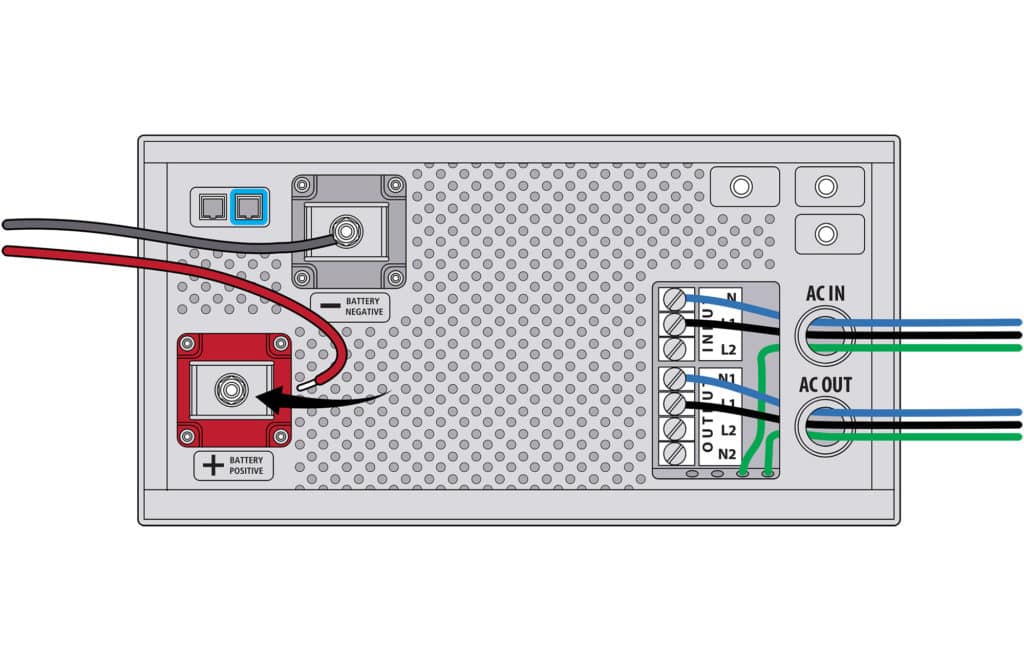
Connect the Power
Open the panel protecting the terminals and, with a screwdriver, pry out the round wire port punch-outs. Feed the old wires through wire clamps and into the box, connecting the green ground to the terminal as labeled, following the same procedure for the white and black lines. Tighten the clamps and replace the cover. Connect the battery bank’s red wire to the red terminal and black to the black, then clamp all down tightly. Never use washers on the DC connections.
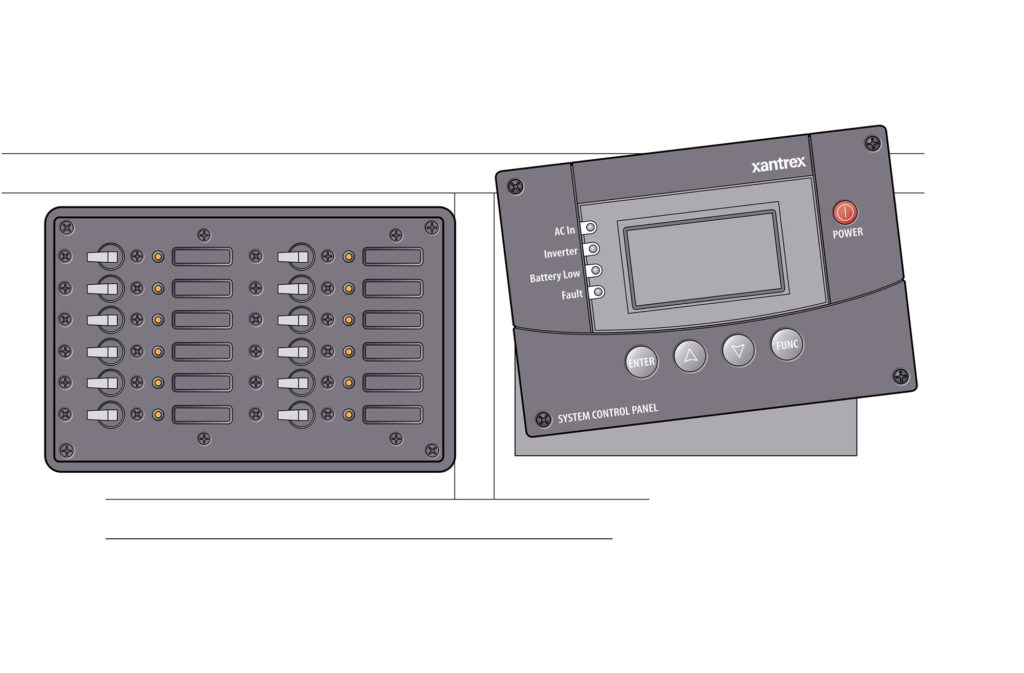
Mount the Control Panel
Mount the panel close to the circuit-breaker panel so you can monitor power capacity and turn off loads as necessary to conserve power. Tape the cutout perimeter in the bulkhead to minimize tear-out when you cut the opening with a jigsaw. Our Xantrex inverter control panel connected via a simple Ethernet plug-in connector. Next, mount your battery temperature sensor to the battery back and connect it to the inverter system. These steps are simple but time-consuming.

Reconnect Shore Power
Bolt or lag-screw the inverter firmly to the surface, leaving egress to the reset button for future needs. Switch off everything on the AC panel (you should have when you disconnected power) and reconnect shore power. Throw the shore-power breaker to “on,” and then, one by one, turn on the circuits you need. Check the inverter control panel to note battery levels and AC presence. When you remove AC, the inverter automatically kicks on to power appliances.