A hydraulic surge-brake actuator is one of those items you rarely think about until it malfunctions and wreaks havoc with your boat-trailer brakes. Sometimes the hydraulics in the actuator develop a leak, leaving the system with no brake fluid and the trailer with no braking ability. You usually feel more pronounced thunks as the actuator slides back and forth freely during starts and stops, and you often see fluid on the ground below the actuator.
An actuator can also jam due to corrosion or mechanical damage. If it jams while compressing, the brakes can lock up and subsequently suffer severe damage, and grow so hot while towing that they burst into flames. That’s when a malfunctioning actuator really gets your attention.
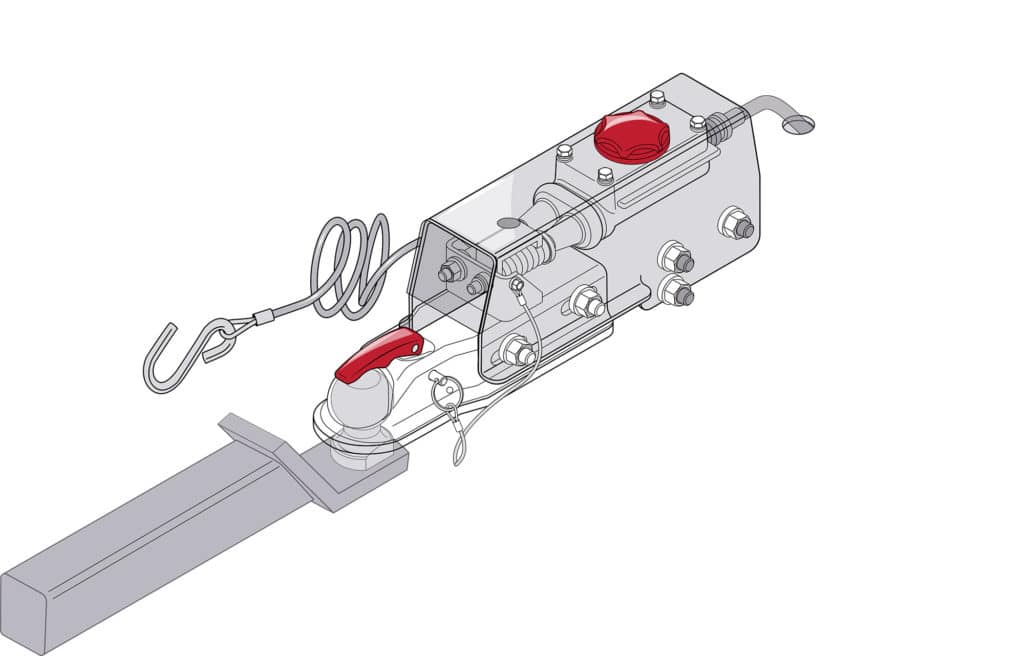
Surge-brake actuators are integrated with trailer couplers, and the working parts are enclosed in a metal housing. Most use an industry standard bolt pattern to attach to the trailer tongue. So, unless the actuator is welded in place, it’s easier to swap out the entire assembly than trying to replace an individual component such as the master cylinder.
Here’s how to get the job done, using a Tie Down Engineering trailer-disc-brake model 750E (for a 2-inch tow ball) designed to fit a 3-inch-wide trailer tongue. The zinc-plated assembly features a breakaway safety cable, pin to secure the coupler, and 7,500-pound tow rating and 750-pound max tongue weight.
Skill Level: 2 of 5
Finish Time: Approx. 2.5 hours
Tools and Supplies
- Tie Down model 750E trailer-brake actuator/coupler for disc brakes ($225, trailerparts.com)
- Three new Grade-5 1/2-inch bolts, minimum 4 inches long, with washers and locknuts
- New safety chains ($19.95, championtrailers.com)
- Butt connector with heat-shrink collars
- Crimping tool
- Socket and open-end wrench sets
- Flathead screwdriver
- DOT 3 heavy-duty brake fluid
- Plastic bag and zip tie
- Wire brush to remove rust
- Rust-inhibiting paint to touch up trailer tongue
Remove the Old Assembly
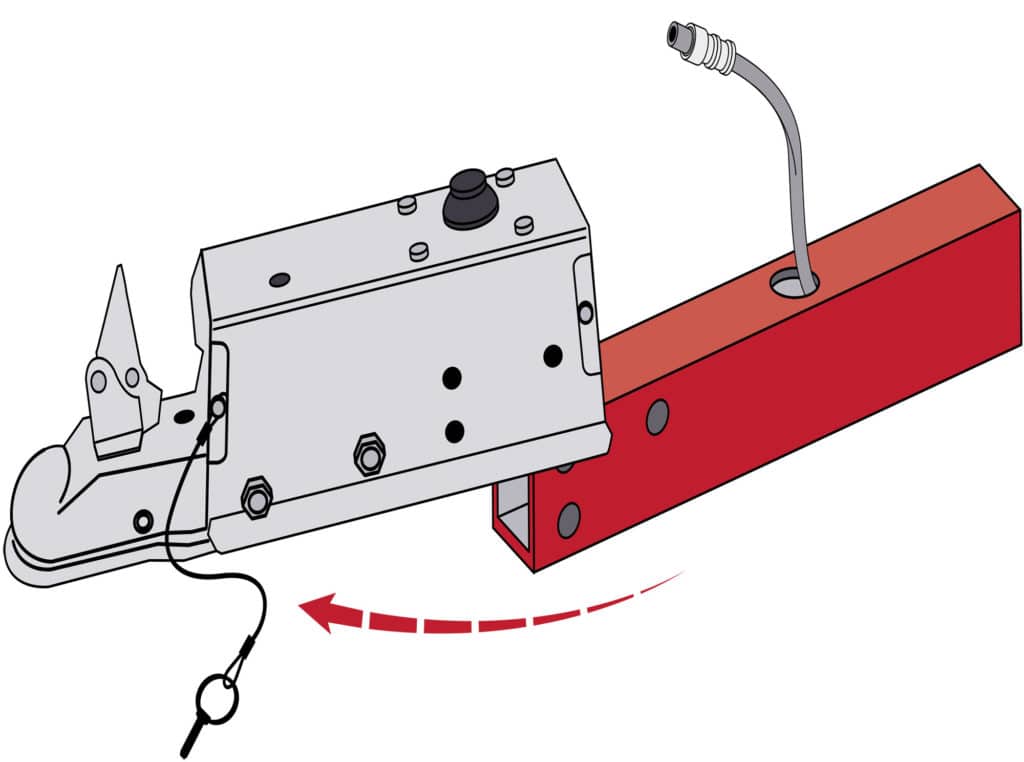
Unscrew the hydraulic line from the back of the actuator, being careful not to spill brake fluid, especially on painted surfaces because brake fluid will crinkle the paint. Covering the brake-line fitting with a small plastic bag— bound with a zip tie—will help catch any leakage. On some systems, you might need to remove the actuator first to access the fitting and remove the brake line. Next, cut the blue wire leading to the disc-brake lockout solenoid at the back of the actuator. Unbolt the actuator/coupler and remove it. Be careful because it can be heavy.
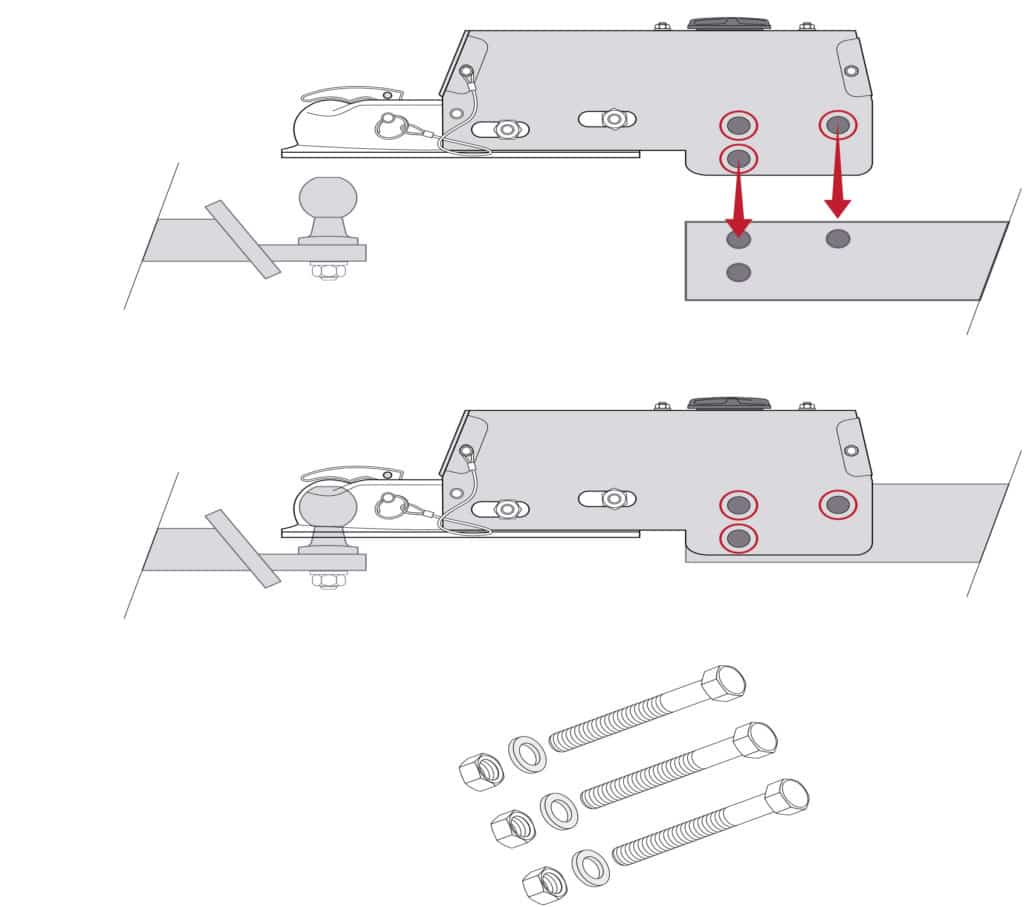
Bolt on the New Actuator
Fit the new actuator/coupler on top of the trailer tongue, making sure the assembly does not sit on or pinch the blue wire for the disc-brake lockout solenoid. Use three fresh Grade-5 1/2-inch bolts, washers and locknuts to secure the assembly in position. The forward bottom bolt is used to secure the safety chains or cables, so you will need a slightly longer bolt and perhaps larger washers here. If using stainless-steel hardware, apply anti-seize to the threads to prevent galling. Tighten all three bolts.
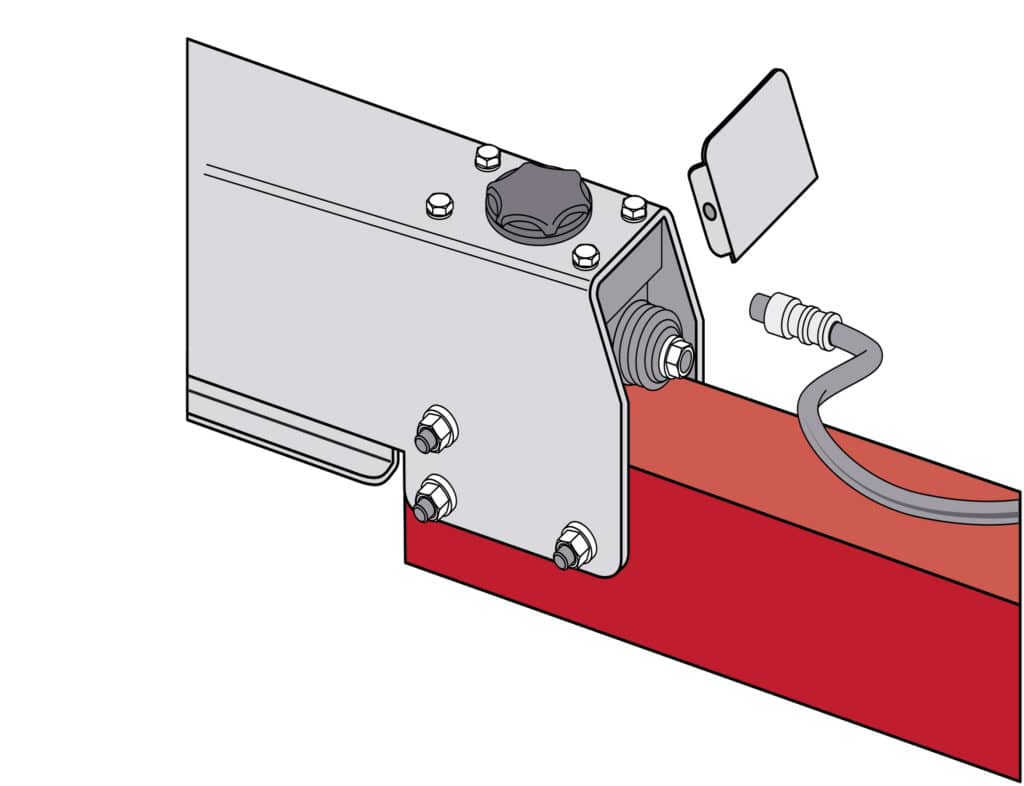
Connect the Lines
Remove the small plate at the back of the assembly and find the actuator’s hydraulic fitting. The new Tie Down 750E model lets you access this fitting while the actuator/coupler is attached to the trailer. Carefully thread the existing brake line into the actuator fitting, and then tighten using two open-end wrenches. Replace the protective plate on the back of the actuator. Next, splice the blue wire from the lockout solenoid to the corresponding blue wire on the trailer-wire pigtail, using an approximate-size butt connector with heat-shrink collars.
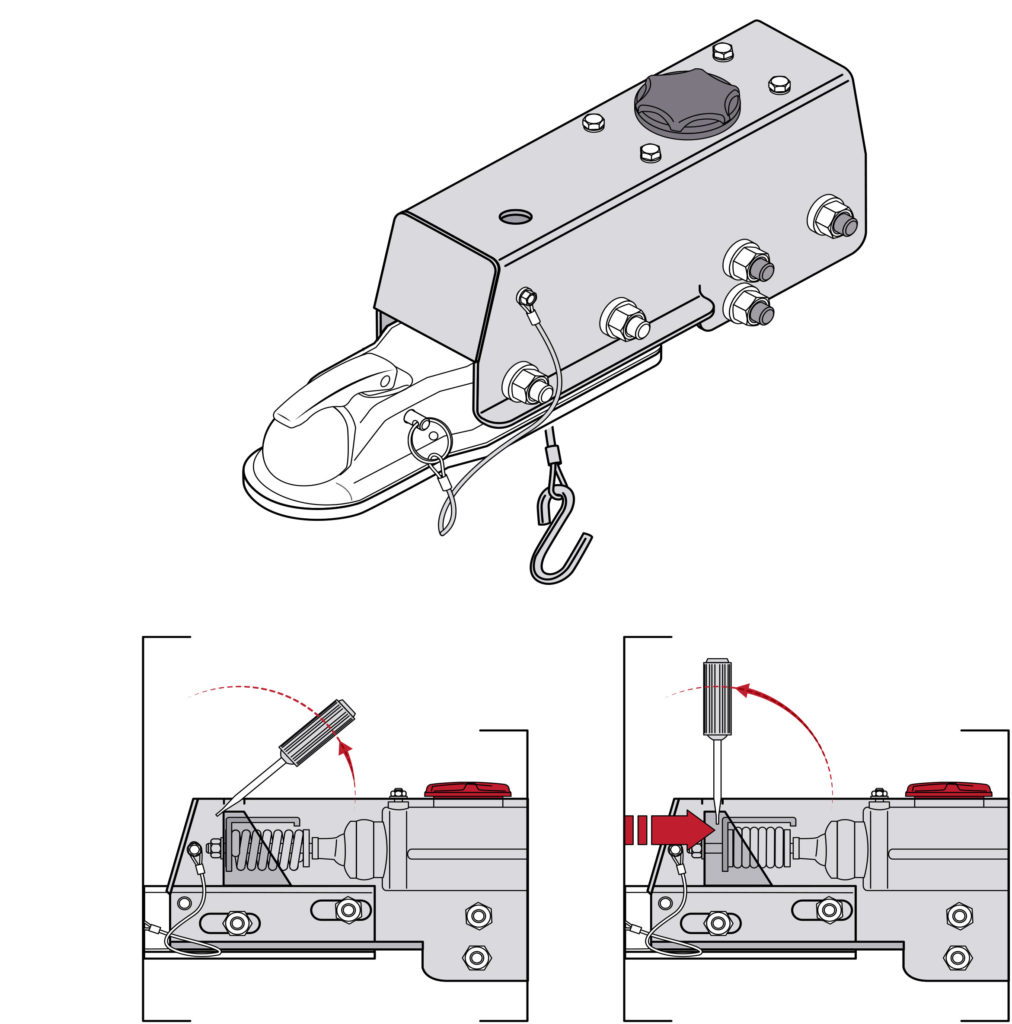
Fill and Bleed
Remove the cap on top of the actuator and fill the master cylinder with DOT 3 heavy-duty brake fluid. Insert a flat screwdriver in the hole on top at the front of the actuator cover, so the blade of the screwdriver is in front of the e-stop bracket inside the actuator. Move the screwdriver back and forth to pump the master cylinder, then hold the screwdriver forward while a buddy opens the bleeder valve on the backside of each brake caliper to purge air from the lines. Continue this process until the lines are free of air. Replace the cap on top of the actuator.
Read Next: More Install Articles From Our Weekend Workbook Series
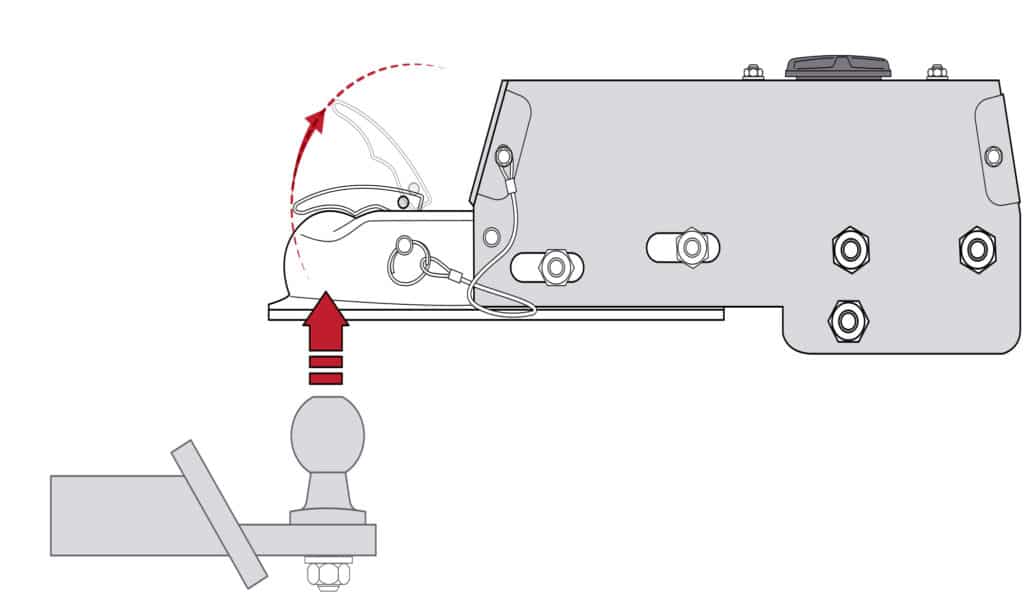
Drop N Go Auto Latch
Tie Down’s actuator model 750E features the Drop N Go coupler that automatically opens, and then closes and latches as you lower the trailer tongue onto the tow ball, thus preventing incomplete or improper latching. The captive safety pin can be inserted only once the coupler is properly latched.