Reflected glare—be it from the sunlight during the day or onboard lights at night—annoys, strains eyes and creates visibility issues that threaten safety, especially when it occurs on surfaces on the dash or bow. Glare can be especially prevalent with white finishes, one of the most common colors for boats.
For this reason, many new boats feature dash areas that are gray or black. Navigation lights are now often located in spots that eliminate glare, or they might be shielded to eliminate reflections. Yet with older boats, you might need to mitigate the issue yourself.
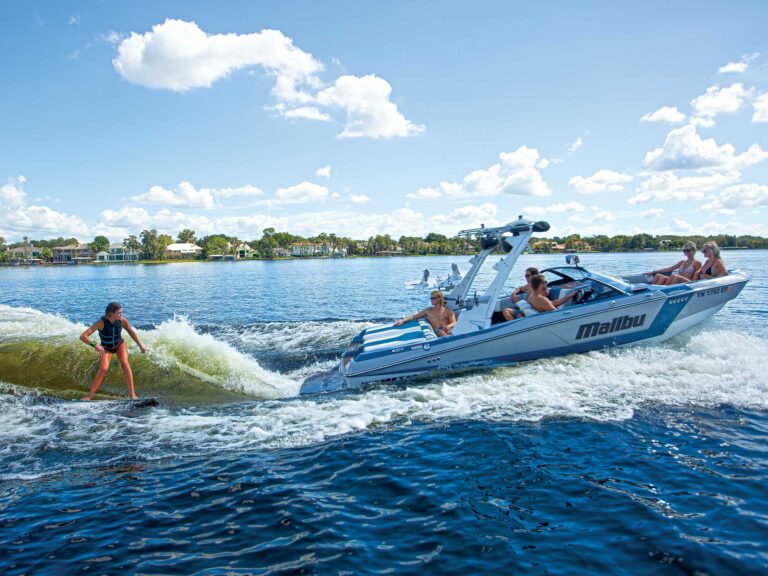
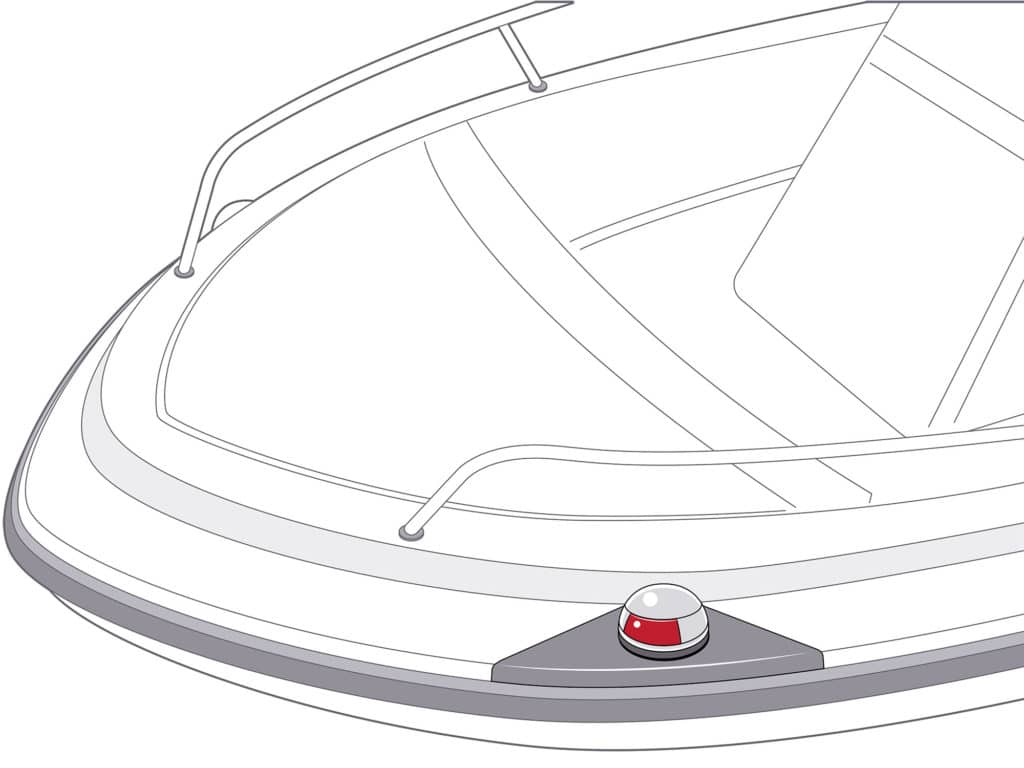
Such is the case with our 21-foot center-console project boat. The red and green navigation lights reflect off the white gelcoat finish on the bow and create a distracting glare at night. To reduce the glare, we decided to change the color of the area around the lights from white to black, a color that tends to absorb rather than reflect light.
We considered different ways to change the color, including paint or using black nonskid tape. But in the end, we settled on using peel-and-stick vinyl, which is affordable, cuts easily, conforms to contoured surfaces, preserves the underlying gelcoat in its original condition, and won’t chip away. Here’s how it went.
Skill Level: 2 of 5
Finish Time: Approx. 2 hours per mask
Tools and Supplies
- Matte-black adhesive waterproof vinyl ($8.99 per 13-inch-by-3-foot roll; hobbylobby.com)
- Sheets of paper and tape (to create a template)
- Pencil
- Ultra Fine Point Sharpie marker
- Scissors
- X-Acto knife
- Needle
- Cutting board
- Spray bottle
- Dish soap and water
- Flexible plastic spatula ($5.95; walmart.com)
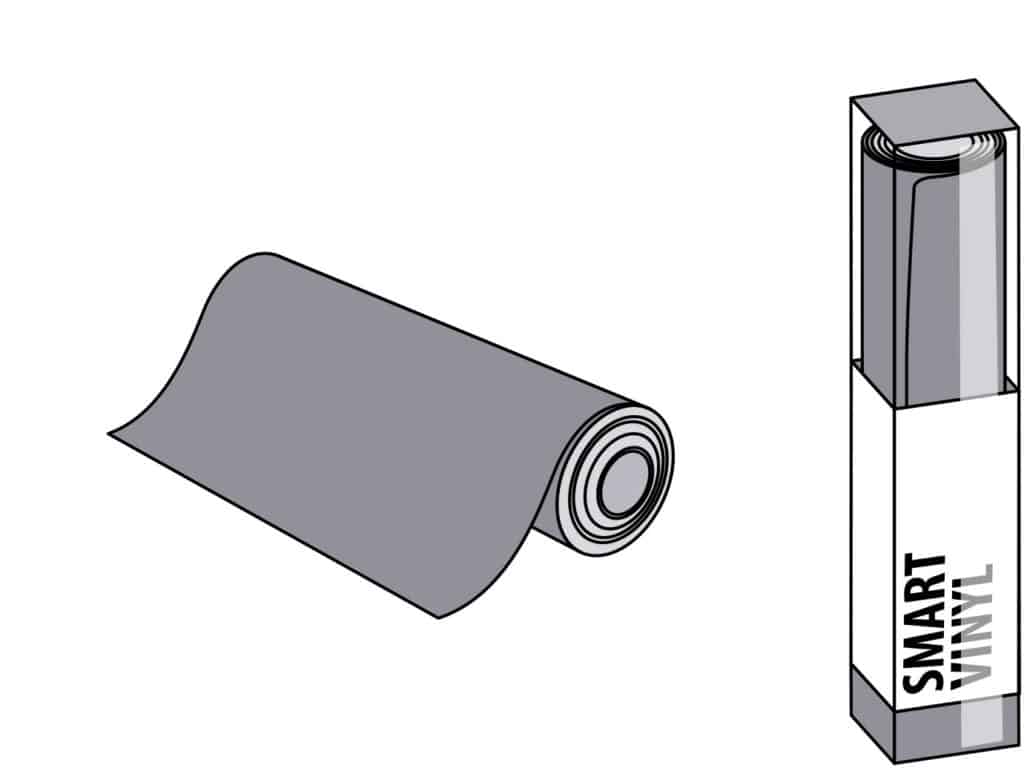
Peel-and-stick waterproof, fade-resistant vinyl is a good choice for this kind of project. It’s available in sheets and rolls at craft stores such as Hobby Lobby and Michael’s. We chose a 13-inch-by-3-foot roll of Cricut Smart Vinyl designed for car decals and outdoor signs (using a decal-cutting machine such as the Cricut Maker 3). We did not need all 3 feet, but we wanted some extra in case we goofed up in the cutting or application process. It is available in a wide range of colors; we chose a matte-black finish and went to work. Avoid glossy finishes because the shine can defeat the purpose of reducing glare.
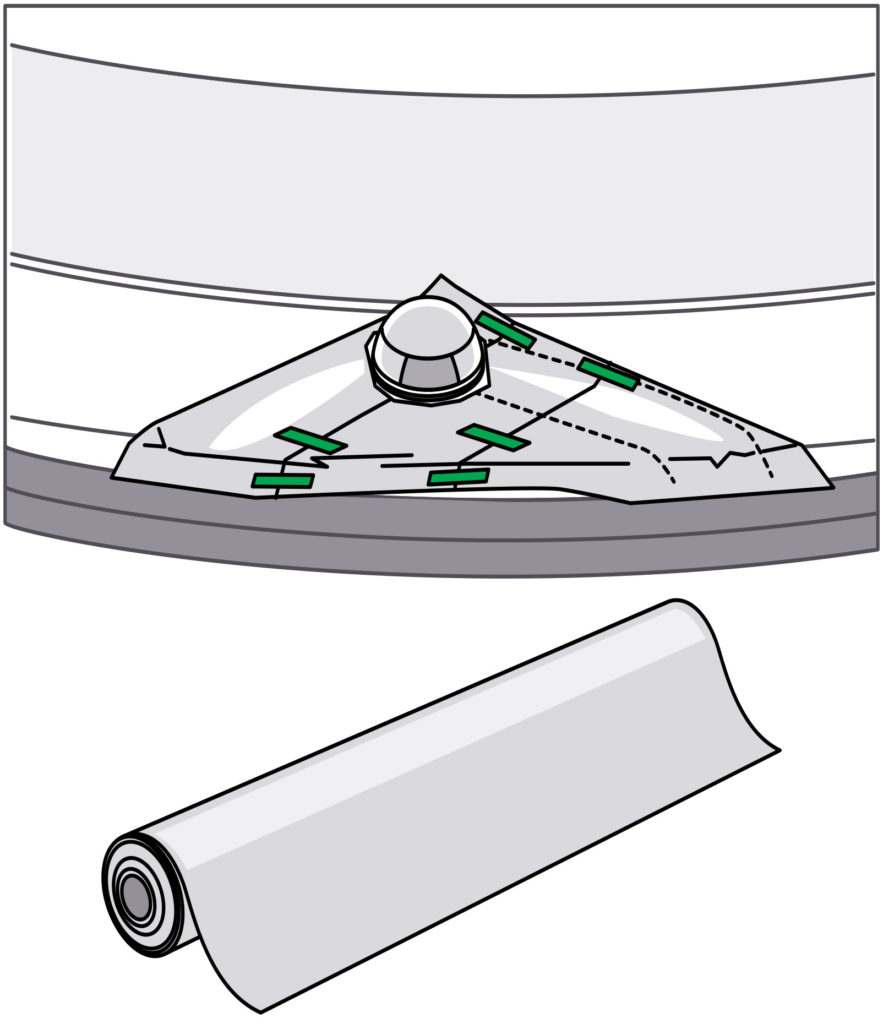
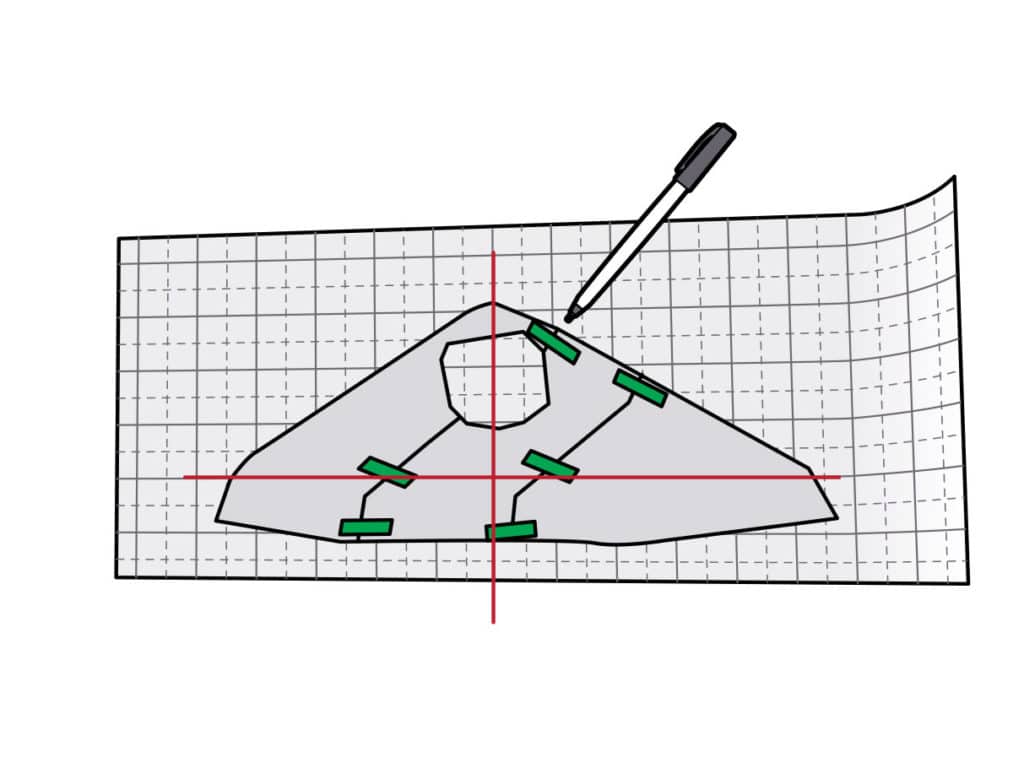
The idea here is to create a pattern that you can transfer to the vinyl to cut the mask. In our case, we turned on the nav lights and used a pencil to lightly outline the area on the bow from which glare emanated. We then placed a sheet of white paper over the area, traced the outline of the glare pattern, and added an inch to the outside of the area for good measure. We also taped a few pieces of paper together to create a mask around the light fixture itself. Once we were happy with the pattern, we used a pair of sharp scissors to cut out the template. Make sure you mark which side of the template is up and which is down.
The backing of the vinyl allows you to use a pen or pencil to transfer the pattern by outlining around the template. A graph-paper pattern on the backing also provides straight-line and 90-degree-angle references if you need them to align your template. Be sure to place the template upside down on the back of the vinyl sheet. Tape the template down at a few strategic points to keep it from shifting as you trace the outline. Use an Ultra Fine Point Sharpie marker to minimize the amount of pressure needed to draw around the template. Otherwise, you might crease or puncture the material.
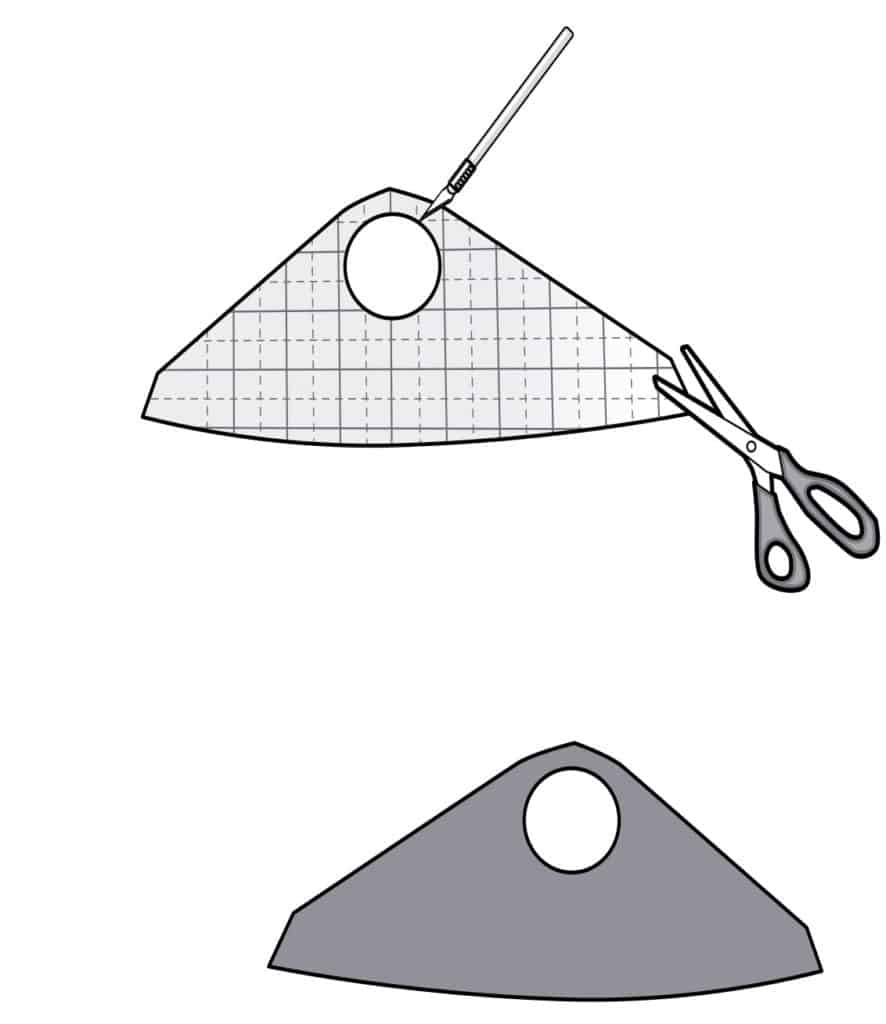
Once you have traced around the template on the back of the material, use a pair of sharp scissors to carefully cut out the vinyl. Try to cut just to the outside of the line you traced because you can trim later. In the case of an inside cut (as in creating a mask around the nav-light fixture as we did), use an X-Acto knife with a piece of scrap plywood, cutting board or art table underneath, and carefully cut just to the inside of the outline for the light fixture. Once you’re done cutting and before you remove the adhesive backing, dry-fit the piece of vinyl on the boat to make sure it fits, and trim any excess material at this stage.
Read Next: More Weekend Workbook Projects
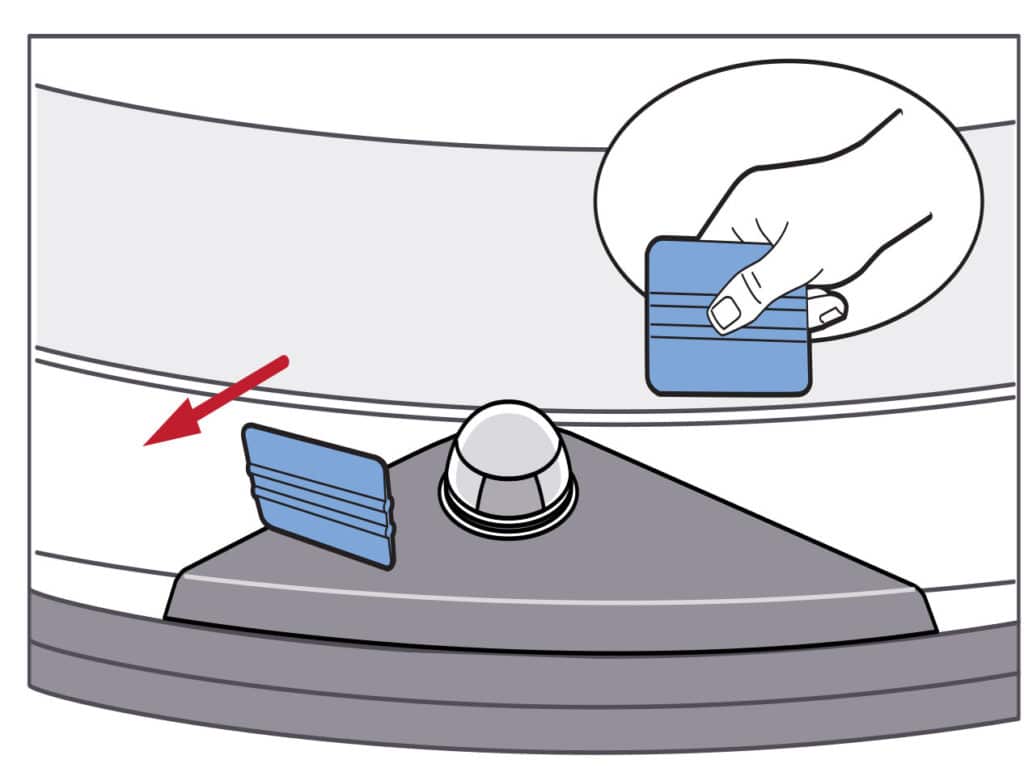
Make sure the area is free of dirt, dust, pencil marks, oil, grease or other contaminants. Clean the surface with denatured alcohol and let it dry. Next, create a mixture of a few drops of dish soap and water in a spray bottle and use it to thoroughly wet the application area. Peel off the backing from the vinyl (being careful not to let the vinyl fold back and adhere to itself) and lay the mask over the area. The soapy water gives you time to slide the vinyl piece into the right position. Once in position, use a flexible plastic sticker spatula to smooth out the vinyl, eliminate air bubbles and squeegee out the soapy water.