In our marine business, after effecting a repair, we are often asked, “Can you take a look at my fuel gauge too? It’s not working.” It’s a familiar story. Here’s how to troubleshoot yours.
Overview
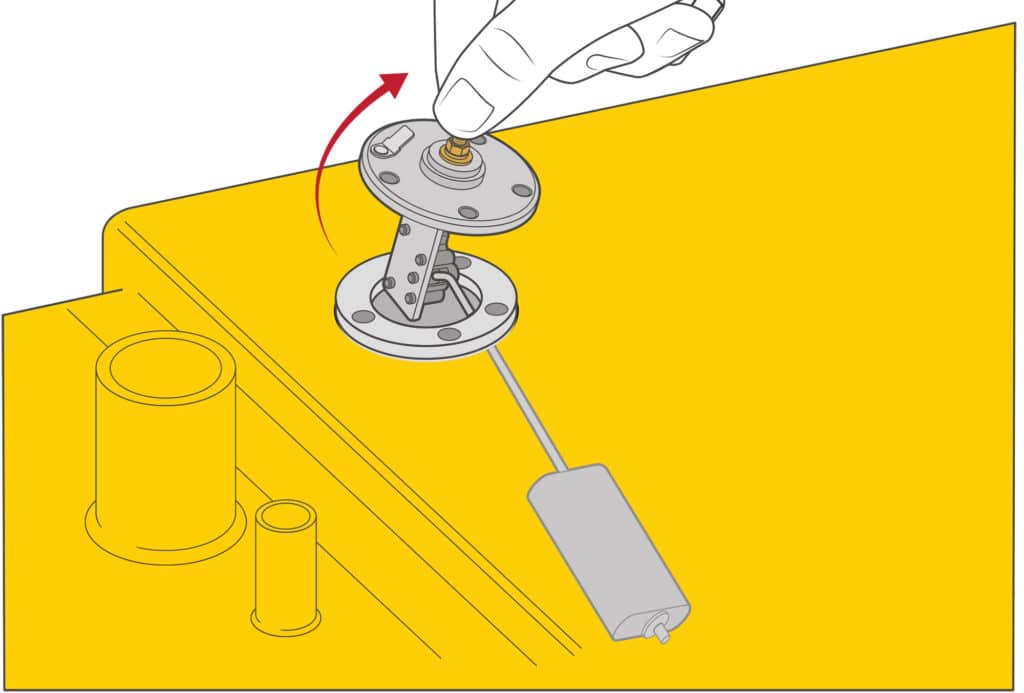
The sending unit in the tank moves with the fuel level. Locate the sending unit at the top of the fuel tank. It’s a small round plate with two wire connections. The sender changes resistance (ohms) variably as the float moves from full (up) to empty (down). Changes in resistance move the gauge needle.
Wiring and Connections
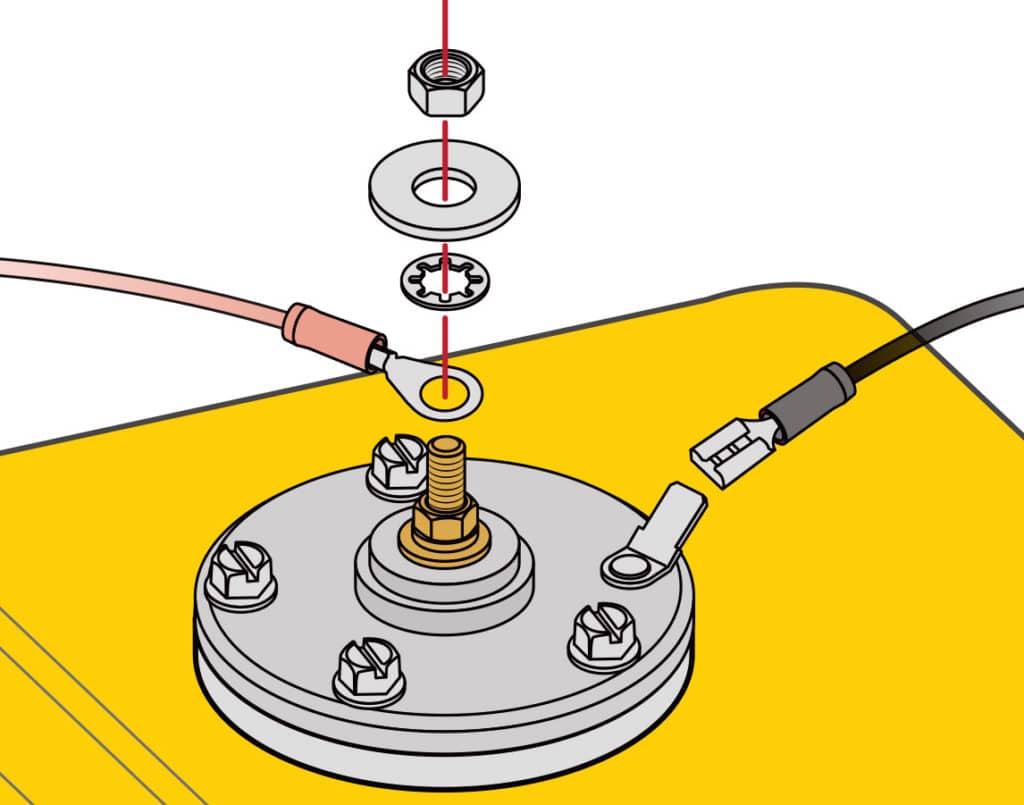
The sender uses two wires: black for the ground and pink for the sender, per American Boat and Yacht Council standards. The gauge has three connections: ground (black), sender (pink), and 12-volt DC positive. The positive wire can be red, if wired to an accessory switch, or purple, if wired to the key switch. Also, the back of the gauge will show which terminal is which with embossed markings (S for sender, G for ground, etc.).
Troubleshooting Your Gauge
Check for voltage and ground at the gauge by connecting a test light or multimeter (set to DC volts) to the gauge terminals. With the meter’s red wire to the I terminal (positive, ignition) and black to the G terminal (ground), the meter should read at least 12 volts. No reading? Turn on the key switch or accessory switch, and check again. Still no voltage? Check connections and your battery.
If your tests show the ground is good and 12 volts at the gauge, take a jumper wire with alligator clips and connect the sender terminal to the ground terminal. If the gauge reads full, it’s good. If not, it’s bad. Replace the gauge. There is nothing to fix inside the fuel gauge; it’s sealed and not serviceable.
Troubleshooting the Sender
If your gauge is good, check the ground at the sender with your multimeter set to ohms. Look for a “no resistance” reading between the ground on the sender and your boat’s battery ground. If your ground is bad, fix it. If the ground proves good, use your jumper wire to short the sender positive terminal to the ground terminal. The gauge needle should peg to “full.” If it does, your sender wire is OK. If not, find and repair the break in your sender wire.
Remember that the sender could be old and the float saturated with fuel. The float arm could be bent or rusted so badly, it’s flexing and giving bad readings. Disconnect the wires, remove the five screws, pull it out and look at it. Replace as needed. Take all precautions against flame and spark when removing a fuel sender.
Replacement
Most fuel gauges are the standard 2 1/8-inch diameter. To replace, disconnect the wiring from the existing gauge and remove the holding bracket using a nut driver or socket. Remove the gauge, install the new gauge, and reconnect the wires.
Read Next: Boat Fuel Tank Vent Tips
The sender is trickier. Your new sender will likely be a universal unit, requiring you to measure your old sender’s length and arc movement, and measure your tank’s depth. Adjusting the sender means carefully cutting the float arm to the correct length for your tank’s depth. Install the new sender in the tank hole with the supplied gasket (no sealant needed). Take a run and check for leaks.