When it comes to a stern-drive, one of the most important winterizing steps is to remove the drive and then inspect the bellows, universal joint, gimbal bearing, shift cable bellows, water intake hose and exhaust run. Once it’s apart, replace the bellows ($35 to $90 for replacements), as well as any O-rings and gaskets; install a new water intake hose; align the engine and drive; and lube the U-joint. For these procedures, visit boatingmag.com/sterndrivebellows or pick up a May 2010 issue of Boating. Here are the other key steps to winterizing a sterndrive.
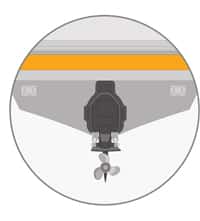
1. Drain Residual Water
First, run the engine on a flusher and get it up to operating temperature so that the thermostat opens. With the boat on a trailer or blocked level, trim the drive all the way down and turn it dead astern, so water in the pickup, water pump housing and exhaust passages can drain. Crank the engine slightly (but don’t start it) to purge any water from the water pump. Keeping the drive down and straight also prevents rainwater or snowmelt from collecting in the exhaust hub during the winter, and helps extend the usable life of the flexible rubber bellows that seal drive components from water intrusion. Insert a small wire repeatedly in the various accessible vents and drain holes to ensure that all water drains from the drive.
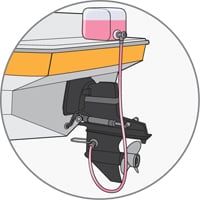
2. Fill with Antifreeze Solution
Engine companies such as MerCruiser require that propylene glycol antifreeze with a rust inhibitor, mixed to the manufacturer’s instructions, be used in the stern-drive raw-water passages in areas subject to freezing temperatures. Attach a flush device (aka “ear muffs”) to the drive’s water pickups, but plumb it to pick up the antifreeze solution from a five-gallon bucket. This will feed the solution through the water pickups into the raw-water systems of both the drive and engine. Run until the pink-colored propylene glycol solution comes out of the drive’s exhaust. Turn off the engine.
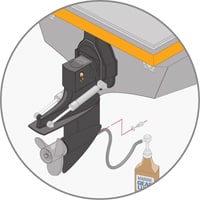
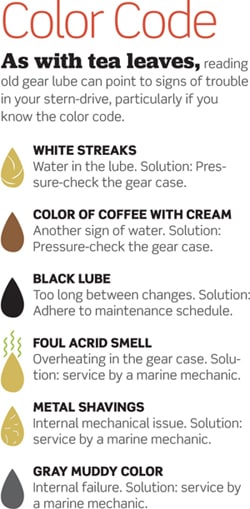
3. Drain/Replace Gear Lube
Drain this fluid by removing the lube drain/fill and vent plug screws. Put new gaskets on the plug screws. If you also have a remote gear lube reservoir (in the engine compartment), remove and drain it; then clean, dry and reinstall the reservoir. Pump fresh lube into the drive from the drain (bottom) hole until fluid appears out the vent (top) hole. Install the vent screw, which creates a partial vacuum. Now quickly replace the drain/ fill screw. The vacuum created doesn’t allow fluid to drain very quickly. Also fill the lube reservoir to the proper level.
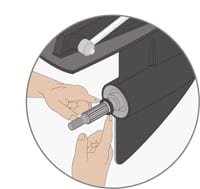
4. Check the Prop Shaft
Remove the propeller and check for fishing line around the shaft seal. Remove any line you find. If it was there too long, it might have cut the seal. If the seal seems damaged or gear lube appears to be leaking from the prop shaft seal, have the seal replaced, the gears and bearings checked, and the gear case pressure-tested. Otherwise, grease the shaft and send the prop out for reconditioning.
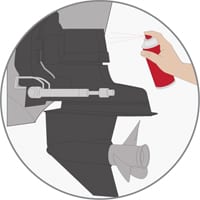
5. Inspect Everything
Inspect the steering and tilt-and-trim components for wear, and replace anything that shows damage. Check the hydraulic fluid levels in the power steering and trim pumps. Inspect all of the sacrificial zinc anodes and replace them if less than 70 percent is left. Use zinc-chromate primer and touch-up paint on any scratches or chips on the drive. Give all grease fittings a shot of fresh marine grease.