Skill Level: 3.5/5
Finish Time: Approx. 6 hours (excluding wiring)
Tools and Supplies
* 3/4-inch-thick sheet of Seaboard or King Starboard marine lumber large enough to cover the dash cutout ($21.25 per square foot, boatoutfitters.com)
* Masking tape
* Marking pencil
* Eight stainless-steel 1/4-20 oval-head bolts with washers and locknuts
* Jigsaw or saber saw with fine-tooth blade
* Power drill and set of drill bits
* Phillips screwdriver
* Box/open-end wrench set
* Router
* Marine silicone sealant
* Clean rags to clean up excess sealant
I recently scored my ultimate ride, a gently used EdgeWater 228cc center console. While the boat is nearly perfect for me, the existing marine electronics were minimal and inadequate for my kind of fishing.
I needed to scrap the old electronics and redesign the dashboard of this unsinkable center console to accept a pair of flush-mounted multifunction displays (MFDs) — twin Furuno GP1870F units. This would allow me to dedicate one display as a chart plotter and the other as a fish finder, and also have the safety and security afforded by a redundant MFD, plus some other electronics.
The plan was to manage the project myself and do most of the work, though I farmed out the job of building the new panel to a company that possessed the tools and skills to create a professional-looking dash based on my design parameters. The fringe benefit of self-installation was the knowledge that if I had an electronic hiccup 30 miles from the inlet, there was an excellent chance that I could troubleshoot it and fix it quickly.
The following recounts my approach to designing and installing a new dash.
Clear the Dash
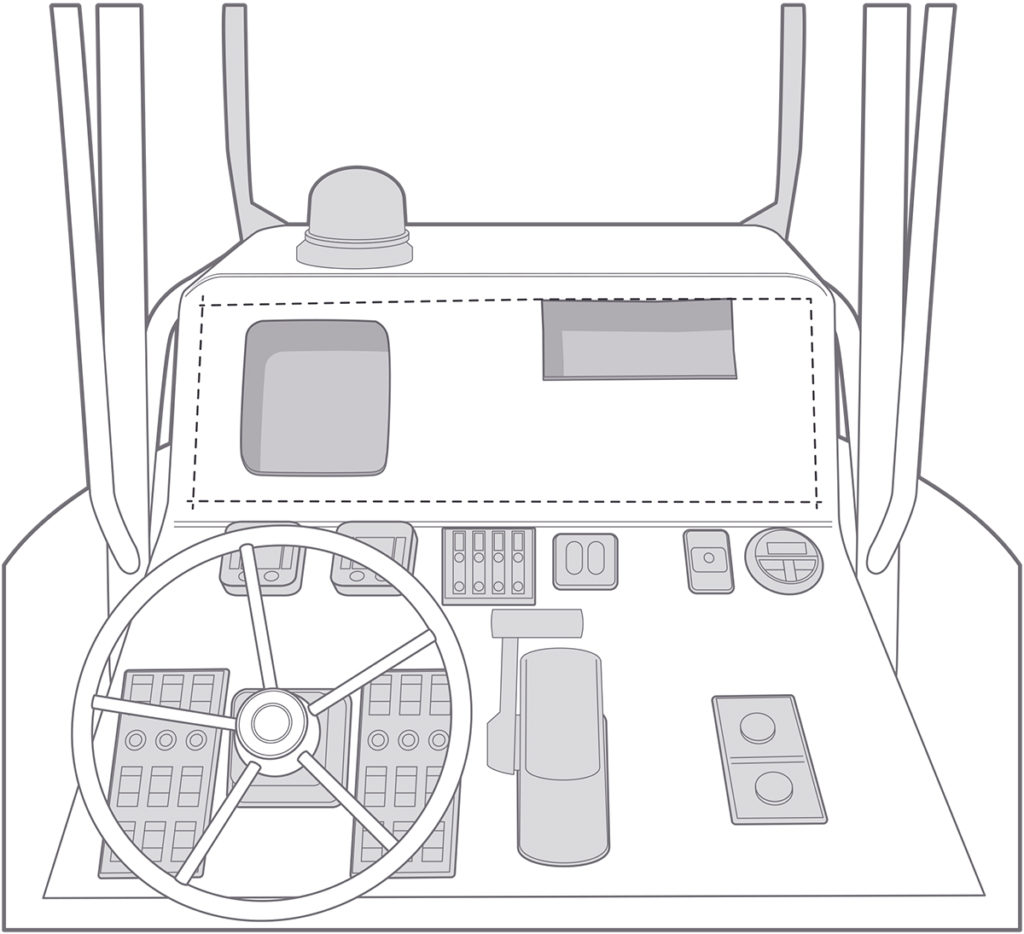
Carefully remove the old electronics. Once you have an idea of what you want to install and the surface area needed, draw an outline of the area you plan to cut away, leaving sufficient room along the perimeter to install mounting screws for the new panel. Make sure there is nothing behind the dash such as structural supports, existing wire looms or hoses that will be damaged by the cut. Ensure there’s enough space behind the panel to accommodate the depth of the new electronics and allow for rigging the wires and servicing the equipment.
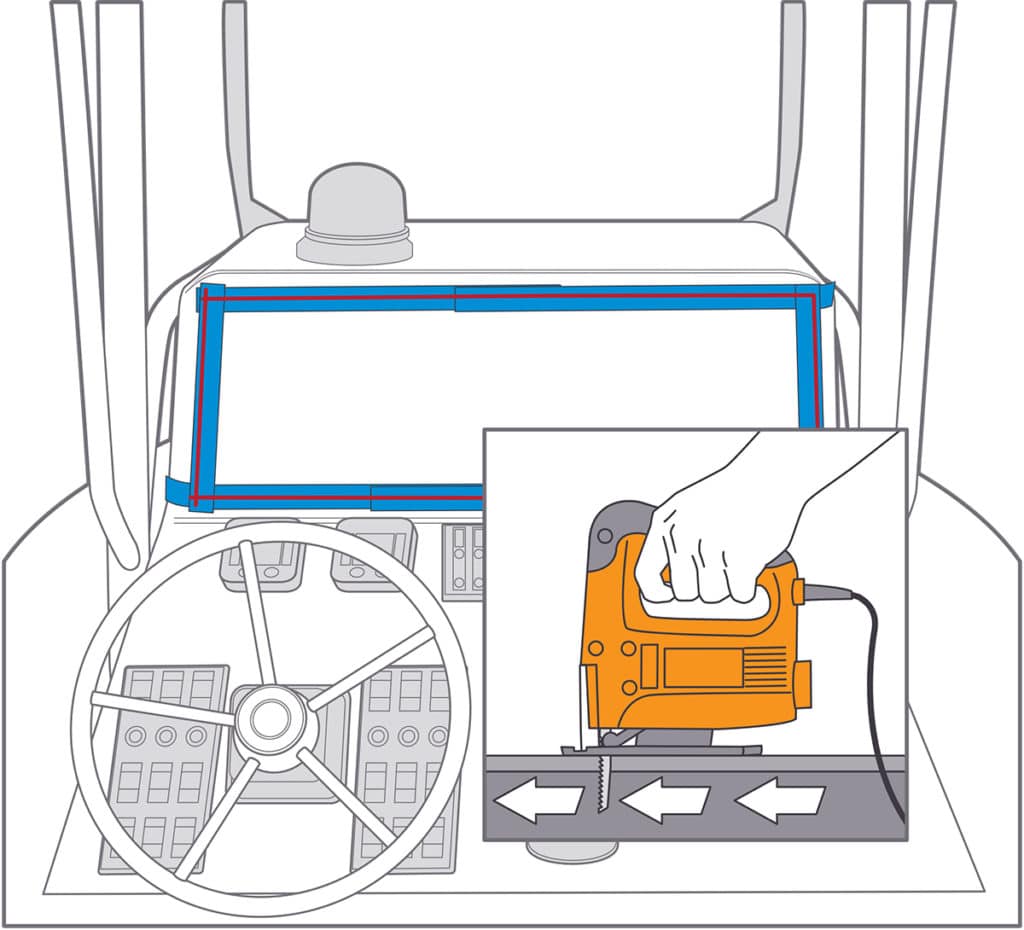
Make the Cut
Mask off the dash around the cutout area to protect the gelcoat from scratches and minimize chipping. Drill 1/2-inch starter holes at each corner of the outline you scribed earlier, and then use a jigsaw or saber saw with a fine-tooth blade to carefully cut along the lines of the area you want to remove. Be careful that the piece you cut away does not fall and damage any existing displays or rigging. If your cut exposes raw marine plywood, apply a coat of marine fiberglass resin to seal the wood from moisture and prevent rot and delamination in the future.

New Panel Creation
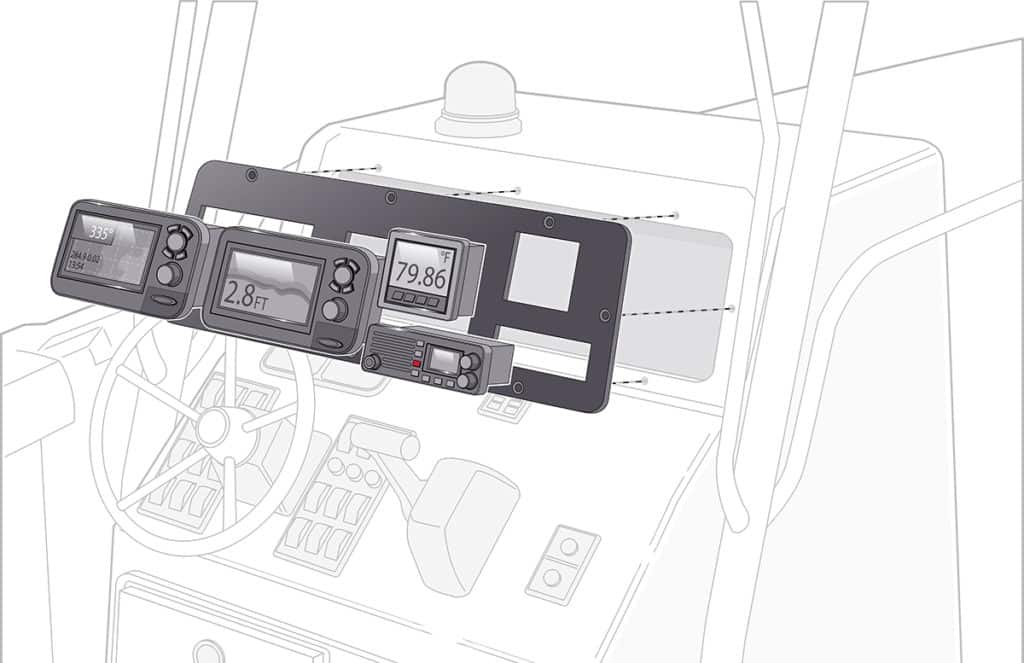
For professional results, turn to a company such as APF Marine in Hauppauge, New York. APF designed the panel to cover the cutout and accommodate the new electronics, then routered it from a piece of 3/4-inch Seaboard high-density polyethylene marine lumber (I chose black) for the twin Furuno MFDs, plus a Si-Tex SST110 seawater temperature gauge and a VHF radio. Bull-nosed edges and eight slightly oversize, countersunk mounting holes (see “Oversize Mounting Holes”) create a smooth, finished look.
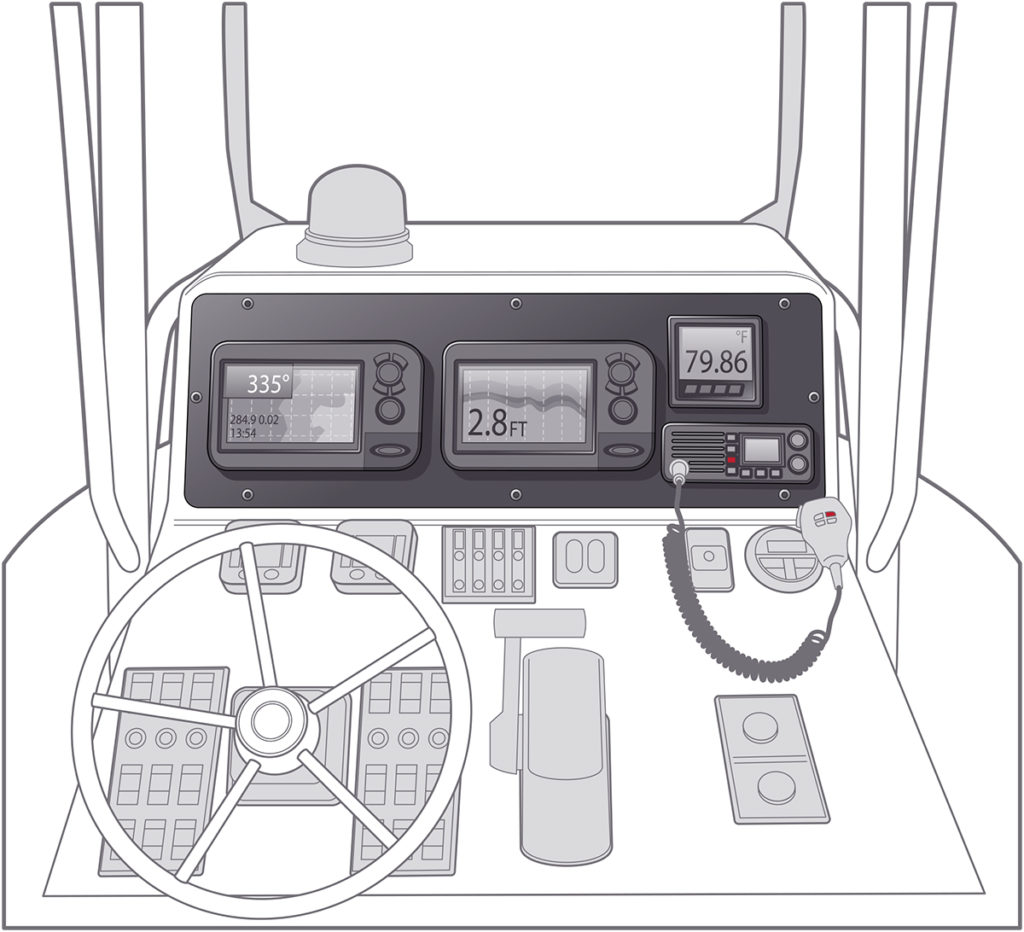
Install the Panel and Electronics
Bed the perimeter with marine sealant and through-bolt the panel to the dash using stainless-steel oval-head bolts, with washers and locknuts on the backside. Be careful not to tighten the hardware excessively, as this has a tendency to crack the plastic panel over time. Flush-mount the displays using any gaskets that come with the products to create a moisture barrier between the exterior and the panel interior. Connect the electronics per the manufacturer guidelines, and you’re ready for some serious fishing.
Oversize Mounting Holes
Seaboard recommends using slightly oversize mounting holes when attaching high-density polyethylene panels to fiberglass, plywood or aluminum. This allows the plastic material to expand or contract with fluctuations in temperature. For best results, use oversize washers or grommets to spread out the load, in combination with through-bolts and locking nuts or screws. With screws, a course thread should yield acceptable holding power.