If you’ve ever been aboard a boat with an enclosed head and holding-tank system, you probably know the smell. Trying to explain it away, I’ve heard some boat owners say, “Well, it smells like a boat.” But I’m here to tell you that a boat isn’t supposed to smell like a bad case of low tide.
When we bought our current boat, it was a stinker. Fortunately, we knew what to do about it. In our previous boat, we had installed a composting head, which gave us 10 years of flawless service without a whiff of stench. So, guess what we did to the new-to-us boat? Yup. Removing a holding-tank system is a big job, but we think it’s worth it. Not only is the stench eliminated and there’s no more hauling around wet sewage, but additional stowage space also results from removal of the tank. Finding a pump-out station is no longer a concern. A composting head takes care of all those issues.
Choosing a Composting Head
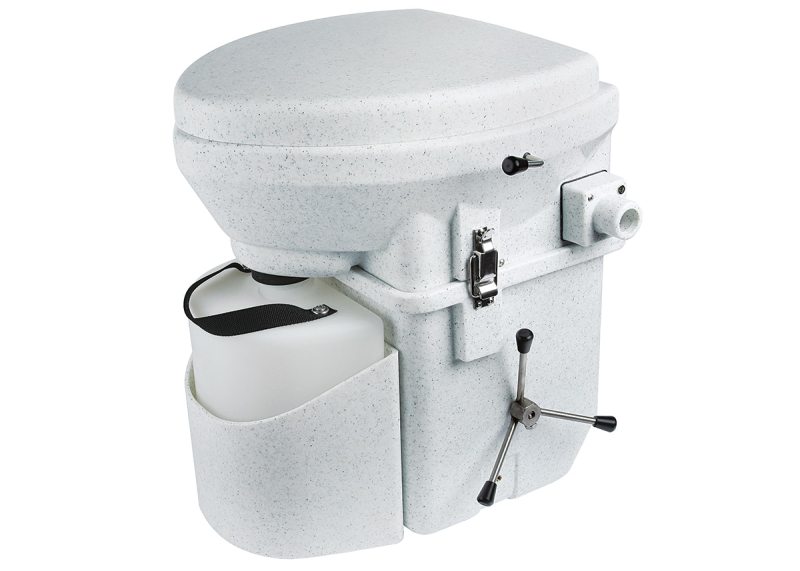
Before beginning this project, make sure your boat will accommodate a composting head. The footprint and bulkhead clearances are the most important considerations. There are two popular composting heads for marine applications. One is Nature’s Head (natureshead.net), and the other is Air Head (airheadtoilet.com).
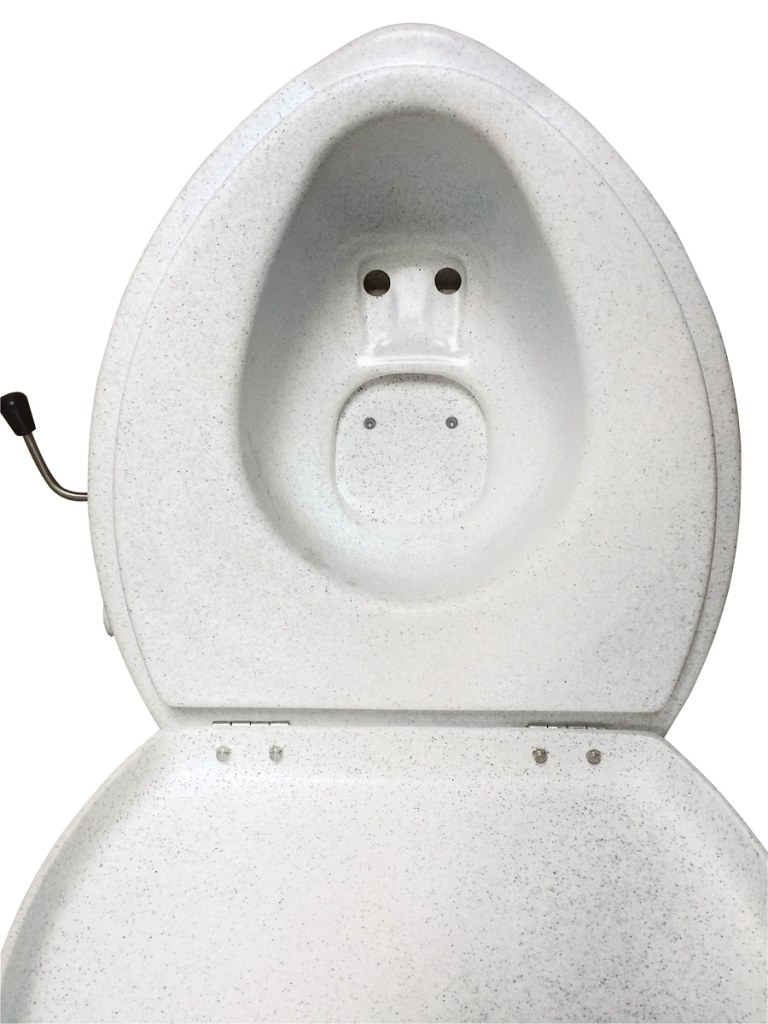
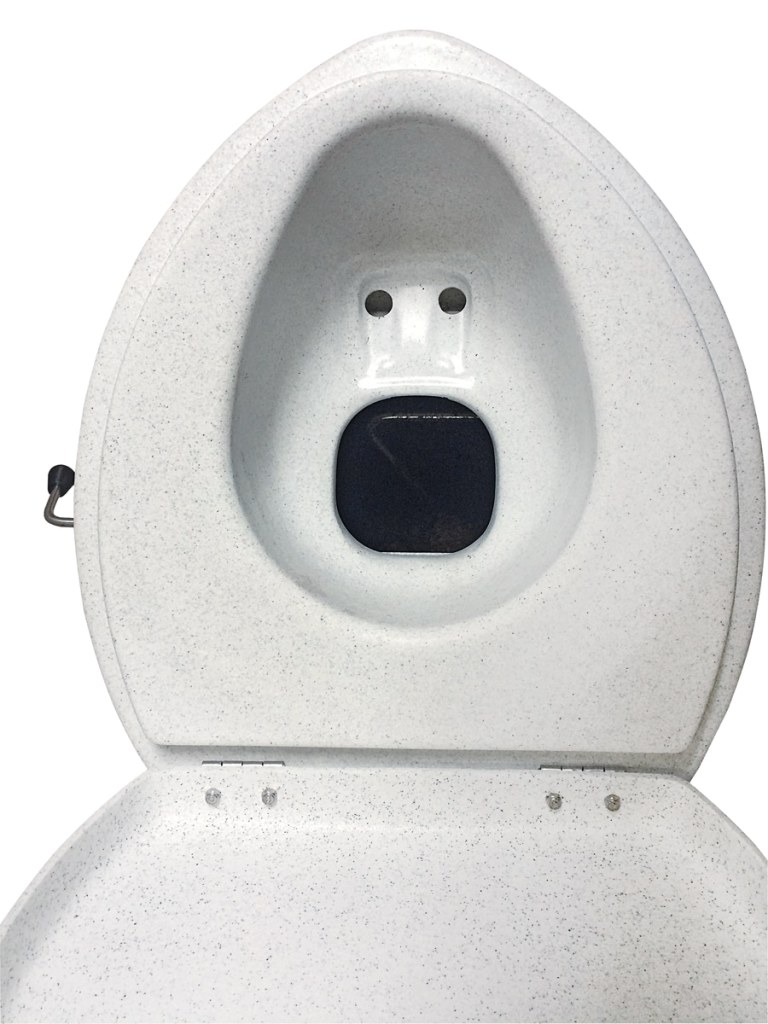
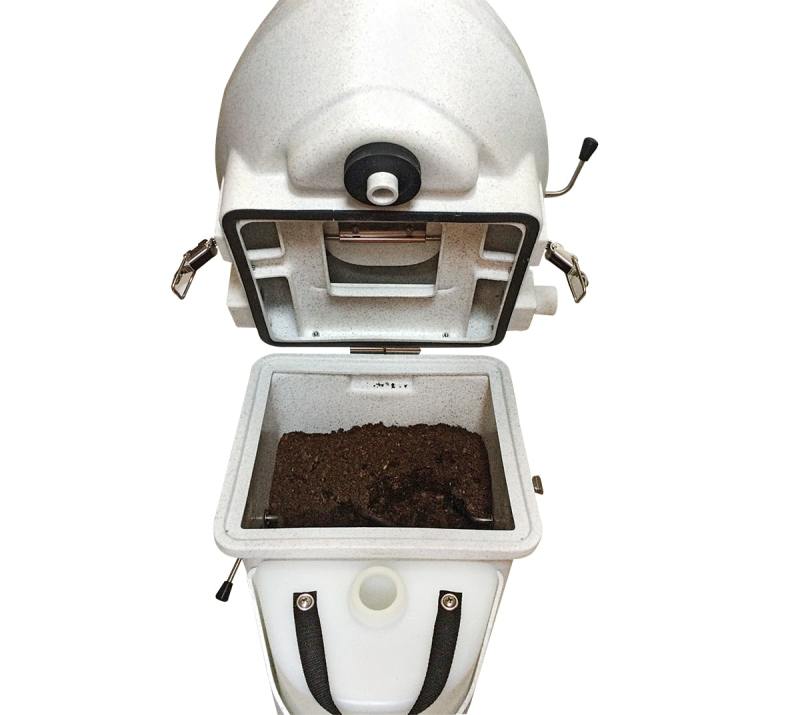
In broad technical terms, these units are identical in the way they operate. Solids and liquid are separated at the moment of deposit (that’s you going potty). And that separation is the magic. As long as they are separated, the solids can decompose fairly rapidly and become essentially dirt. Solids are mixed into a bed of peat moss or coconut fiber, and liquid is collected in a separate container for disposal. A small fan moves air through the composting bin to promote friendly microbial activity that transforms the contents into soil. And the air is vented outside, so there is no smell.
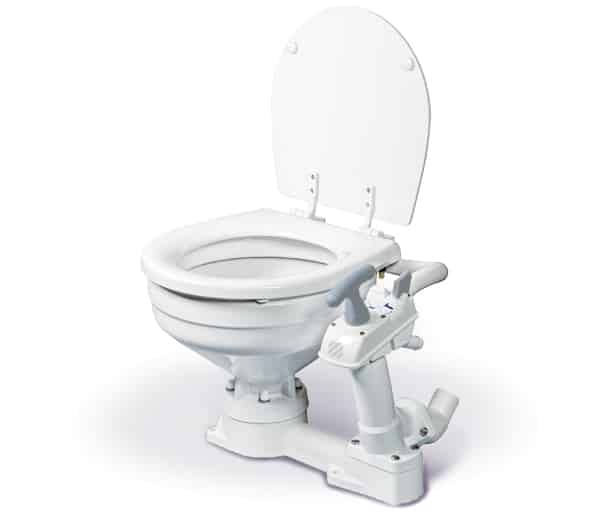
So, you’re not going the composting route. Here are some things to consider in choosing and evaluating a more conventional marine head for your boat. West Marine
There is no plumbing, no valves, no pump, and nothing to break down, clog up or leak. Because there is no possibility for overboard discharge, the unit is U.S. Coast Guard-certified and meets all “no discharge” regulations as a Type III marine head.
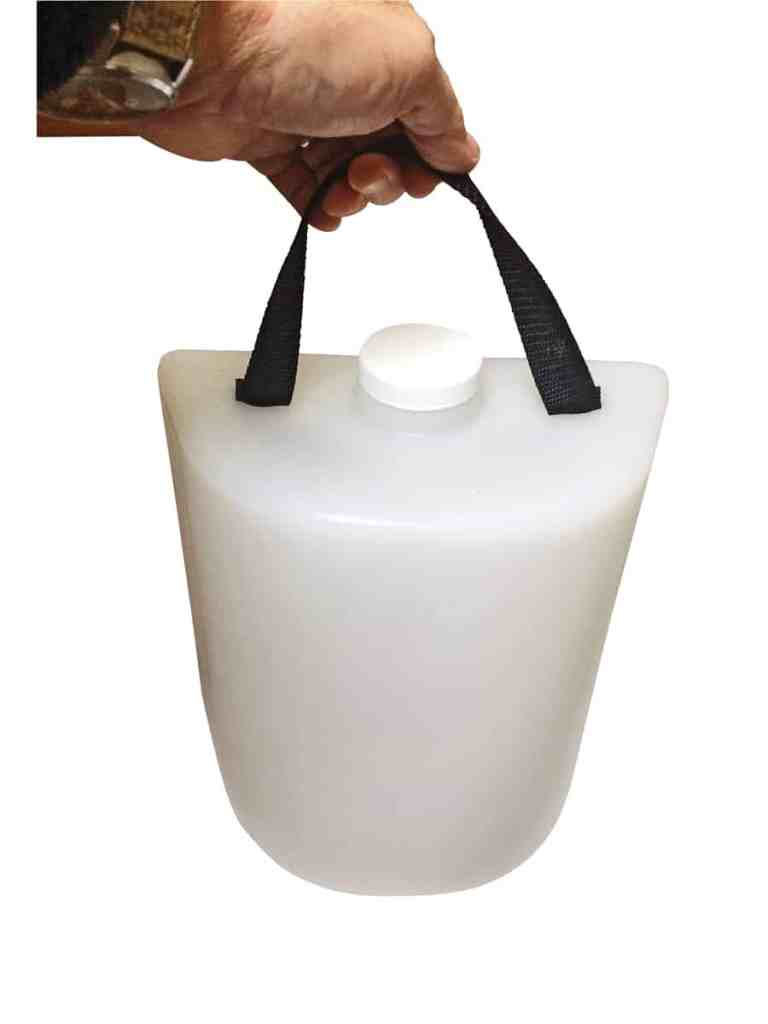
The intervals between service depend on owner usage habits. We empty the liquid container about every three or four days when we are on the boat full time for a long cruise. To extend this interval, you can buy additional containers with lids; when one fills, set it aside and replace it with the spare. When you get to a convenient place — say, a marina or launch with a restroom — empty the containers. The solids bin goes for a month or more (60 to 80 uses). The longer you allow the solids to compost, the better. For part-time boat use, we let it go all year before emptying. By then, the solids are nothing but soil that can be added to our flower beds.
The differences between the toilets are primarily design elements intended for service convenience, and each purchaser must decide what is and isn’t important. For our latest installation, we again went with Nature’s Head. Here’s how to do it.

Phase 1: Preparation
Begin at your local pump-out station. Suck out everything that’s in the holding tank, then use the water hose to fill the tank about halfway and suck it dry again. Go inside the boat and flush the head, fill it with water, flush it again, and repeat that process several times, which will help clear the plumbing that runs from the toilet to the holding tank. All of this will pay big dividends when you start disassembling the components.
Phase 2: Disassembly
We recommend wearing sturdy rubber gloves, safety glasses, and a dust mask or face shield for this, for obvious reasons. As you loosen clamps and disassemble hoses, immediately seal the ends with duct tape to keep anything unpleasant from escaping.
After removing the holding tank and all the hoses, thoroughly clean all the areas where those components were. Leaks are almost inevitable. The problem is, because of the way boat manufacturers route plumbing, leaks are nearly impossible to resolve without dismantling the whole system.
After removing all the components, we used a bleach-and-water solution to disinfect, scrubbing everything multiple times. Then we left the compartments open and placed fans to ventilate and dry the sanitized spaces.
Make sure decommissioned seacocks and the deck pump-out fitting and vent are either removed, and the holes filled with fiberglass, or at least secured in such a way that there’s no chance of them causing water-ingress problems. After closing the seacocks, we installed short lengths of hose on the fittings and then plugged them with tapered wood plugs known as bungs.

Phase 3: Installation
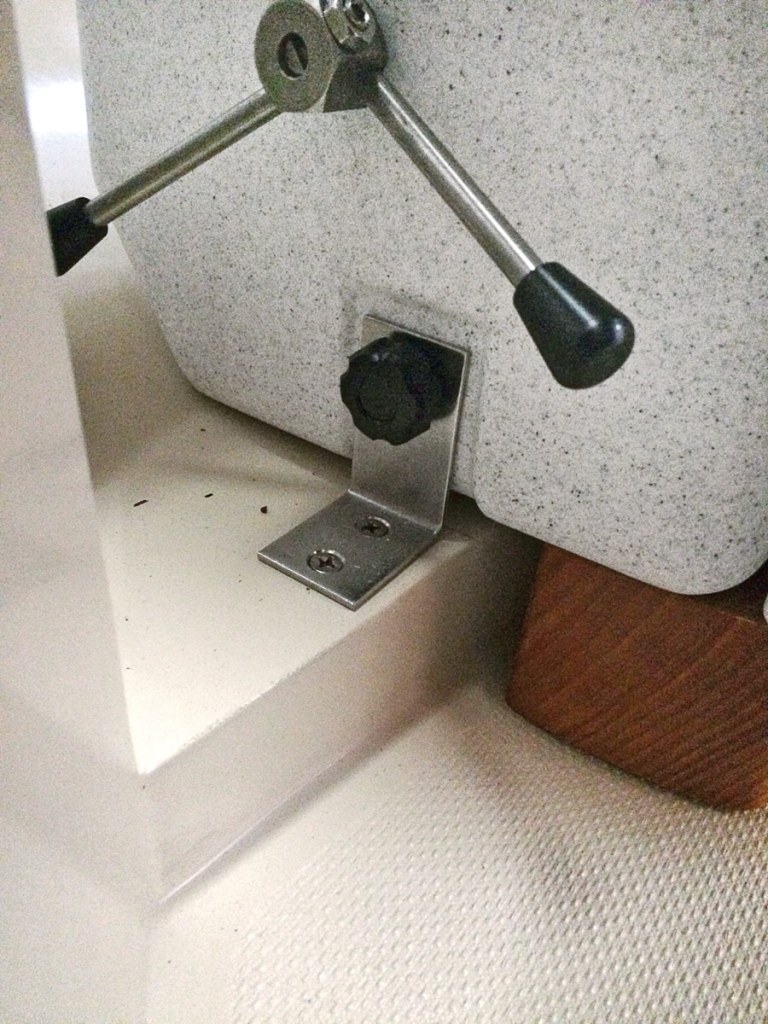
The rest of the process of installing a composting head is simple. Locate the spot that allows the head to fit. There are L-brackets that hold the unit to the sole. Mark their positions, drill appropriate holes in the floor, and bolt the brackets in place. That allows you to use mounting knobs to install or remove the head in less than a minute. You read that right. The toilet can be entirely removed from or installed in the boat in less than a minute.
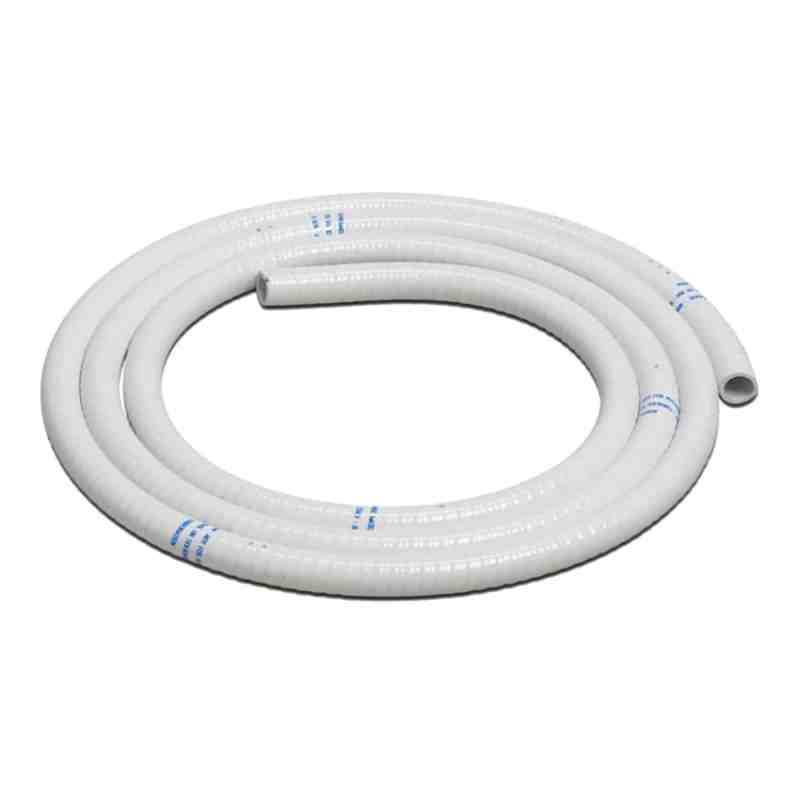
On each side of the compost bin there is a port for attaching a vent hose. The hose and fan can be swapped from one side to the other for installation convenience. Decide how you want to route the vent hose: either up through the deck to a solar vent fan or into an exterior locker (such as the anchor locker). The integral fan can be wired to 12-volt DC for active operation, or you can depend solely on the solar vent fan (not included) to pull air through the chamber, or both.
We opted to wire the fan to the house battery bank that is charged by a pair of solar panels. The 1½-inch diameter vent hose runs to an exterior clamshell vent on the transom. (The vent for the existing holding tank could be refitted and used, but I chose this location for convenience.) The tiny fan draws so little power that there is no risk of depleting the house battery bank, especially with the solar panels keeping things charged.

Operation
One nice thing about a composting head is that it’s so simple to use. There are no complicated pump and valve orientation instructions needed for guests. The one rule: On a boat, every visit to the head should be a sit-down occasion. This is because the liquid needs to channel into the small holes in the toilet bowl that lead to the storage tank.
If, on the other hand, you have additional business at hand, activate the handle on the side of the toilet bowl to open the flapper to deposit solids into the compost bin. When finished, close the flapper to seal the compost bin and then turn the crank handle three or four times to mix the compost medium and the solids. We use a spray bottle of water to rinse the bowl with a couple of spritzes. This helps keep it clean and also moistens the composting material.
Toilet paper? You can drop toilet paper into the compost bin, if you wish. It’s best if you use marine or RV paper that is formulated to decompose rapidly. The more paper you “flush” into the compost bin, the faster it will fill up and require emptying.
Maintenance
Emptying the compost bin is a snap. Let it go as long as you can still easily turn the mixing lever. The longer, the better — months, if possible. When it comes time to empty the bin, simply remove the upper chamber (toilet bowl part), remove the liquid container, stretch a plastic trash bag over the top of the compost bin, release the mounting knobs at the floor brackets, lift the bin and turn it upside down. All the stuff will tumble into the trash bag. Don’t worry about cleaning out the bin — the old bits of microbe-rich compost stuck inside will jump-start the composting process again. Just put the bin back into the mounting brackets, add fresh peat moss or coconut fiber, and reinstall the upper chamber (bowl) and the liquid container. You’re good to go (so to speak).
You can deposit the trash bag in a dumpster or spread the compost around nonedible plants (not in your vegetable garden). If you’ve waited long enough, the material in the compost bin should look and smell like regular soil.
Clearing the Air
Most boaters who have made this conversion state emphatically that they would never go back to a traditional holding-tank system. And we can tell you the same thing. This is one of the best modifications we’ve ever done to a boat.
If your current marine head is causing olfactory problems, here are three tips to help it. 1. After pumping out your head at the station, fill it with a 50-50 mix of bleach and water and pump it out another time. 2. After the tank is empty, pour in a solution of two cups water softener mixed with hot water to prevent solids from sticking in the system. 3. Change the system’s hoses at least every four years. These are frequent odor culprits. Domestic


