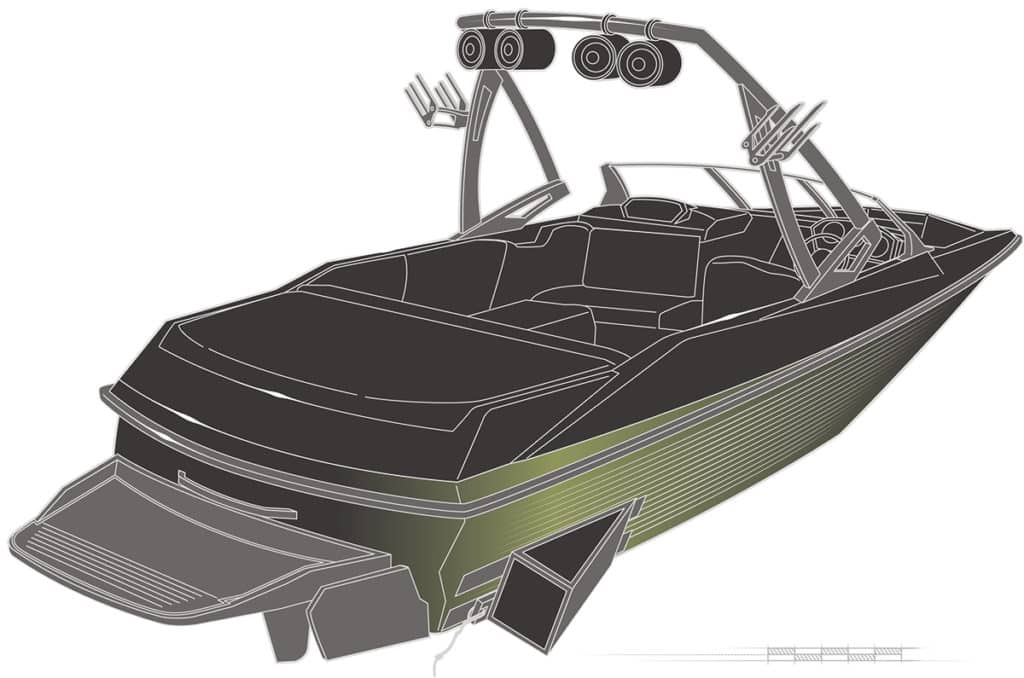
Wakesurfing seems to have taken over the watersports world. Wakesurfers — both young and young at heart — are grabbing their boards and catching curls as boats plow the water to create tasty waves.
Boat companies such as Malibu and MasterCraft have developed V-drive models with advanced, optional wave-generating systems especially for wakesurfing. If you don’t currently own such a machine, take heart. There’s a product that lets you quickly transform a V-drive wakeboard boat, mid-engine inboard water-ski boat or forward-drive runabout into a wakesurfing machine — and it’s affordable.
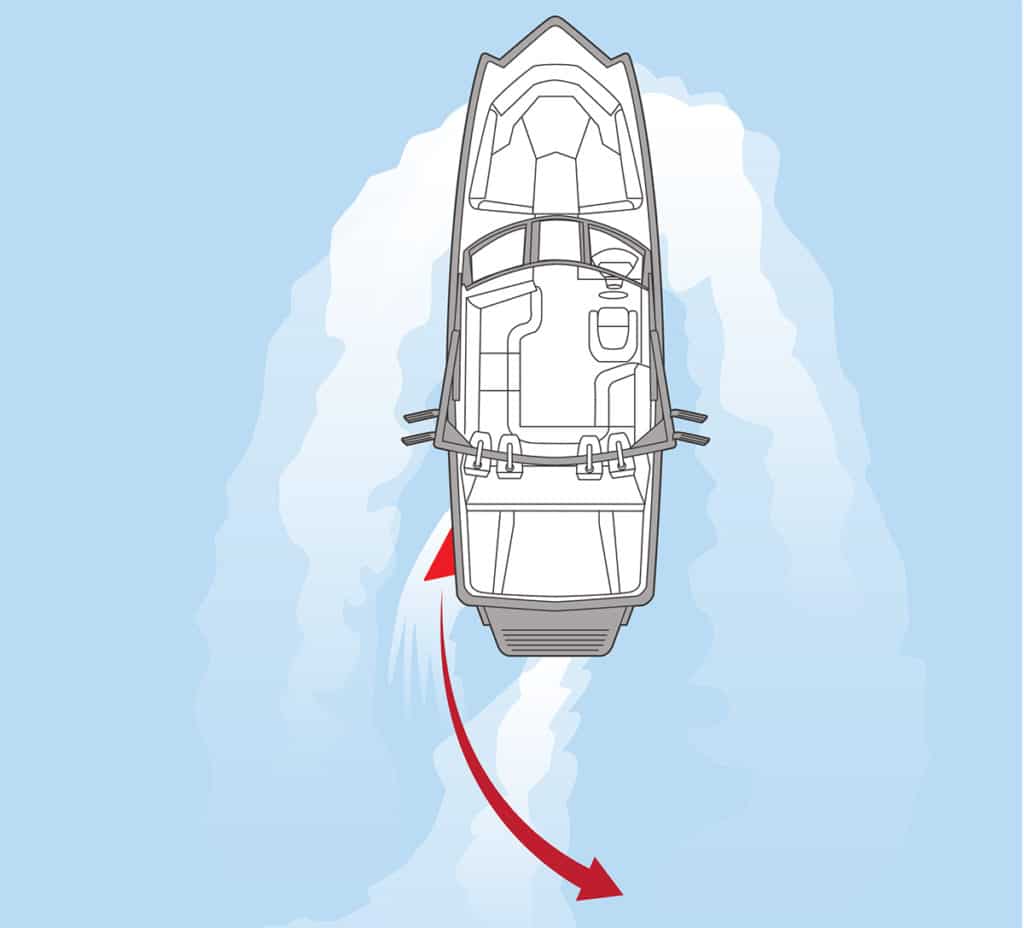
Ronix Eight.3 has introduced the Wakesurf Shaper, a 19-inch-long wedge that temporarily attaches to either side of your boat’s hull with heavy-duty hook-and-loop fasteners. The device causes the boat to “crab” slightly at speeds of 10 to 15 mph and generates an asymmetrical wake with a tasty (and customizable) wave that develops on the side opposite the Shaper. Here’s how to install it on a V-drive wakeboard boat that’s on a trailer or boat lift.
Getting Started
Skill Level: 1/5
Time to Complete: 0.5 Hours
Tools and Supplies
* Ronix Eight.3 Wakesurf Shaper ($600 with fasteners, shims and carrying case; ronixwake.com)
* Boat soap
* 70-percent isopropyl alcohol
* Clean terry towel
* Clean microfiber towels
1. Clean the Hull
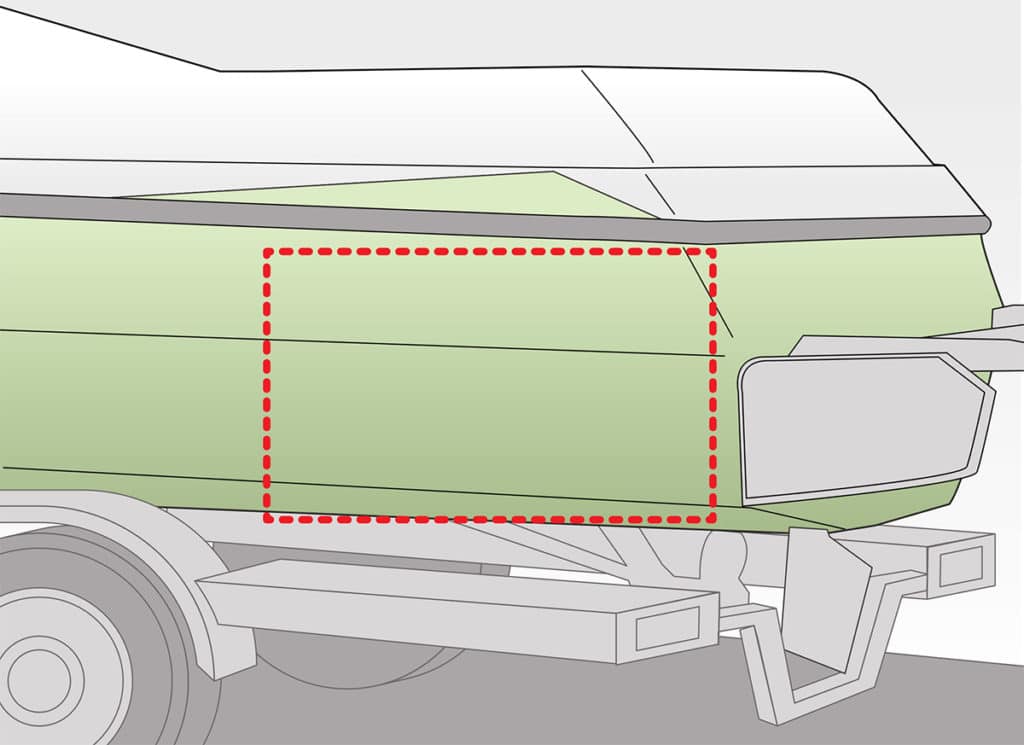
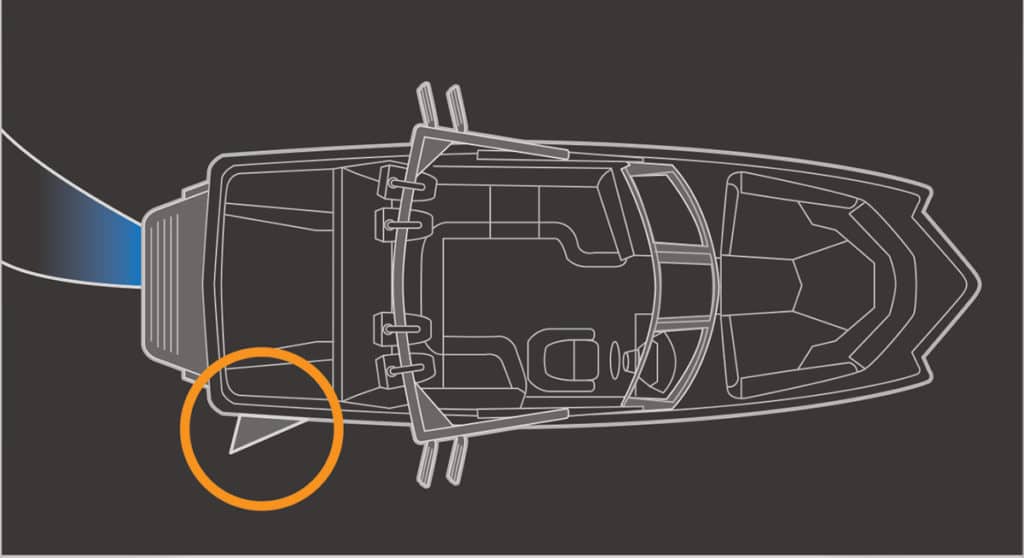
The Wakesurf Shaper is designed to install on either side of your boat’s hull — as far aft and as low as possible — with peel-and-stick adhesive hook-and-loop strips. Wash this area on both sides of your boat with soap and water to remove any deposits or scum, and rinse and dry with a clean towel to avoid water spots. Spray the areas with a 70-percent isopropyl alcohol solution (available at drug stores such as CVS) and wipe down with a clean microfiber towel to remove any wax from the application surface.
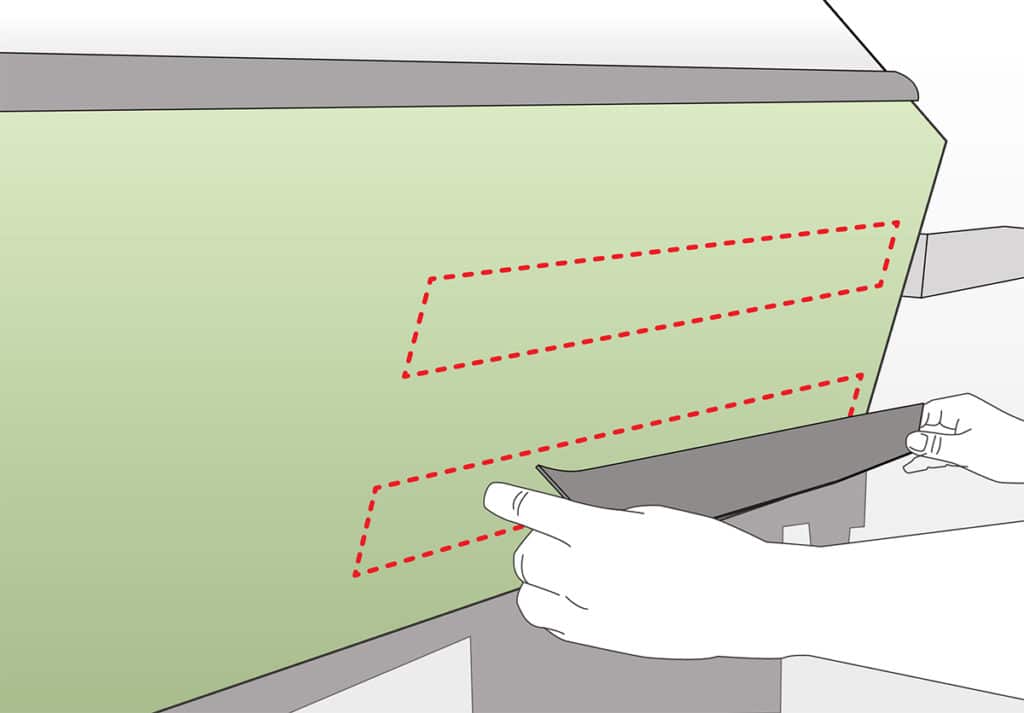
2. Position the Lower Fastener
Remove the adhesive backing from one of the supplied 25-inch-long hook-and-loop fastener strips and apply it to the lowest horizontal flat surface as close to the transom edge as possible, even if there is a recess or style line above creating a step-in. (Supplied shims will fill in, see step 4.) Make sure the strip is parallel to the chine at the bottom of the hull. Apply firm pressure to help ensure proper bonding to the hull surface. Repeat this procedure on the opposite side of the boat.
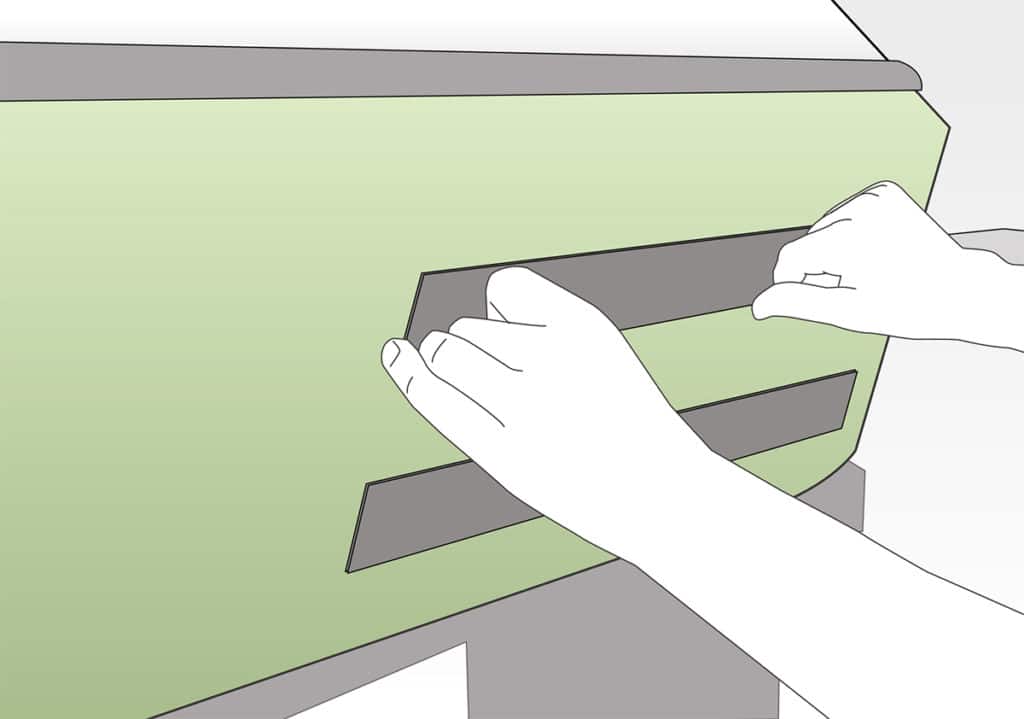
3. Position the Upper Fastener
Use the supplied template and printed instructions to identify where to place the upper adhesive hook-and-loop fastener. Then remove the adhesive backing from one of the supplied strips and apply in the position indicated by the template, making sure it’s aligned vertically and is perfectly parallel with the lower fastener strip that you applied earlier. Repeat this procedure on the opposite side of the boat and then let the adhesive cure for 24 hours before placing the boat in the water.
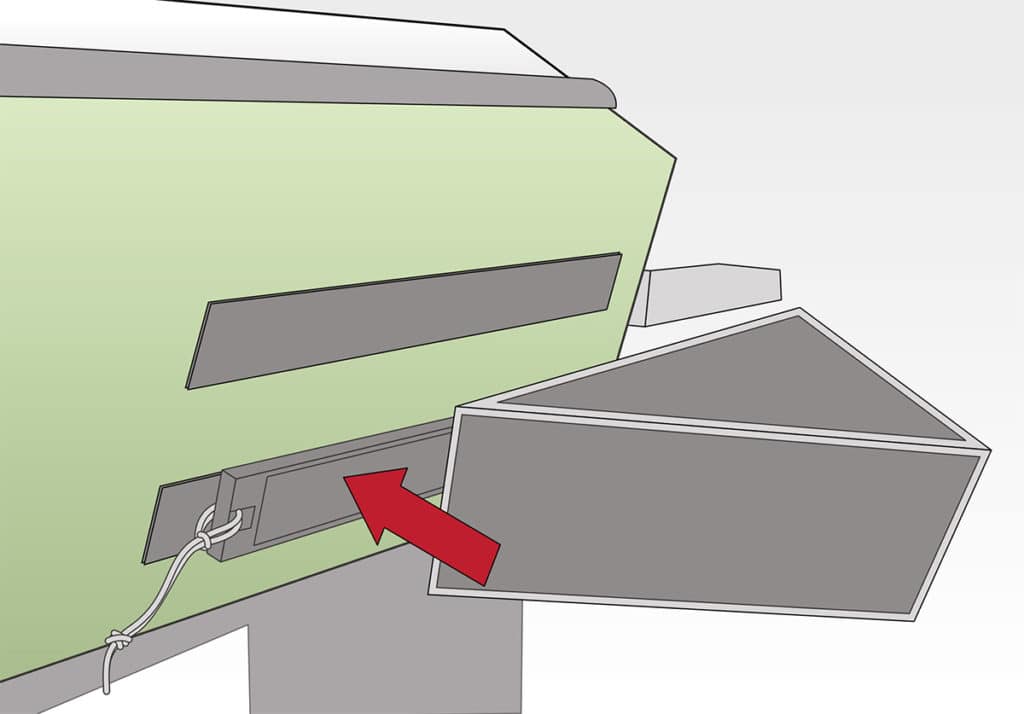
4. Attach the Shaper
After the adhesive cures, mate the hook-and-loop fasteners on the Wakesurf Shaper with the strips on the hull. If the lower fastener is positioned on a step-in due to a style line, or the side of the boat tapers sharply inward as it approaches the chine, use one of the supplied shims (which come with hook-and-loop fasteners) between the Wakesurf Shaper and the lower fastener to plumb the wedge. Shims 1 and 2 inches wide are supplied, and you can stack them to compensate for deep step-ins. Water pressure keeps the device from dislodging.
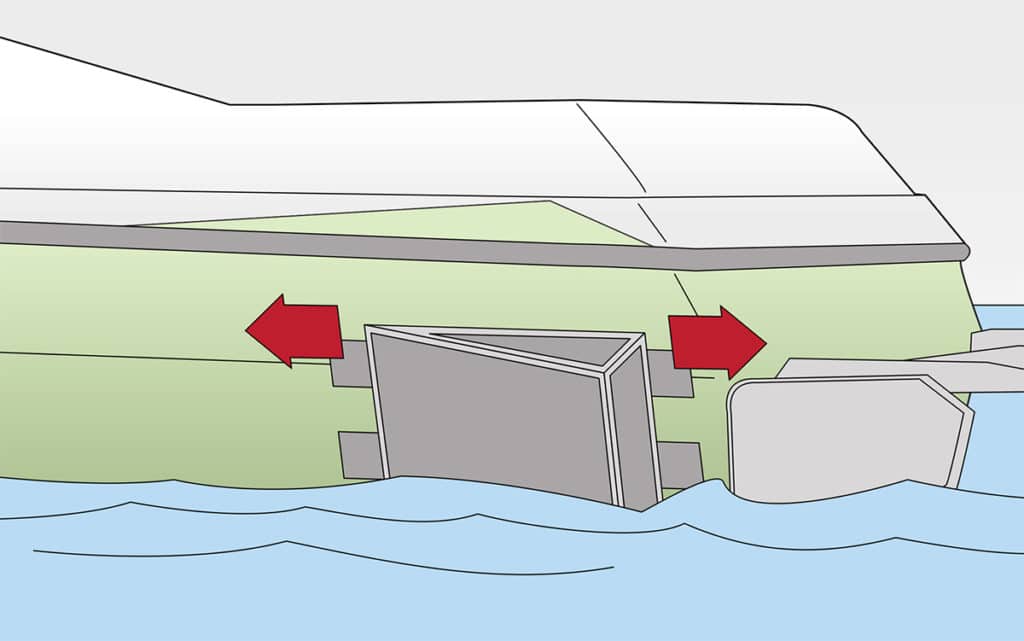
5. Fine-Tune the Wake
The fasteners are 6 inches longer than the Shaper. This allows for adjustment fore and aft, which alters the shape of the wake. Each boat will respond differently but, generally, when the Shaper is closer to the stern, the wave (on the opposite side) becomes steeper and deeper. As you move the Shaper forward, the wave becomes longer and wider — what wakesurfers describe as “rampier.” With fasteners on both sides, you can move the Wakesurf Shaper to create tasty waves on either side of your boat.
Pick a Side
The Wakesurf Shaper is designed to be placed on either side of your boat’s hull and, thus, generates a wave on one side or the other. Putting the Shaper on the port side creates a surfable wave on the starboard side. When the wakesurfer gets bored, move the Shaper to starboard and create portside curl.
Steering Difference and Precautions
Because the Wakesurf Shaper dramatically affects the yaw of the boat while underway, wait until you’re ready to go wakesurfing to attach it and remove it before you pick up speed again. At wakesurfing speeds of 10 to 15 mph, the boat tends to “crab” to the side on which the Shaper is attached. That’s what creates the asymmetrical wake and a nice wave, but it also forces the helmsman to pay close attention to the wheel to keep the boat on course. Also, Eight.3 promotes using this product with inboards and forward-drive boats but advises against use with conventional sterndrive-powered boats due to the propeller’s proximity to the wakesurfer.