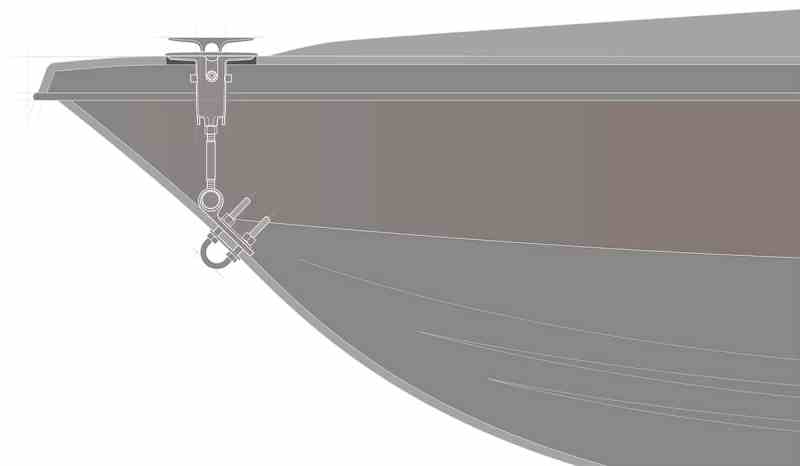
If you keep your boat on a tidal creek, you know the importance of lifting eyes. These let you attach a cable to the bow (along with a bridle to the transom eyes) to hoist your boat with a pair of davits to keep the hull clean and prevent it from resting on the bottom at low tide. You can accomplish the same thing with a lift or sling hoist, but using lifting eyes is a common method, especially for boats that are less than 20 feet length overall.
Most boats come equipped with a pair of transom eyes as well as a bow eye in the stem, but not all boats have a suitable point for lifting the bow. It’s important that any lifting point is properly connected to the hull. Using hardware secured only to the deck can damage the hull-to-deck joint. Here is how to install a bow-lifting point using a kit supplied by Accon Marine, which includes a retractable 6-inch lifting cleat that will support a 4,000-pound load.
Accon president and owner Bernie Czipri provided guidance, but he also emphasized that if you feel uncomfortable with this DIY project, ask a servicing dealer to handle the installation.
Getting Started
Skill Level: 3/5
Time to Complete: 3 to 4 Hours (approximately, per pad installation)
Tools and Supplies
* Accon Marine Retractable Lifting Cleat Kit (includes stainless-steel retractable lifting-cleat assembly, sling, crossbar and 12-inch threaded connecting rod); $269.80, shop.acconmarine.com
* 3/8-inch U-bolt-style stainless-steel bow eye (in case your boat is not equipped with one); $17.54, shop.acconmarine.com
* Square edge
* Marking pencil
* Channel-lock pliers (to tighten connecting rod)
* Four 1½-inch-long No. 10 oval-head self-tapping stainless-steel screws
* Jigsaw with fine-tooth blades
* Power drill and set of drill bits
* Phillips screwdriver
* Box/open-end wrench set
* Head-mounted flashlight (for seeing better under the bow)
* Marine bedding compound
* Clean rags to clean up excess sealant
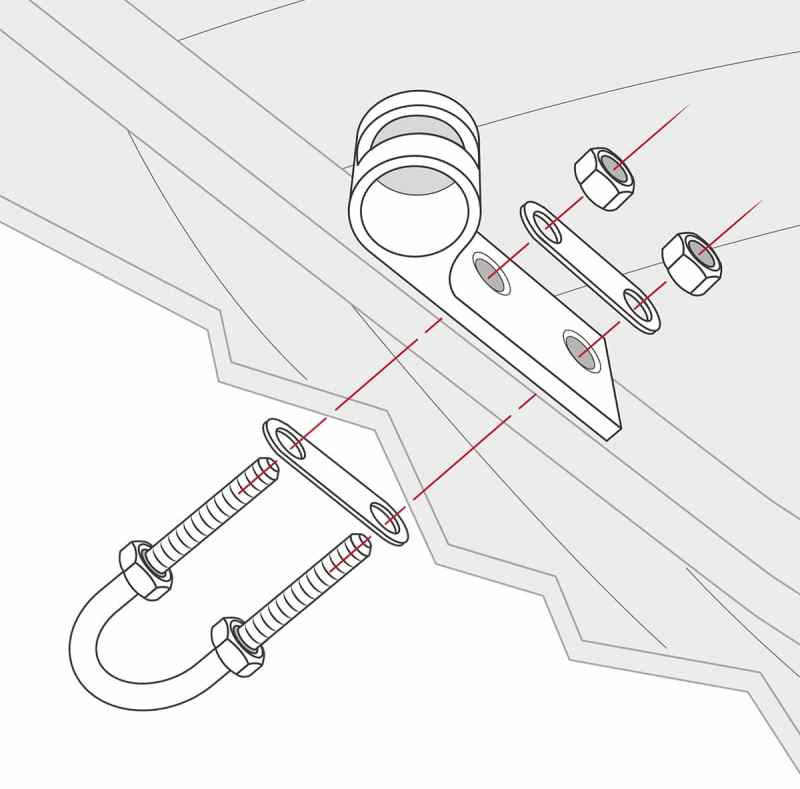
1. Bolt on the Sling
Working inside the bow of the boat, remove the two nuts from the bolts of the bow eye. You might need to rebed the bow eye with fresh sealant after loosening it from the stem. After rebedding, place the sling over the two bolts of the bow eye, making sure the barrel of the sling is positioned at the top and that it angles away from the hull. Place the bow-eye backing plate over the sling, then thread the two nuts to the bow-eye bolts. Use a wrench to torque the bow-eye nuts securely.
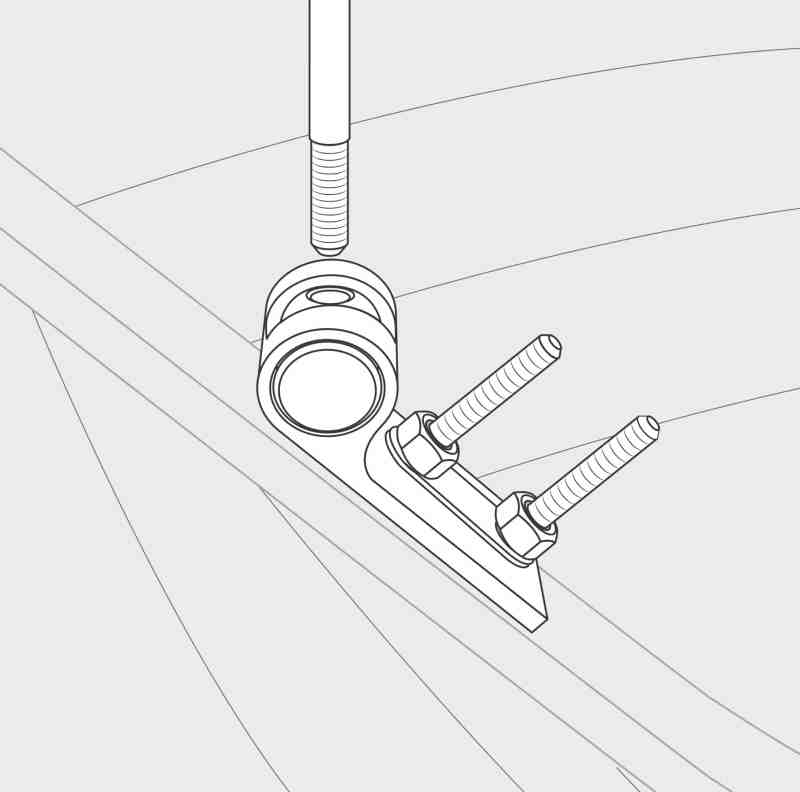
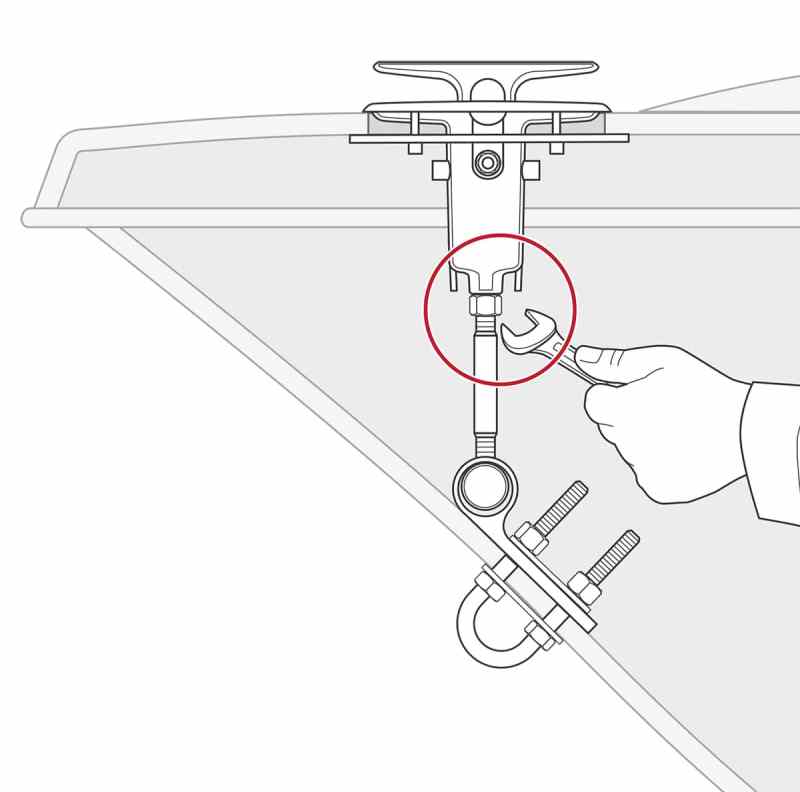
2. Attach the Connecting Rod
Place the crossbar inside the barrel of the sling, then insert one end of the 12-inch-long connecting rod between the straps of the barrel and thread it into the hole of the crossbar (keeping in mind that it has left-hand 5/8-11 threads). The rod will eventually need to thread for 1 inch into the crossbar, as well as 1 inch into the threaded hole at the base of the lifting cleat. If the rod is too short, order a replacement rod of the appropriate length, diameter and thread type from a dealer.
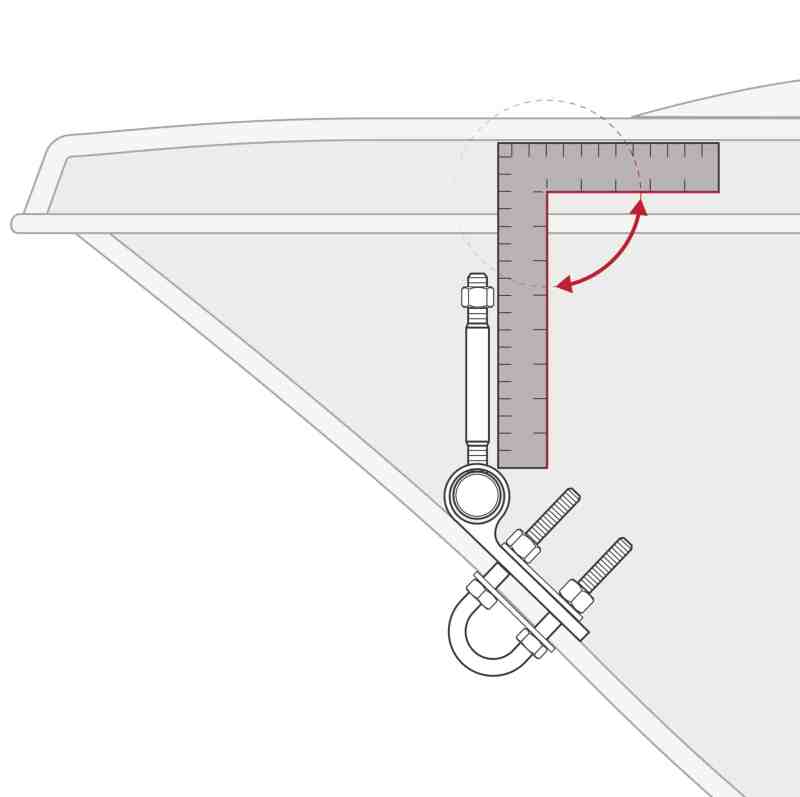
3. Find the Center Point
The connecting rod must be vertical and perpendicular to the bow deck to allow for a straight upward pull when lifting. With the rod attached to the crossbar, use a square edge to position the rod at a 90-degree angle to the deck and mark this point. Then drill a small 1/8-inch hole upward through to the bow deck (making sure there are no obstructions). This hole marks the center point for installing the chamber for the lifting-cleat assembly.
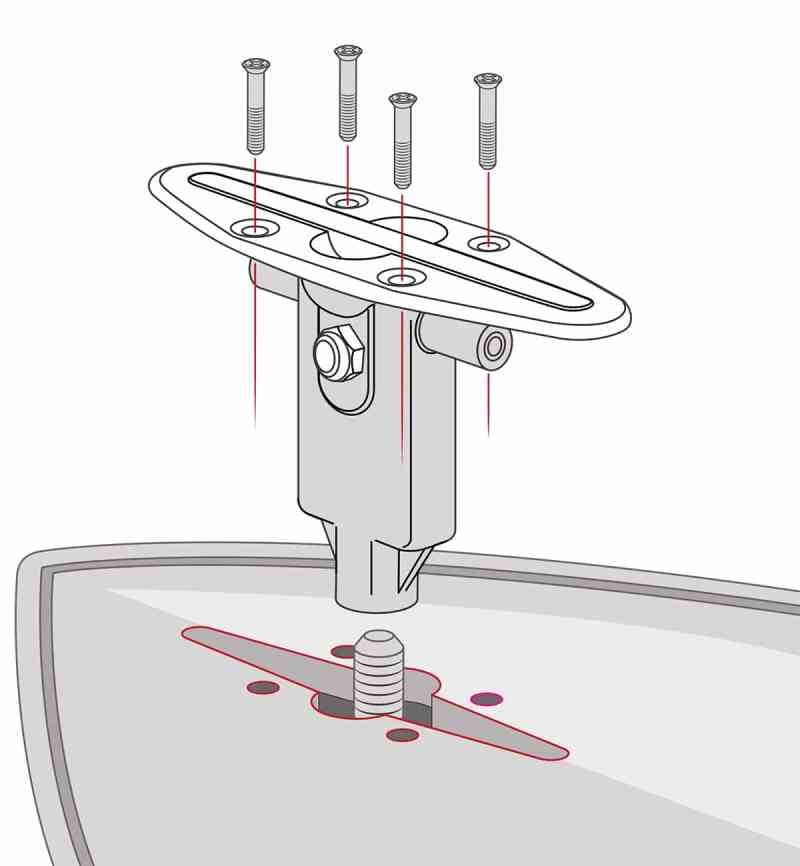
4. Create the Cutout
Using the supplied template, place it over the center point with the cleat aligned with the centerline of the boat. Mark the cutout and mounting holes. Use a jigsaw to create the cutout. Use a power drill to create the mounting holes. Bring the connecting rod up to the base of the lifting eye. Thread the rod into the base of the lifting cleat; as you do, it will also thread into the left-hand threads of the crossbar.
5. Bolt It Up
Bed the topsides under the cleat with a marine sealant, then tighten the connecting rod, making sure it threads in at least 1 inch at each end. Screw the face of the lifting cleat to the deck. Wipe away any excess sealant. Make sure the connecting rod is in tight, and then tighten the nut against the base of the lifting cleat to prevent the connecting rod from backing out. Test to make sure the lifting cleat deploys and retracts fully and easily.
Quick Tips
1. The mounting surface for the face of the lifting cleat needs to be flat and horizontal. If it’s angled or curved, you will need to fashion a shim or spacer from a material such as King Starboard to create a suitable mounting surface.
2. The connecting rod might be too long, in which case you need to cut it to fit using a hacksaw. Leave the securing nut on the rod, making sure it is inside the cut. After making the cut, unscrew the nut to chase the threads and clean up any burrs.


