Managing all your batteries while boating is a cinch with an automatic charging relay system such as the Add-a-Battery kit ($137.99, westmarine.com) from Blue Sea Systems (bluesea.com). Such a system allows charging current to flow to both starting and house batteries automatically, without your having to remember to throw a switch, yet prevents inadvertently draining the starting battery while using house loads (stereo, fish finder, plotter, etc.) that might leave you dead in the water.
While there are a number of ACR configurations, here’s how to set up a basic two-battery system on a single-engine boat, using the Add-a-Battery kit.
Getting Started
Time to Complete: 2-3 Hours
Skill Level: 2.5/5
Tools and Supplies:
*Blue Sea Systems Add-a-Battery kit
*Marine-grade tin-plated copper wire/cable for + and – connections
*Marine-grade fuses (4)
*Marine-grade tin-plated copper common bus bar
*Marine-grade crimp connectors
*Cable clamps and tie-wraps
*Heat-shrink tubing
*Stainless-steel fasteners
*Wire cutter
*Wire stripper
*Crimper
*Power drill and drill bits
*Screwdrivers
*Socket wrench set
*Heat gun
*Dielectric grease
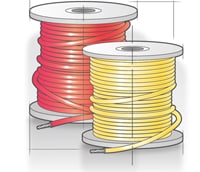
1. Select the Wire Size
Make sure you use marine wire and fuses sized to handle the engine’s alternator output and starting requirements. Check the owner’s manual to determine the amperage output and draw, and then go to boatingmag.com/amp-draw.
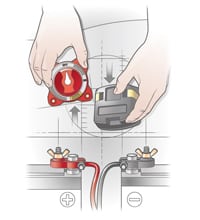
2. Plan the Layout
Choose a location close to the batteries to attach both main components — a Blue Sea Systems e-series Dual Circuit Plus battery switch and SI-ACR. It should be dry and well ventilated. Use stainless-steel fasteners to install them securely, and check behind bulkheads for wires, hoses and tanks before drilling any holes. You will need access to the back of the battery switch to connect wires, so don’t mount it until after step 3.
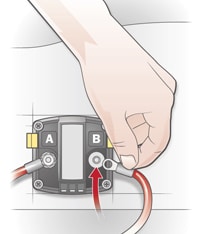
3. Connect Positive Terminals
Connect starting battery positive to ACR stud A and house battery positive to stud B, with fuses for both. (Always connect positive first in 12-volt systems.) Connect house and starting batteries’ positives to the lower studs 1 and 2 on battery switch, respectively. Finally, connect switch panel positive with a fuse to upper stud 1 and outboard starter/alternator positive to upper stud 2.
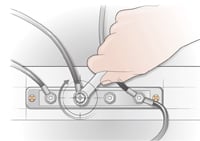
4. Connect Negative Terminals
Connect the negative terminals of both batteries to the negative bus bar. Next, connect the terminal marked GND on the ACR to the negative bus bar. Install a fuse in the ACR ground wire. Make sure all terminal connections are crimped firmly, tightened properly and coated with dielectric grease.
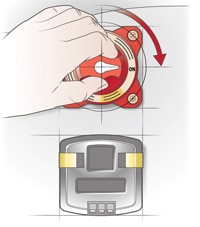
5. Operate the System
Turn the Dual Circuit Plus battery switch to “on.” The SI-ACR will manage the charging of both batteries when under way and when plugged into a charger. In case you need the house battery to start the boat in an emergency, turn the switch to “combine batteries.” Rotate the battery switch to “off” when you leave the boat.
Quick Tip: To fight corrosion, use marine crimp connectors with heat-shrink collars from companies like Ancor marinco.com/brand/ancor. Then cover each crimp with a length of heat-shrink tubing, and coat each terminal with LubriMatic dielectric grease ($9.99/2 ounces, etrailer.com).


