How to Install an Electronic Compass
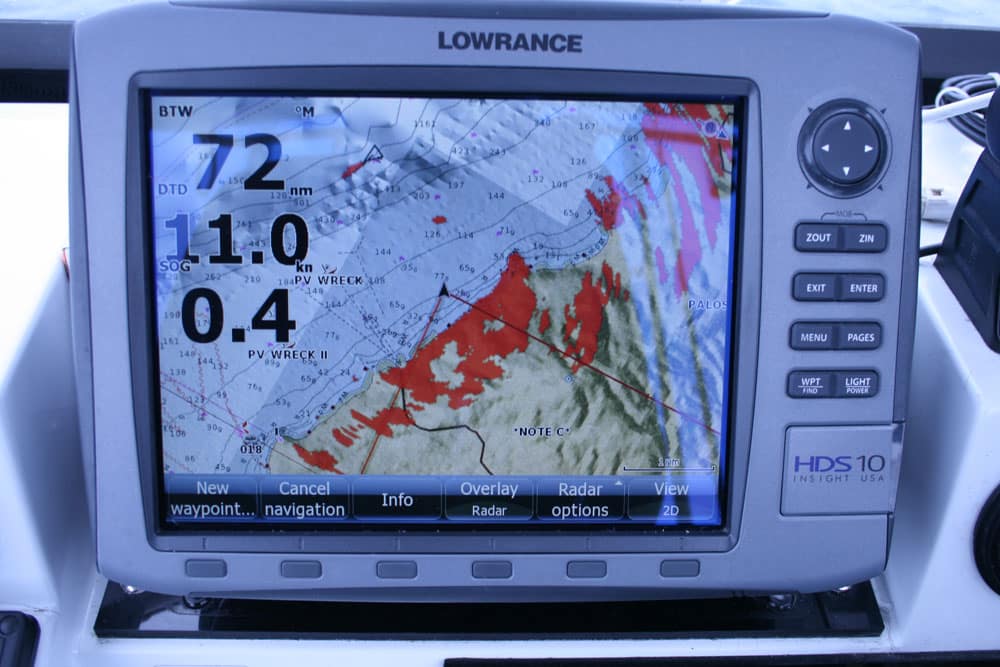
Electronic chart plotters are great. So are today’s radar units. And I can display both electronic charts and radar side-by-side in split-screen mode on my Lowrance HDS-10 multi-function display ($2,349, thegpsstore.com). Until recently, however, I could not overlay radar returns on the chart plotter on a single screen, because this trick requires connecting the HDS-10 to an electronic compass.
Actually, I have a Si-Tex electronic compass for my autopilot that I could have used with the HDS-10, but this compass has only a NMEA 0183 output, and connecting this would have meant tearing into a lot of existing wiring. So I opted to add a Simrad RC42 electronic rate compass ($623.69, amazon.com) with an NMEA 2000 output that would be simple to tie into the HDS-10’s NMEA 2000 backbone. It also requires a special adapter fitting and cable to connect the compass’s Simnet cable, but everything’s plug and play. Here is how to set up this electronic compass with an HDS-10.
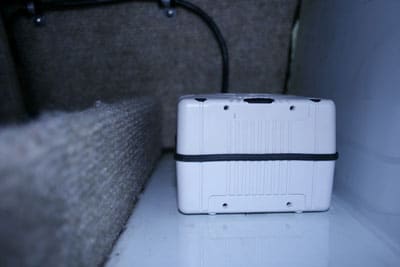
The box-shaped RC42 rate compass needs to be mounted horizontally. I mounted mine in the aft portion of the storage tray rimming the cabin interior. Stainless steel mounting screws are included.
Mounting the Compass
Mount the box-shaped RC42 flat or on a bulkhead, but as horizontal and low as possible. I mounted mine in the cabin of my walkaround cuddy, securing it in the storage tray on the portside a far aft as possible. Keep it away from magnetic interference such as stereo speakers or electric motors. Make sure the forward cardinal point (the point on the opposite side of the compass cable) is aligned parallel with the centerline of the boat.
Connecting the Compass
The hardest part about connecting the compass is routing the compass cable to your boat’s NMEA 2000 network. You will need a Simnet joiner and adapter cable, as well as a NMEA 2000 T-connector to make the connection with an HDS-10. The RC42 draws power from the network, so there’s no need to connect it to a separate 12-volt source. Once you have routed and connected the adapter cable, use the T-connector to tie it into the NMEA 2000 network.
Calibrating the Compass
Calibrating an electronic compass is a fairly simple procedure. Once the RC42 compass is connected, use the Settings menu on the HDS-10 to guide you through the process of driving the boat in a circle as the rate compass automatically calibrates itself.
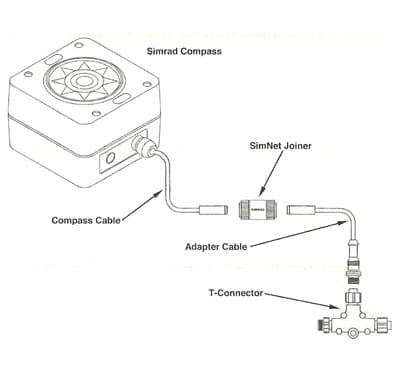
A compass with an NMEA 2000 output is fairly easy to connect to the HDS-10’s NMEA 2000 network. With the Simnet joiner, adapter cable and T-connector, it is a plug-and-play procedure. Don’t forget to cap the T-connectors at either end of the backbone with terminator plugs.
Correcting the Heading
You may also need to compensate the heading sensor, particularly if you did not mount it to point parallel with the centerline of the boat. As with calibrating the compass, use the Settings menu on the HDS-10 (with the boat pointed at a known compass bearing) to compensate the RC42 to show the correct magnetic heading.
Creating the Overlay
To create a radar overlay on the HDS-10, bring up the chart plotter page. Across the bottom of the page will be two menu items – Overlay and Radar Options. Press Overlay button so that Radar reads below it, and then press the Radar Options button. This will bring up a menu; choose the top item and scroll down to Transmit and press the Enter button, then Exit. The radar will automatically adjust to fit the range and heading on your chart plotter.
Thanks to the RC42 rate compass, I can now take full advantage of the navigational capabilities of the Lowrance HDS-10 multi-function display.