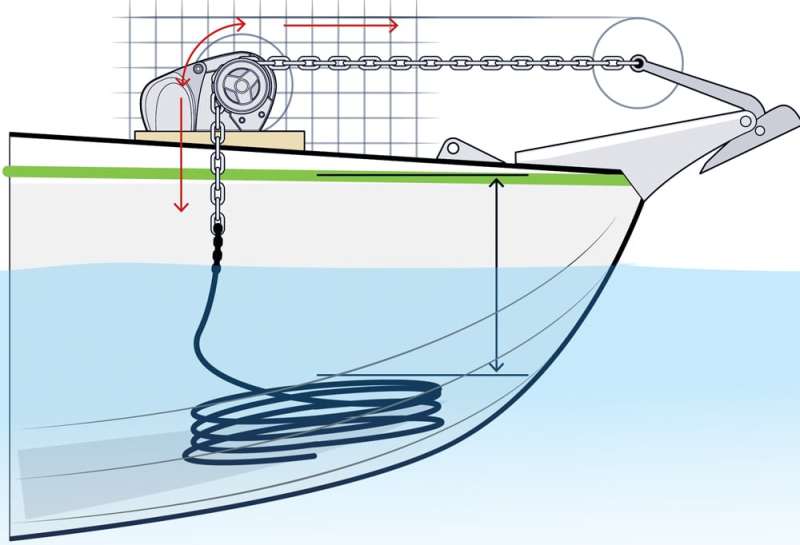
There are two types of electric anchor windlasses: horizontal-gypsy models with the unit fully enclosed above deck and vertical-gypsy models with much of the unit concealed below deck.
Both automaticaly feed line and chain into the rode locker. We chose the Pro-Fish 1000 horizontal windlass from Lewmar (lewmar.com), which has a free-fall function. This feature lets you drop anchor quickly, allowing more precise anchoring than slower “power-out” models, but requires a deeper rode locker to prevent tangles. It is suitable for boats to 38 feet in length.
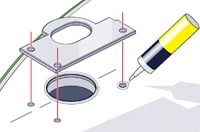
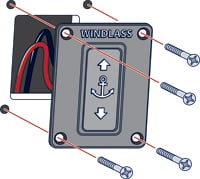
1. Mounting of the Windlass
Select a mounting location on the bow that allows the rode to drop directly into the anchor locker and also puts the gypsy in a straight line with the anchor roller. The minimum anchor-locker depth is 12 inches to the top of the rode pile. Use the supplied template to cut the holes to feed the rode into the locker and to accommodate the wires and the three supplied mounting studs. If the deck is not flat, create fairing blocks for both the top and underside of the deck. Also consider a backing plate made of aluminum or plywood. Secure the studs inside the windlass with Loctite. A rubber gasket seal fits between the windlass and the mounting surface.
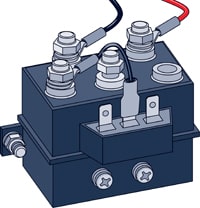
2. Up/Down Contactor Installation
We ordered an optional up/down contactor (part 68000939) that allows for multiple control switches and relays 12-volt power from the battery to the windlass. This allows control from the helm and from on the bow. The contactor needs to be installed vertically in a dry area. We through-bolted ours to a bulkhead in the bow and connected the wires from the windlass to the output studs on the contactor.
Quick tip: To resist corrosion, use tinned-copper marine wire and marine-grade connectors with heat-shrink nylon sleeves. Also, enclose all connections with heat-shrink tubing.
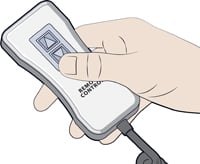
3. Bow Switch
There are a number of optional bow switches, but we chose a hard-wired, waterproof, hand-held control (part 68000599) with a coiled electrical cord. When not in use, it can be snapped into a vertical bracket (which we mounted inside the anchor locker) or unplugged and stowed. We wired it to switching posts on the contactor.
4. Helm Switch
The Pro-Fish 1000 comes with an up/down rocker switch. Using the supplied template, we cut a rectangular mounting hole near the helm and drilled four holes for the supplied screws to install the switch. We then extended its two size 14 American wire gauge (AWG) wires and snaked them forward to connect to switching studs on the contactor.
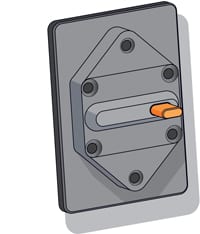
5. Power Delivery
A windlass requires heavy-gauge cable from the battery to the contactor. Lewmar provides charts to determine cable size. Our run of 25 feet called for size 4 AWG cable for both the positive and negative feeds. For circuit protection, the positive cable must be fed through a supplied 70-amp breaker switch, which also allows you to shut off power to the windlass.
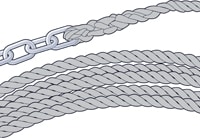
6. The Right Rode
The gypsy on the Pro-Fish 1000 is designed to fit 9/16-inch three-strand or eight-plait line and 5/16-inch G4 chain. To function properly, it also requires a rope-to-chain splice. You can buy a pre-made windlass rode ($284.99 for 200 feet, westmarine.com).
For more on horizontal versus vertical windlasses, visit boatingmag.com/windlass.


