One of the joys of owning a boat lies in its versatility. You can fish, enjoy wake sports, explore new waters, entertain friends and much more. In coastal areas, a popular boating activity is setting and retrieving baited traps or nets to catch tasty crustaceans such as crab, lobster, prawns and shrimp.
In certain locales, sets might take place in relatively deep water, sometimes with stiff leaded line. Gear can grow heavy (especially when occupied by a bunch of crabs or lobsters), and retrieving by hand proves back-breaking. Fortunately, today’s recreational crabbing, lobstering and shrimping enthusiasts can avail themselves of a cool labor-saving device: an electric line puller.
Offered by brands such as Ace, Discovery Bay, EZ-Pull, Powerwinch, Scotty, Trac and others, electric pullers make easy work of retrieving gear. Most systems are designed to use 12-volt DC power delivered by the boat’s onboard electrical system. Many models can be quickly and easily removed from the boat when not being used to make room for other activities and prevent theft.
Before you purchase and install an electric line puller, make sure it is rated to retrieve the amount of weight you expect to haul. For this project, we selected the Brutus Pacific Pro hauler from Ace Line Hauler. The popular 20-pound Brutus features corrosion-resistant construction and is rated to haul 110 pounds, drawing between 14 and 35 amps, depending on load, at speeds as high as 140 feet per minute. It will accommodate most line diameters and folds up for stowage.
Skill Level: 2 of 5
Finish Time: Approx. 2 hours
Tools and Supplies
- Brutus Pacific Pro line hauler ($699.99; acelinehauleronline.com)
- Bulldog hands-free accessory ($89.99; acelinehauleronline.com)
- Scotty No. 1023 down-rigger mount ($19.16; fisheriessupply.com)
- Scotty No. 1028 rod-holder gimbal mount ($79.99; westmarine.com)
- Scotty No. 1026 swivel mount ($79.95; amazon.com)
- Power drill and bits
- 1 1/8-inch hole saw
- 40-amp fuse holder or circuit breaker
- Marine-grade wire and crimp connectors with heat-shrink collars
- Crimping and wire-stripping tools
- Screwdriver set
- Wrench set
- Marking pencil
- Marine sealant
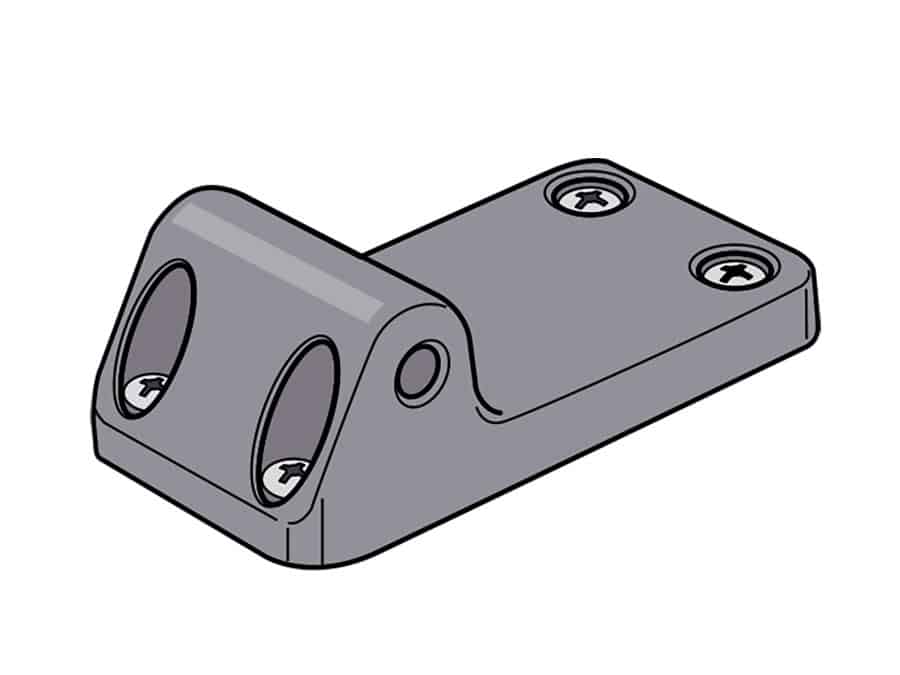
We chose the Brutus model that fits the Scotty No. 1023 low-profile reinforced nylon base. Pick a location on the gunwale with room to operate the puller and swing aboard gear on the same side as the helm so the captain and operator can both see the float as it comes alongside. Position the mount so the puller is perpendicular to the boat’s centerline, ensuring the raised portion with the horizontal mounting hole is inboard. Use the base as a template to drill mounting holes; bed with marine sealant and securely through-bolt the mount using fender washers underneath with the supplied stainless-steel hardware.
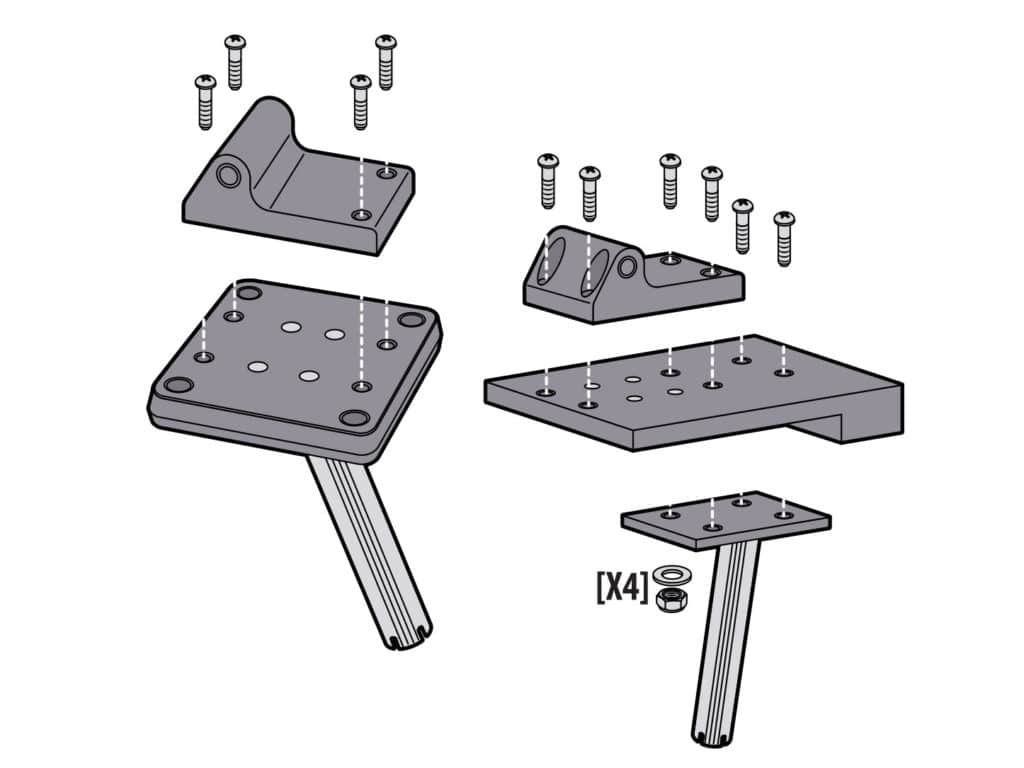
Scotty offers a system that uses an existing gunwale rod holder, if you’d rather not drill holes in your gunwale. The Scotty gimbal mounts No. 1028 and 1029 (for 1.5- and 1.75-inch-diameter rod-holder tubes, respectively) are designed for 30-degree rod holders. The stainless-steel gimbals are topped by a nylon plate to which the mount bolts. The plate also has a 5.5-inch slot on the outboard edge for inserting a 3/4-inch-thick piece of piece of lumber or King Starboard cut to a height to brace the plate. Make sure the rod holder is through-bolted with fender washers or a backing plate to take the strain.
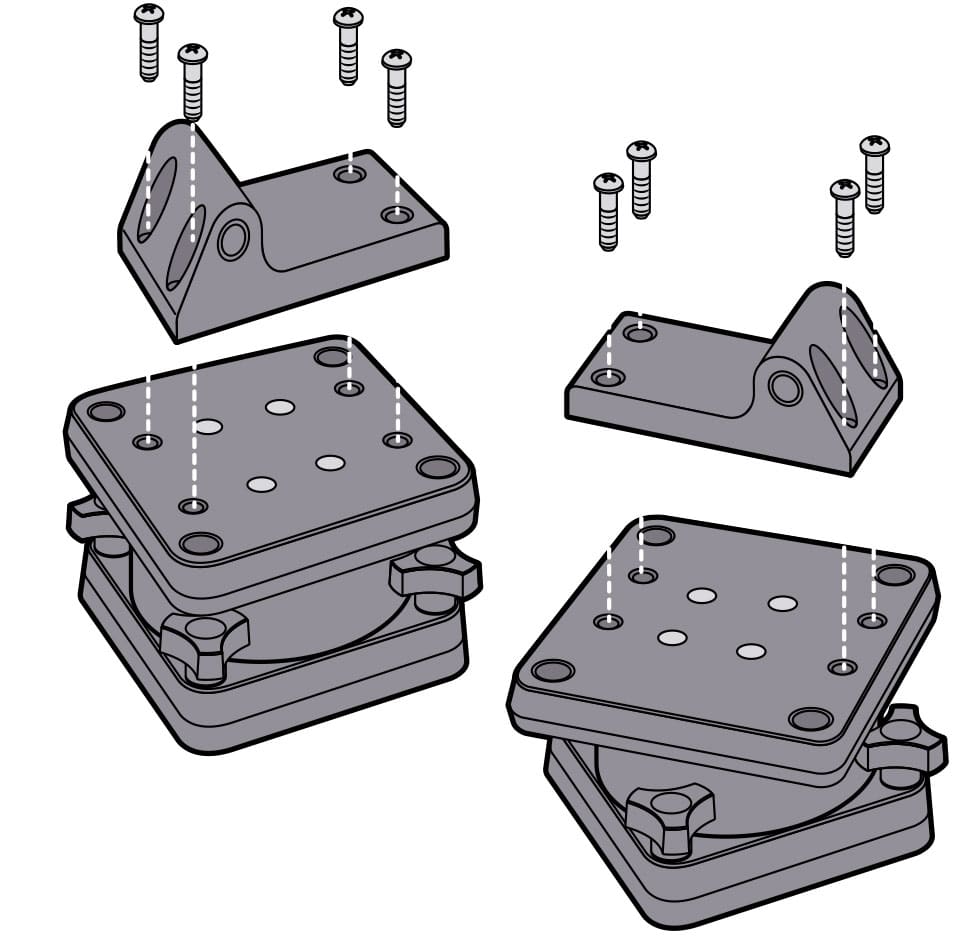
The rod-holder option will usually angle the line puller slightly astern, unless the gunwale rod holder is angled perpendicular to the boat’s centerline. To compensate for this and make sure the puller is directly outboard, use the Scotty No. 1026 reinforced nylon swivel-base adapter between the gimbal plate and the mount. It’s easy to install and offers 360 degrees of rotation with 16 locking positions so you can angle the line puller any direction you wish, including perpendicular to the centerline, or even rotate it inboard while underway or make it easier to reach a line in the block to swing gear aboard.
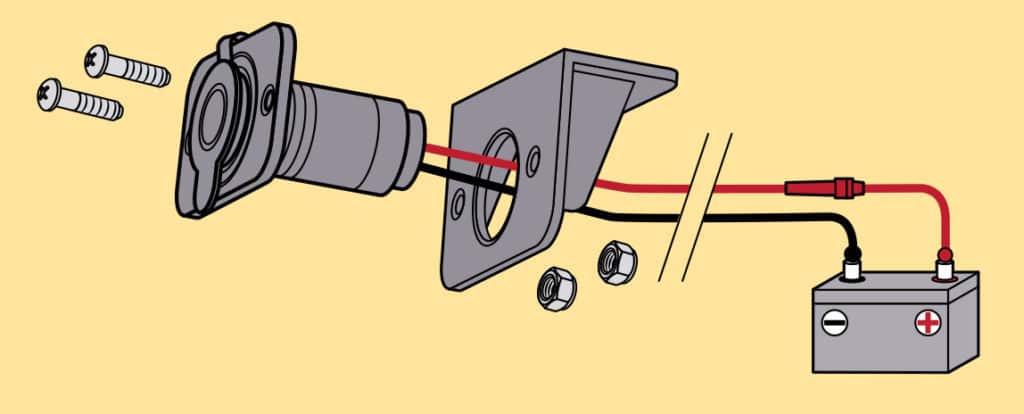
The Brutus comes with a Marinco 12-volt ConnectPro pre-wired, two-prong locking plug and weather-
resistant receptacle. Install the flush-mount receptacle near the hauler using the supplied template to drill the mounting holes for the body and two mounting screws. Run marine-grade positive and negative wires from the battery source through the main hole and connect to the back of the receptacle. To determine the best AWG wire size and prevent voltage drops on long runs, refer to the online calculator at circuitwizard.bluesea.com. Use a 40-amp fuse or circuit breaker to prevent overloads.
Read Next: How to Repin Marine Electrical Connectors

To set up the Brutus Pacific Pro line puller on your boat, first connect the detachable arm to the main body of the puller using the captive quick-connect locking pin. Then slide on the two sides of the Brutus base to the Scotty mount and secure it by inserting another captive quick-connect pin through the hole in the inboard portion of the mount. Try to do this at the dock and have a buddy help hold the top-heavy puller to prevent dropping it. Connect the power plug to the receptacle, and give it a quick twist to lock the plug in position. Flip up the line puller’s toggle switch for quick test to make sure it works.
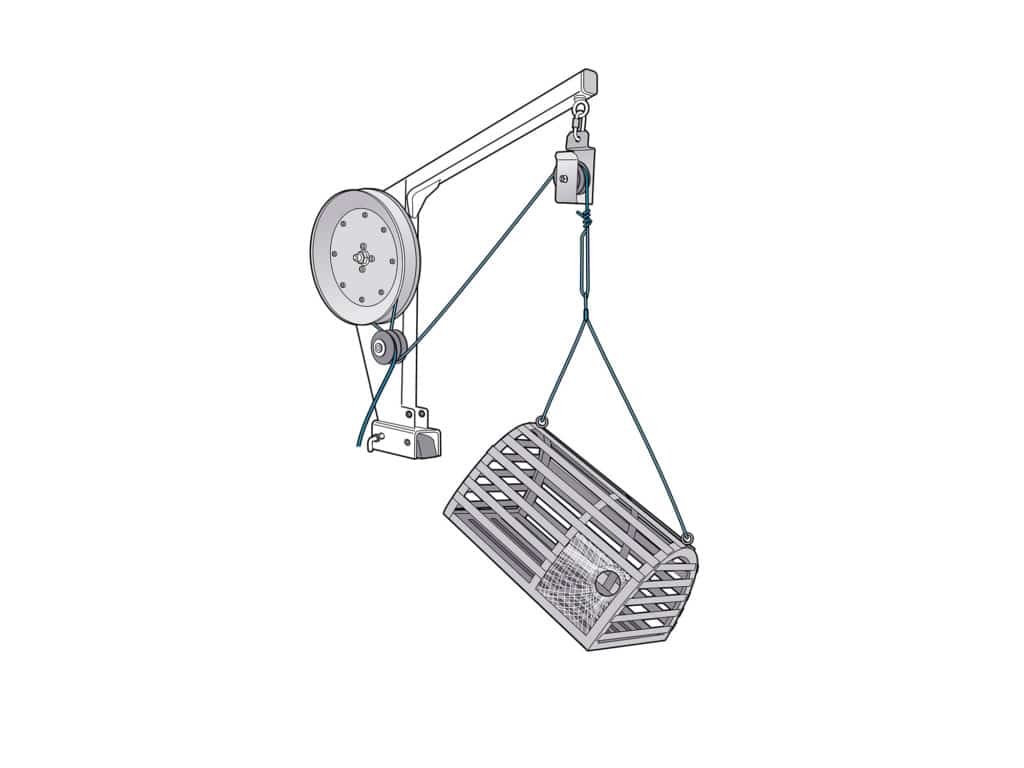
Using the Line Puller
To use the puller, first retrieve the float for your trap and put it in the boat, then feed the line over the block at the end of the arm, under the idle pulley (along the inner groove), over the sheave (drive pulley), and over the idle pulley (outer groove). Flip on the motor while pulling the line into the boat to maintain tension. If using the optional Bulldog, bring the line from the block under the idle pulley and over the sheave. The Bulldog roller will automatically press the line against the sheave for tension to feed line onto the deck while the puller runs. There is a major caveat: Keep hands and loose clothing away from the pulleys while operating. Also, be sure to turn off the puller before a trap or net reaches the block; otherwise, it will blow the fuse or breaker. Swing the gear into the boat and enjoy the ocean’s bounty.