Boat names can be inspiring and fun to read aloud as you’re cruising along waterways and harbors. However, on evening cruises, you can’t see boat names. That’s why many yacht names feature large raised letters that are illuminated or backlit. It adds a touch of class and proclaims the owner’s pride.
Such extravagance isn’t practical for boats with limited space for a name, but Oracle Lights offers a solution for smaller vessels. Its illuminated decals are easy to install, can be switched on and off, and require a minimal amount of 12-volt DC electrical power. Oracle began by offering illuminated signage for race cars, and now offers essentially the same technology for boats.
The semi-rigid electroluminescent name panels are 1 millimeter thick, conform to mildly curved surfaces, and come with high-strength peel-and-stick 3M tape that eliminates the need for drilling or fasteners, save for a small hole needed for the wire to connect to onboard power.
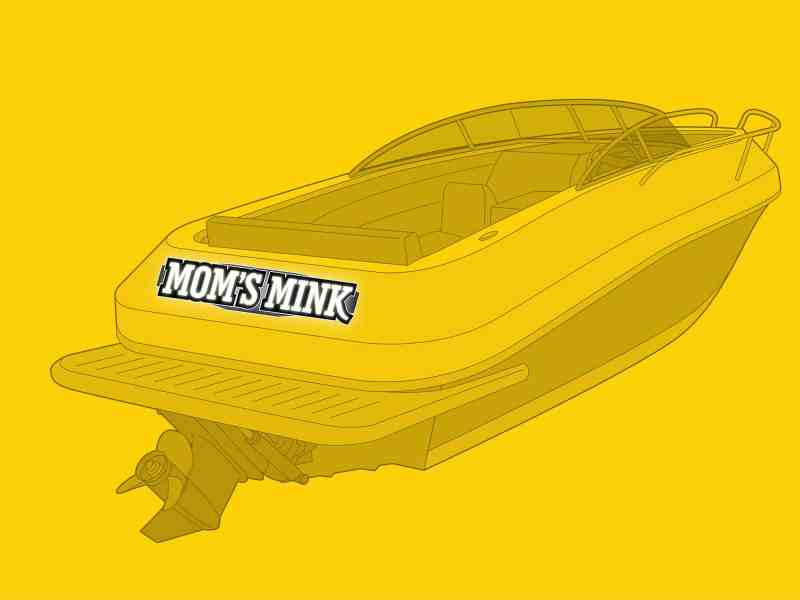
Boaters can install the dielectric polymer decal on the transom or the sides of a cabin (you will need to order one for each side), but installing on hullsides is not recommended to avoid damaging the decal when docking the boat. We decided to install an illuminated name on a sterndrive-powered boat’s transom for this project. Not only is this the traditional place for a boat name, but it also offers easy access to 12-volt DC power via the battery compartment in the stern area of the boat.
One word of caution: Be prudent when you switch on the illuminated decal—as well as any other extraneous lights, such as underwater and interior LEDs—particularly in a crowded waterway in pitch black. Illumination can obscure the US Coast Guard-required navigation lights and confuse other boaters as to your boat’s course and heading, possibly leading to uncomfortably close and unintentional encounters with other vessels.
Skill Level: 2 of 5
Finish Time: Approx. 3 hrs per decal
Tools and Supplies
- Electroluminescent boat-name decal and inverter (starting at $300 to $500 for a single color per decal, depending on size; oraclelights.com)
- Tape measure
- Masking tape
- Denatured alcohol
- Acetone
- Shop rags
- Drill motor and bits
- In-line 3-amp fuse
- Marine sealant
- Assorted crimp-on ring terminals with heat-shrink collars (to connect inverter to onboard power)
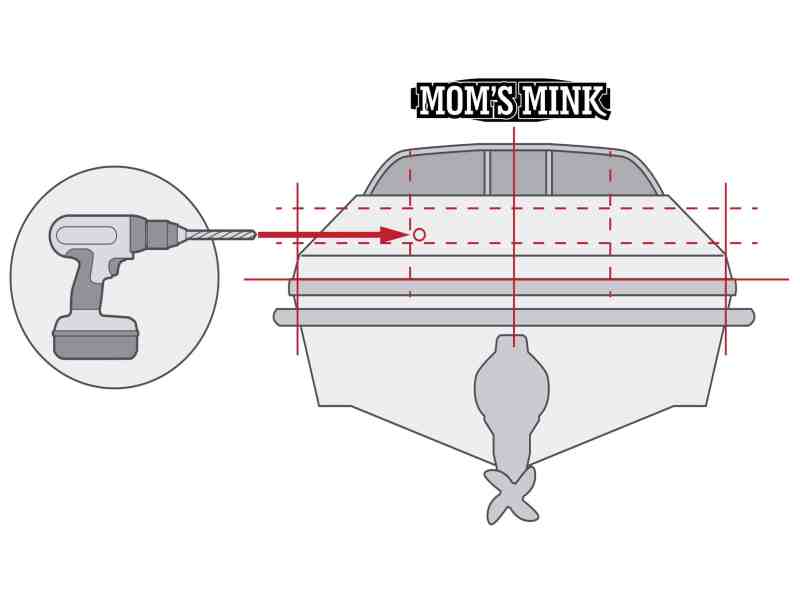
Start by deciding where you want the name, then measure how much room is available in terms of width and height. While the panel will accommodate a slightly curved surface, there should not be any indents, ridges or strakes. Also, make sure the area is free of obstructions, such as canvas snaps, through-hull fittings, hatch seams, hinges, latches or screw heads. Give yourself plenty of margin space—at least 4 to 6 inches—from the vertical and horizontal edges of the area.
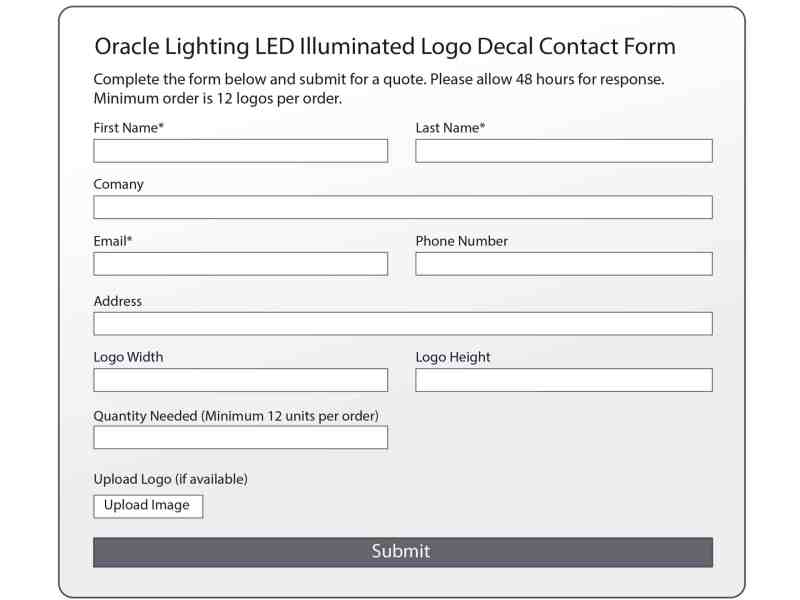
Visit oraclelights.com/logos and fill out the online form with your name, address and email, as well as the dimensions and the color of the decal. You can choose from 31 colors. The form asks you to include an image of the design, such as your current boat name. If you don’t already have a design, Oracle can supply a selection of 200 fonts from which to choose. Submit the online form, and allow 48 hours for a response to discuss and approve the price. The decal will be shipped to you.
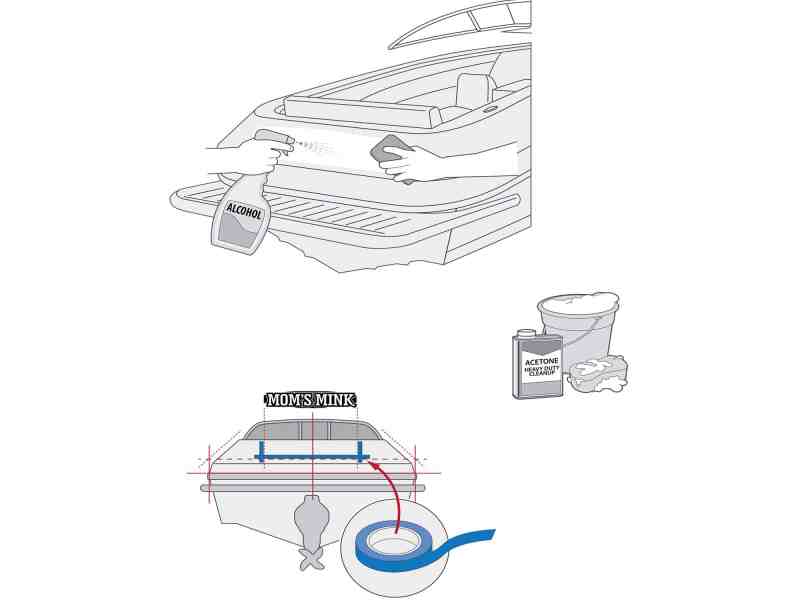
Remove previous decals. Use acetone to wipe off adhesive residue or painted names, being careful not to damage items such as plastic fittings. Wash and dry the surface with soap and water. Based on the desired position of the decal, create straight guidelines with masking tape for the top, bottom and sides of the panel. Then drill a 1/8-inch hole on the mounting surface behind the decal to feed the duplex wire and connector inside the boat. Wipe down with denatured alcohol.
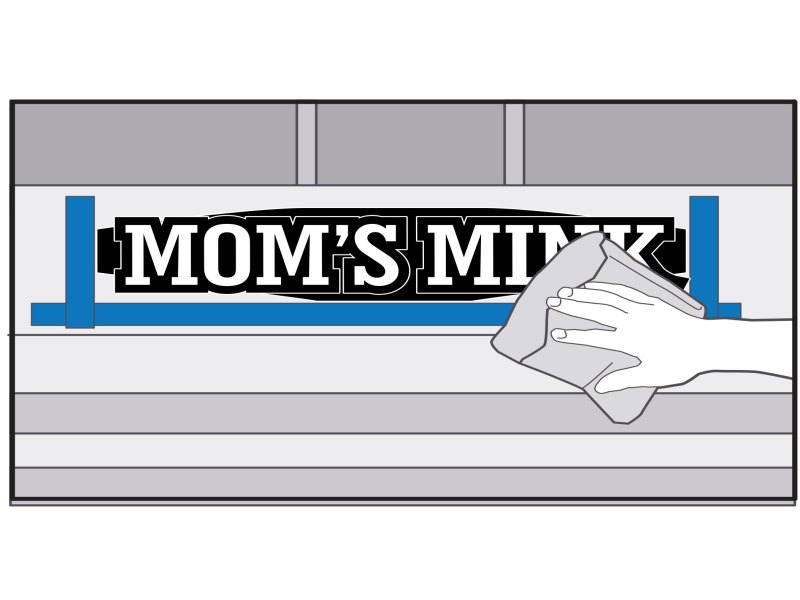
Thread the connector and duplex wire through the hole inside the boat, then seal the hole/wire entry with a slight dab of marine sealant. Peel away the lining of the adhesive strips on the back of the decal, and align the name horizontally and vertically with the masking-tape frame you created. Once the decal is in position, press the adhesive strips against the surface from top to bottom. Apply additional pressure to ensure a strong adhesive bond. Remove the masking tape.
Read Next: Installing Illuminated Boat Trailer Bunks
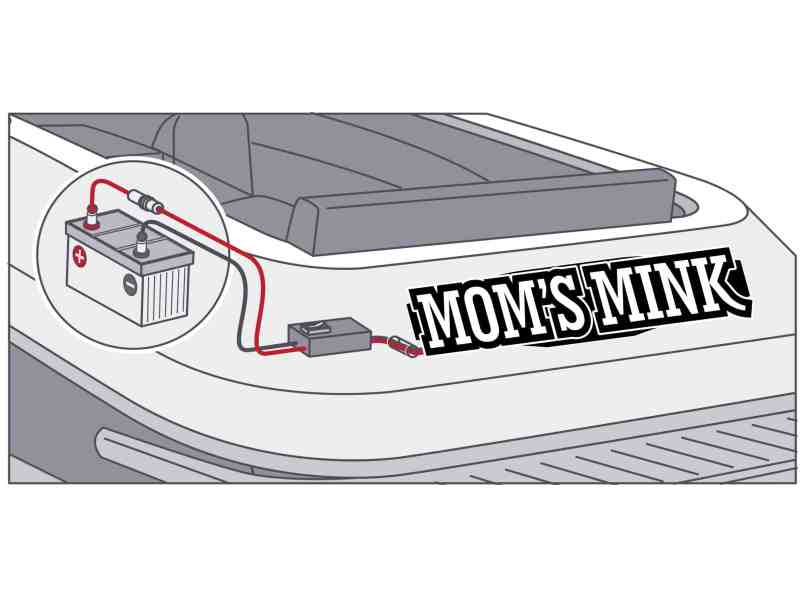
Mount the supplied compact inverter in a dry place that is easy to access inside the boat to conveniently turn the illuminated boat name on or off. Then route and connect the inverter’s positive and negative leads to an onboard 12-volt DC power source, ensuring that the positive wire is equipped with a marine in-line 3-amp fuse. Then plug the connector from the illuminated boat name into the inverter. Turn the dial switch on the inverter to the “on” position to light up your boat name.


