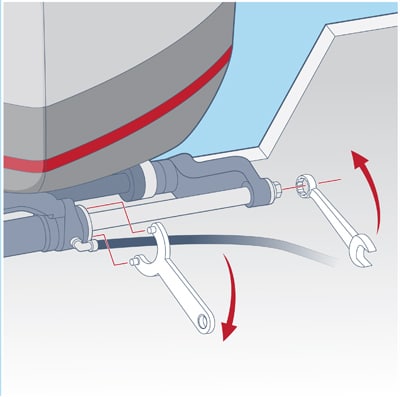
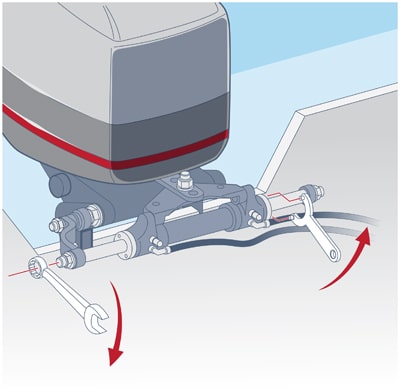
Turn the outboard hard to port; place the pin wrench (supplied in the seal kit) in the holes of a gland, and use a 5⁄8-inch box wrench on the nut on the port end of the piston rod. Turn counterclockwise on the pin wrench with opposite pressure on the box wrench to loosen the seal gland.
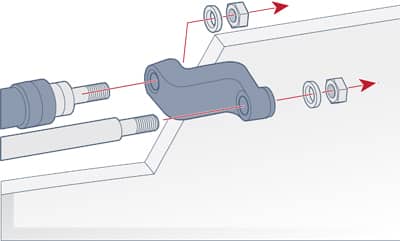
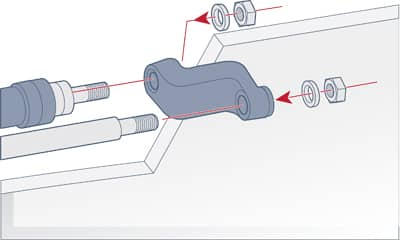
Use a 3/4-inch socket wrench to remove the nut and washer securing the support bracket to the support rod. Do the same to the piston rod nut and washer. Use wrenches on the opposite ends to keep the rods from turning. With hardware gone, pull off the support bracket.
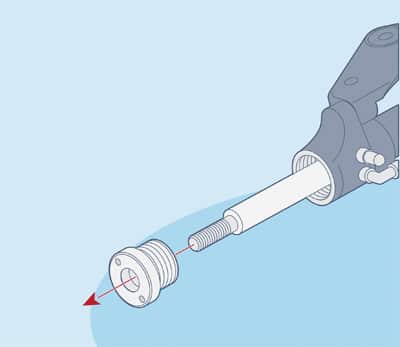
Finish unscrewing the old seal gland. If you can’t grip it well with your hand, use the pin wrench. Slide it off the piston rod. A small amount of hydraulic fluid will leak out of the cylinder, but having the outboard hard over to port should minimize this.
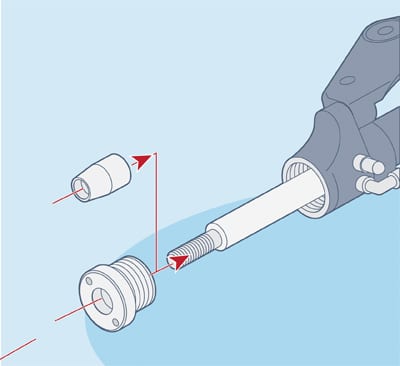
Place the tapered guide tool from the kit on the end of the piston rod and lubricate it and the piston rod well with oil or grease. Carefully slide the new seal gland over the guide and onto the piston rod until it reaches the cylinder. Screw the seal gland into the cylinder, but don’t tighten it yet. Remove the guide tool; it is not part of the final assembly, but you will need it for the other side.
Reconnect the support bracket to the support rod and piston rod and replace the washers and nuts, tightening the nuts against the washers. You may need to use wrenches on the opposite nuts to tighten sufficiently.
Use the pin wrench to tighten the new seal gland while using a 5⁄8-inch box wrench on the starboard end of the piston rod for counter torque. To replace the starboard seal gland, turn the outboard hard to starboard and repeat steps 1 through 6. Quick Tip: Use the adjusting nut inboard of the starboard support bracket to remove steering slop. Once the tension screw is loosened on this nut, turn it counterclockwise by hand to remove any slop, and then retighten the tension bolt.
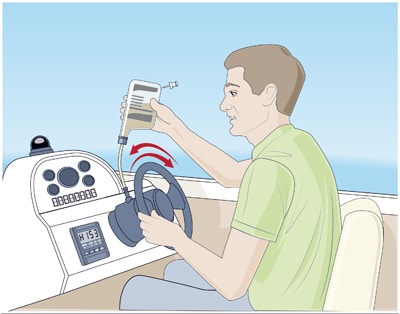
Add approved hydraulic steering fluid at the helm using a Teleflex HA5438 fill kit. Use a 1/2-inch open-end wrench to open and close the bleed nipples on the hydraulic cylinder to expel air from the system. For detailed top-off and bleed instructions, visit boatingmag.com/hydraulic or seatechmarineproducts.com.
The most common outboard hydraulic steering cylinder in service as of this writing is probably the front-mount type branded Teleflex Marine, and now made by SeaStar Solutions. This system is reliable, but with age it can leak, usually around the seal glands on the ends where the piston rod enters and exits the cylinder.

On models such as the 5340 or 5345, replacing the seal glands is easy, thanks to the Teleflex HS5157 seal kit. However, bad seals may be a sign of other problems, such as a burr in the piston rod that is damaging the seal. If there are other issues, replace the cylinder ($501.19, go2marine.com) or have it rebuilt by a shop such as Boat Steering Rebuilders ($250, boatsteeringrebuilders.com).


