A marine stereo system can be as simple or complex as you like. Systems such as those from Clarion, Fusion, JL, Polk, Prospec and Rockford Fosgate offer lots of room for expansion. Beyond a head unit and speakers, you can add features like amplifiers, subwoofers, tower speakers, remote controls, SiriusXM and speakers with LEDs to create a rockin’ audio/visual experience.
Yet many of today’s aftermarket installations prove less ambitious, consisting of a source unit, control/display and four marine speakers. Some add an amplifier and NMEA 2000 networking to control the sound through a multifunction display.
Here we outline DIY steps for a simple yet state-of-the-art Clarion Marine Bluetooth- and SiriusXM-enabled stereo system that offers the flexibility to add components later.
Custom Speaker Rings
Because many boat surfaces are curved, and often cramped, an easier, better, and more attractive stereo installation can often be accomplished by using custom speaker trim rings, like those available from Boat Outfitters. Available to suit your size needs and aesthetic wants, custom speaker rings offer a number of advantages, including covering oversized holes, shimming.
Skill Level: 4 of 5
Finish Time: Approx. 12 hours
Tools and Supplies
- Clarion CMS4 digital marine source unit and display/controller ($549.99, amazon.com)
- Clarion XC2410 marine amplifier ($199.99, amazon.com)
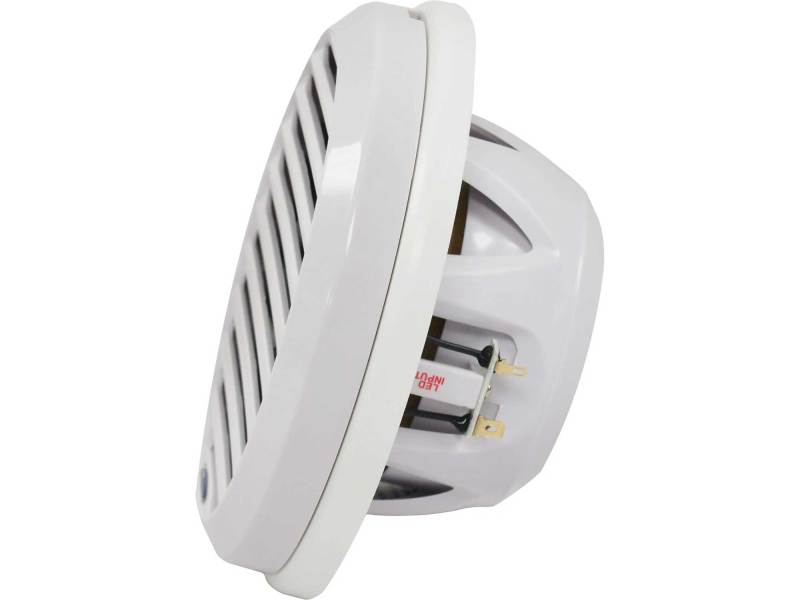
- Clarion CM1623RL 6.5-inch marine coaxial speakers ($299/pair, crutchfield.com)
- Custom Speaker Trim Ring (price varies, boatoutfitters.com)
- 16-gauge marine duplex speaker wire ($26.99/50 feet, amazon.com)
- Marine-grade cable for powering amplifier
- Assorted butt and terminal connectors with heat-shrink collars
- Diagonal cutters, wire stripper and crimping tool
- Heat gun
- Drill motor and drill bits
- Jigsaw
- Phillips screwdriver
- Electrician’s snake (for routing speaker wires)
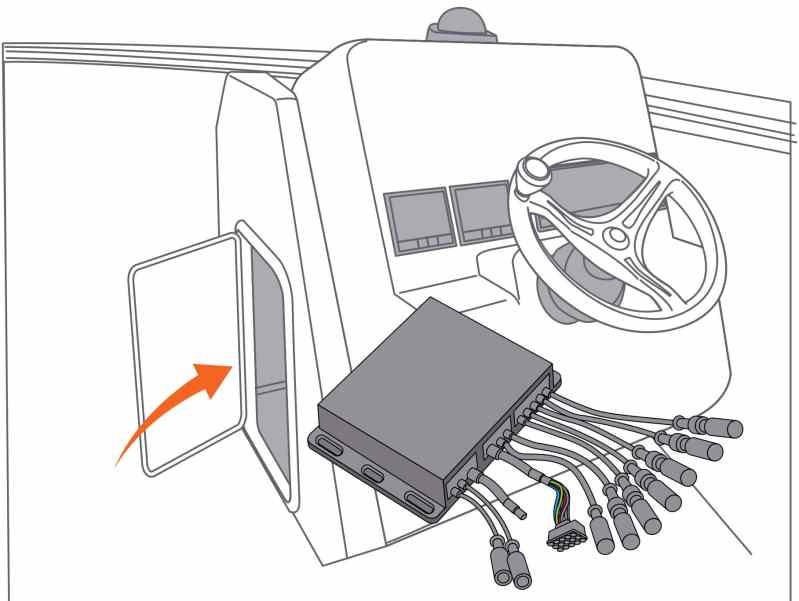
Install Source Unit
Clarion’s CMS4 black-box source unit has a footprint of 7.5 by 9.75 inches. We used the four supplied self-tapping screws and washers to secure the module to a bulkhead on the inside of the helm console to keep it dry. Check behind the mounting surface before drilling. Using the pigtail wires on the female portion of the Molex-style plug, connect the fused yellow wire to a 12-volt DC positive power source. Connect the black wire to ground. Also, now is the time to install a marine AM/FM antenna (not included) and plug it into the source unit.
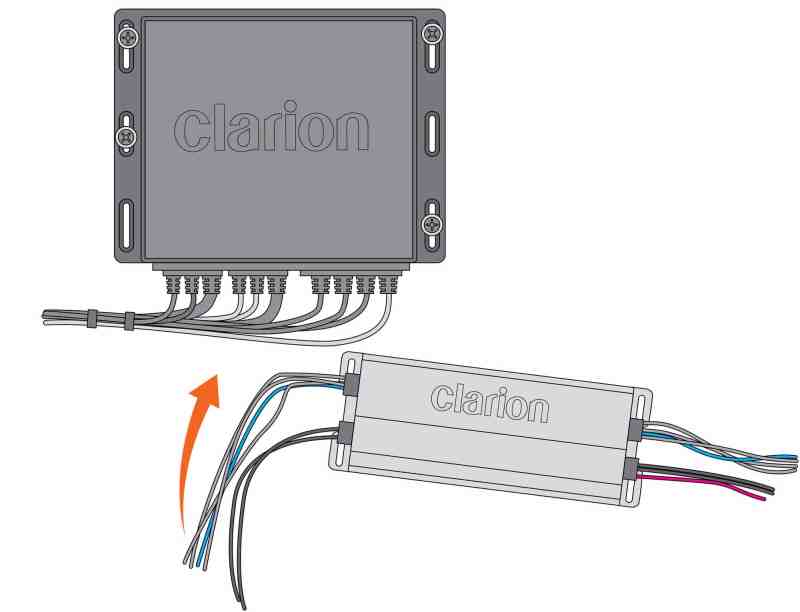
Install Amplifier
We added the compact (3.23-by-7.17-inch) four-channel, 400-watt Clarion XC2410 marine Class D amplifier to optimize audio, mounting it inside the helm console. Connect the red fused 12-volt DC positive power cable directly to the output terminal on the battery selector switch, and connect the black wire to ground, using the appropriately sized cable for the length of both runs. (Check for the appropriate wire size at ancorproducts.com/en/resources/ten-percent-voltage-drop.) Follow the supplied wiring instructions to connect the amplifier to the CMS4 source unit.
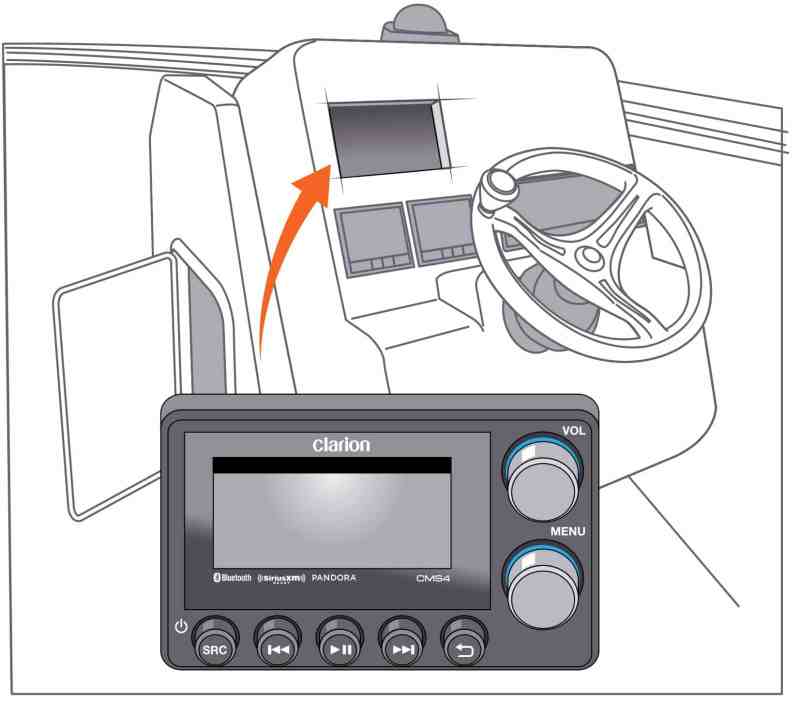
Install Display/Controller
The waterproof 4-by-6-inch CMS4 display/controller flush-mounts. Use the supplied template and jigsaw to make a cutout at the helm to drop in the display, then use the supplied bracket to secure the unit from the backside. Route the control cable from the back of the display (along with the display controller USB cable and video cable) through the cutout and tighten the two supplied nuts over mounting studs to secure the bracket. Plug the control cable from the display to the source unit as outlined in the installation instructions.
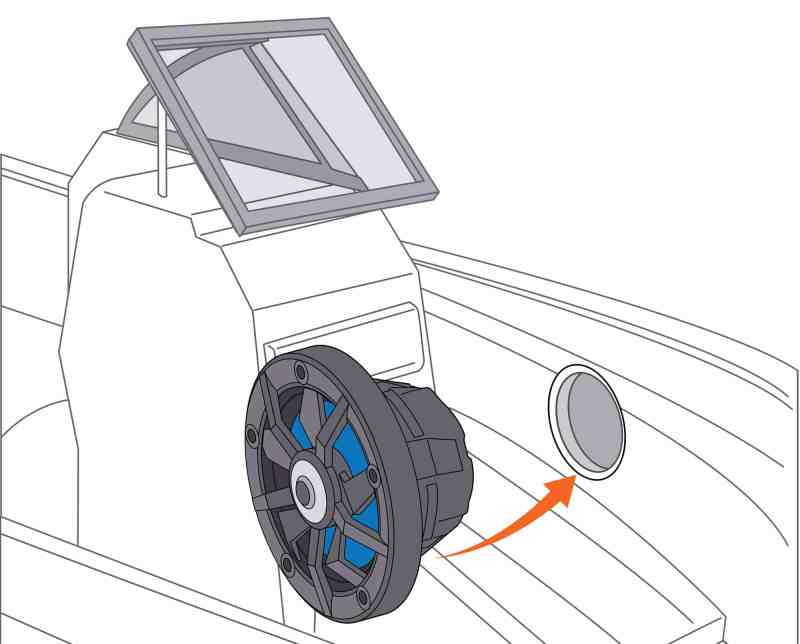
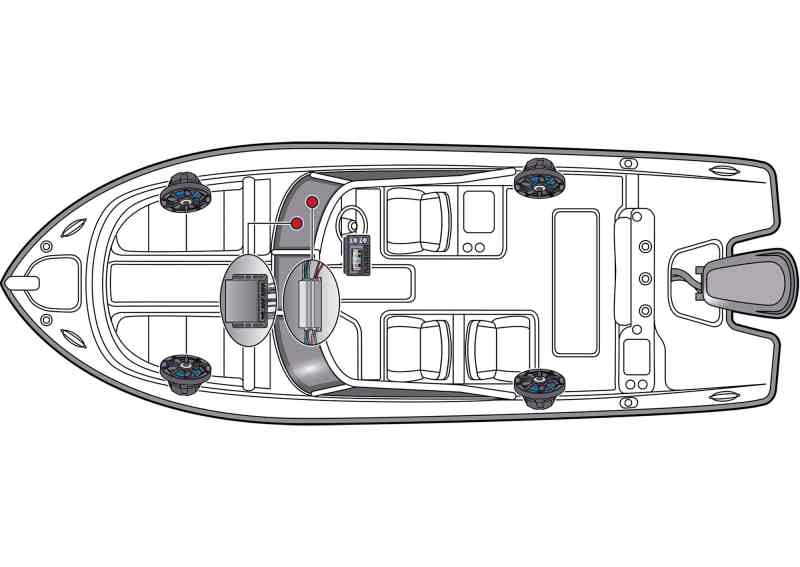
Install and Connect Speakers
We installed two pairs of Clarion’s new CM1623RL high-performance marine coaxial 6.5-inch-diameter speakers — one pair in the inwales of the bowrider area and another in the inwales of the aft cockpit — marking holes and then cutting them with a jigsaw. Once the speaker holes are cut, run marine duplex speaker wire from the source unit to each location, connecting the speakers using the supplied waterproof Deutsch connector plugs. Then drill the five mounting holes and secure the speakers with the supplied self-tapping screws.


