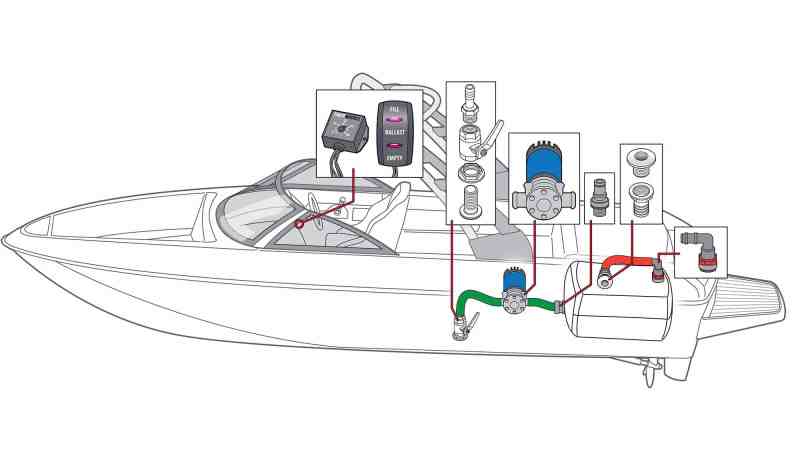
Not all boats can generate the sizes and shapes of waves that wakeboarders and surfers who enjoy their respective sports need. Installing a ballast system with a reversible pump can change that, letting you pump in water to add extra weight when and where you need it to add displacement and boost the wave-making ability of your boat. These systems then let you pump out the water to empty the bag when the watersports are done. Companies such as WakeMakers simplify the addition of a ballast system for watersports by supplying the parts and technical guidance for DIYers. You need to put the boat on a trailer for this project. Take time before to plan the location for the elements of the system such as the ballast bag itself to make sure all will fit as planned. Here are the key steps to installing WakeMakers’ Complete Ballast System kit, with a single bag and pump timer to ease the fill and drain process.
Skill Level: 3 of 5
Finish Time: Approx. 3 to 4 hours
Tools and Supplies
- WakeMakers Complete Ballast System kit ($409.99 without ballast bag, wakemakers.com)
- WakeMakers Ballast System timer ($49.99, wakemakers.com)
- Ballast bag (starting at $99.99/350-pound bag, wakemakers.com)
- Power drill and bits
- 11/16-inch hole saw
- Screwdriver set
- Grinding bit
- 3/8-inch nut driver
- Marine pipe sealant
- Heavy-duty PVC hose cutter
- Zip ties (to secure wires and hoses)
- Shop rags (to wipe off excess sealant)
Cautionary Notes
Make sure your boat can handle the additional weight of a filled ballast system without inducing instability that might cause an unsafe situation. Also, avoid wakesurfing behind sterndrive- and outboard-powered boats, because the propeller is situated far too close to the surfer. Wakesurfing should be reserved for inboard-powered boats designed for watersports or for boats fitted with a Volvo Penta Forward Drive.
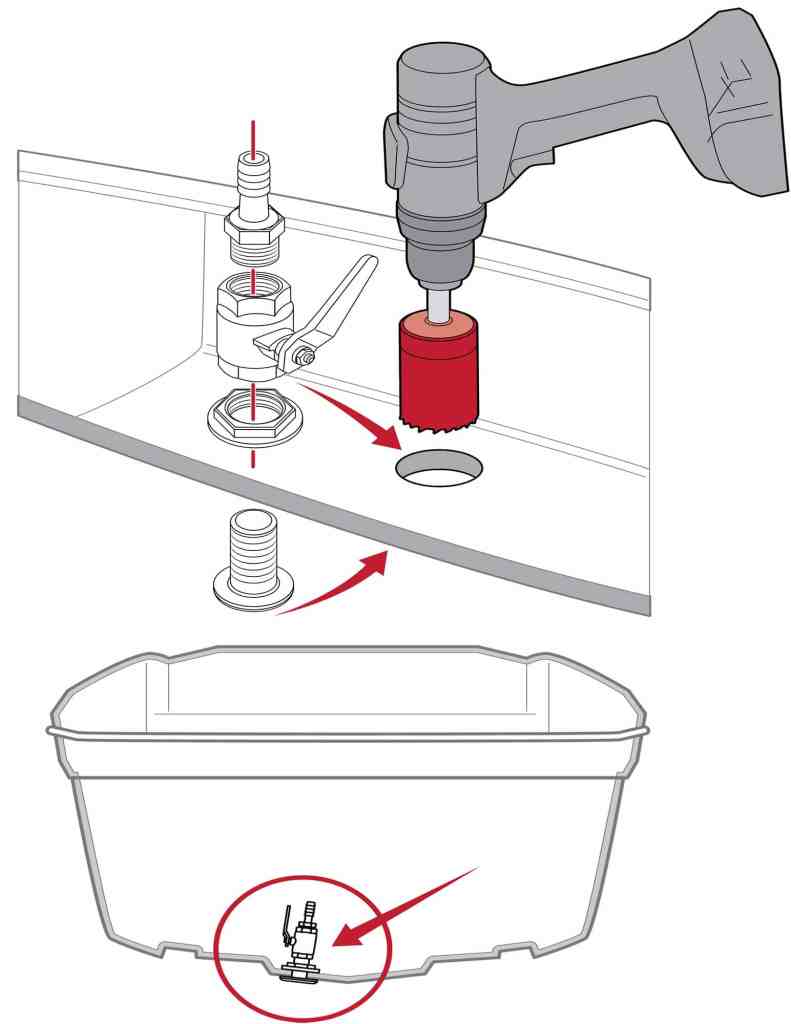
Install the Intake
WakeMakers’ available Thru-Hull Pinpoint Magnets help match the location on the underside of the hull to a spot selected inside. We recommend installing a backing plate for a more robust installation. Cut and chamfer a 11/16-inch hole. Bed inside and outside with the supplied marine sealant/adhesive, insert the stem from underneath, and thread on the nut from inside; tighten the fitting and wipe away excess sealant. Install the ball valve on top of the fitting, then thread the hose adapter into the top of the valve. Use pipe sealant to ensure all are watertight.
Tip: For technical advice before, during or after your DIY ballast system installation, call the WakeMakers technical hotline at 888-338-6085 or email support@wakemakers.com. You can also live-chat at wakemakers.com.
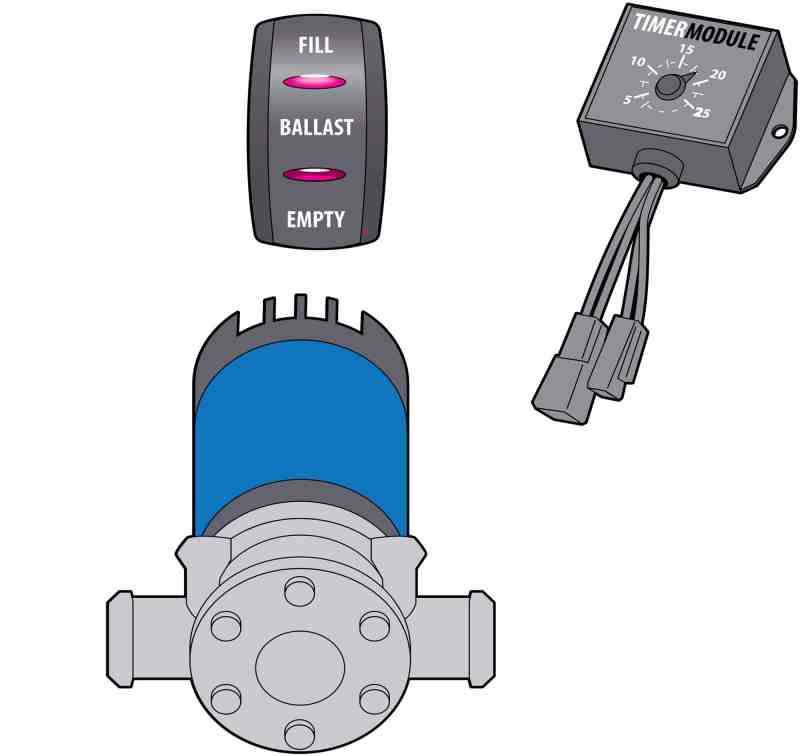
Pump, Timer and Switch
Use the supplied hardware to mount the reversible ballast pump and optional pump timer module in spots that are dry and easy to access for service. The pump should be above the waterline. Mount the rocker-style pump switch on the dash, then run the supplied wire harness from the battery to the switch, from the switch to the timer module, and from the module to the pump. Connect the Plug-and-Wake connectors to complete the wiring. Support the wiring throughout its runs to prevent it from sagging into the bilge water and chafing.
Read Next: Installing a Wakeboard Tower
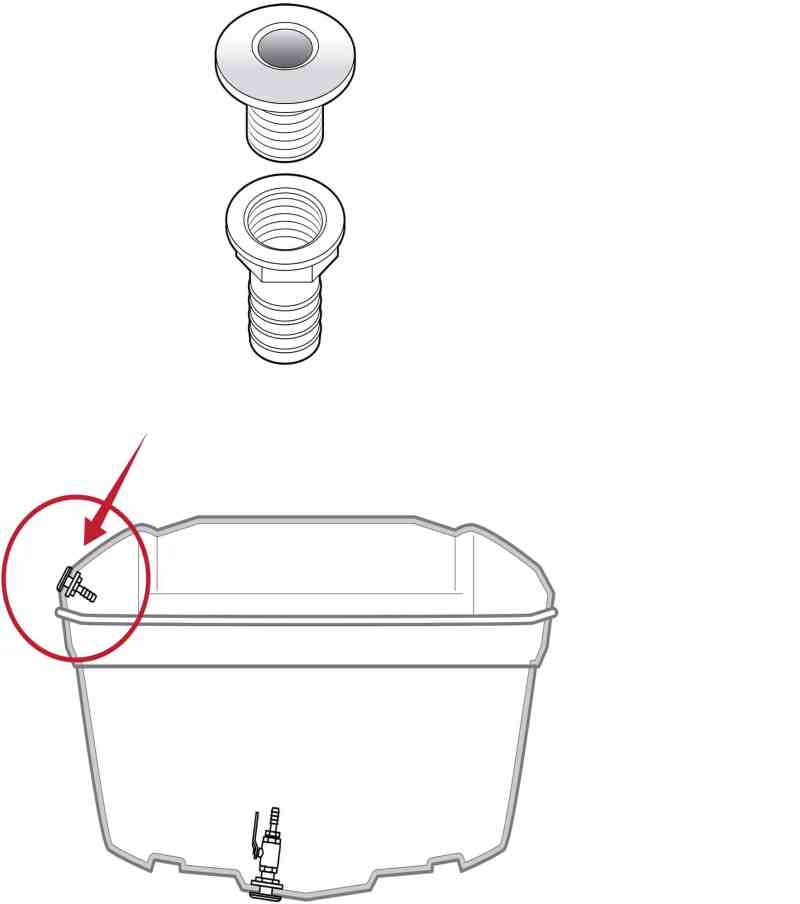
Install the Overflow/Vent Fitting
Select a location on the boat’s side or transom for the stainless-steel through-hull fitting that serves as the vent/overflow for the ballast bag. The fitting should be located higher than the water level in the bag when it is full. Cut and chamfer a 11/16-inch hole in the desired location. Bed the hole on both sides with the supplied marine sealant/adhesive and insert the fitting from the outside, then tighten and torque the fitting nut on the inside to ensure a watertight fit. Wipe away any excess sealant.
Tip: It helps to have two people when installing through-hull fittings: one on the outside to hold the flange in place with a step wrench and the other inside to tighten the fitting nut.
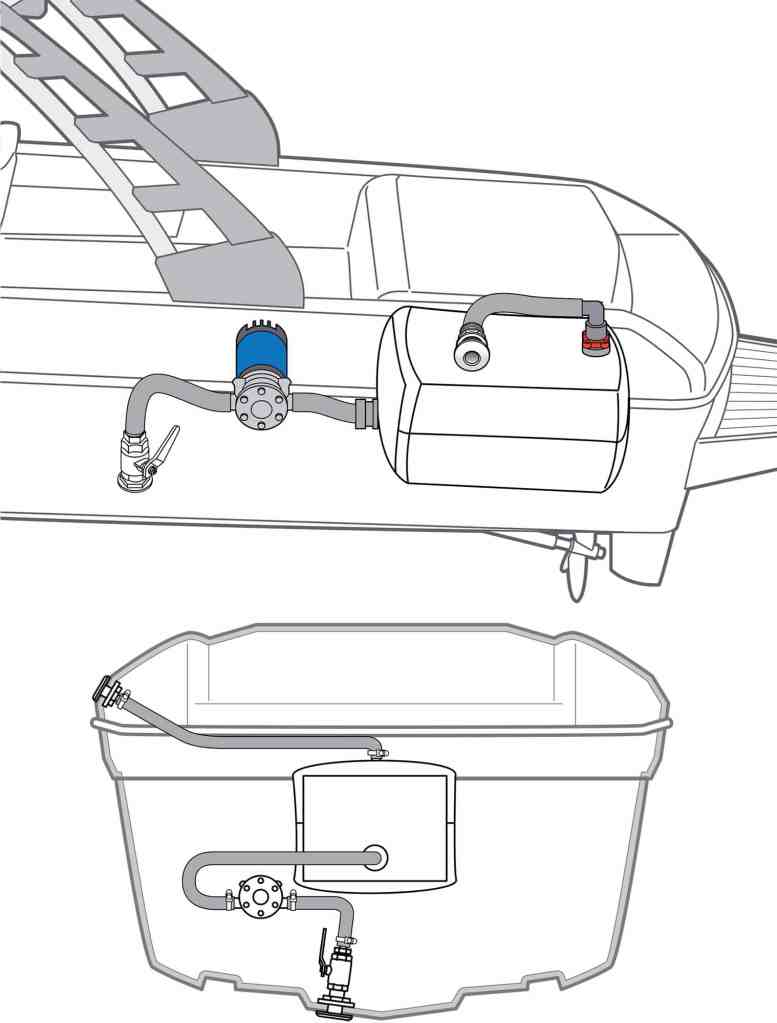
Plumb the System
Use the supplied hose assembly kit to connect the hose barb on the through-hull intake/valve assembly with the A fitting of the ballast pump. Then place the ballast bag (not included) in the desired location and use another section of the supplied hose to plumb the B fitting of the pump with the fill/drain fitting on the ballast bag. Use the supplied vent/overflow hose to connect the fitting on the top of the ballast bag with the vent/overflow fitting. Secure all hoses to the fittings on the ballast bag and the boat using the supplied hose clamps to prevent leaks.
Set the Timer
Select the run time on the ballast timer using the dial on the module and the supplied chart to ensure the pump will run long enough to fill and drain the ballast bag you chose for your system.


