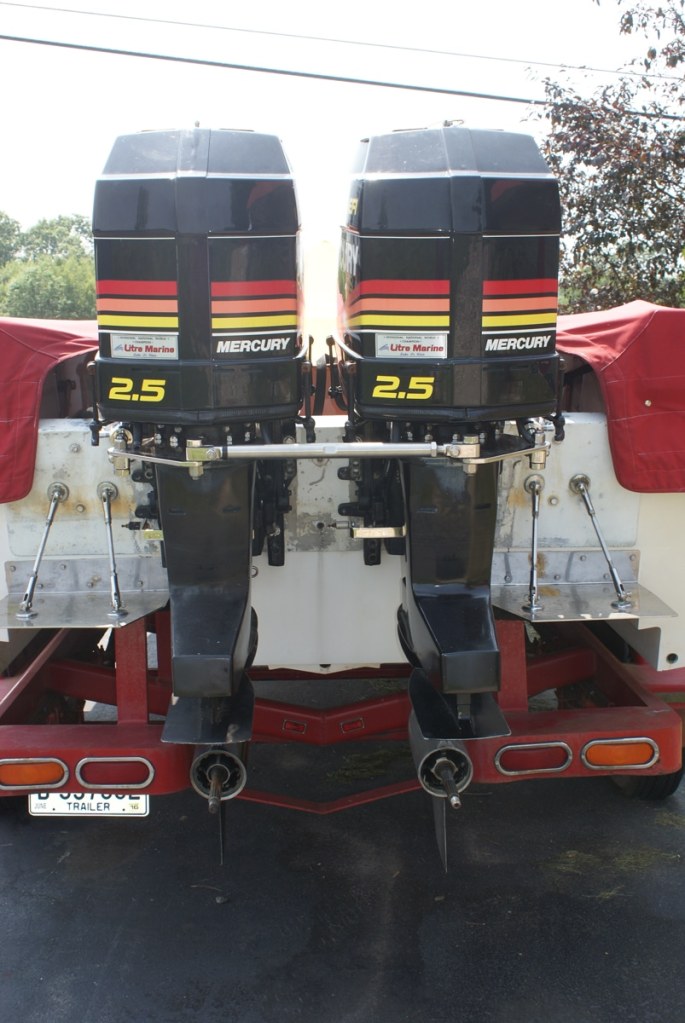


The final step in the rigging of my 1986 Stoker 26 Super Sport Tunnel was to install the hydraulic steering system from Latham Marine of Fort Lauderdale, Florida, that arrived last winter.
Like any project, this one took a fair amount of preparation, and the more accurate the information you provide to Latham when designing a system, the better off you’ll be when the equipment arrives. The most important early step is to take accurate measurements for the two hoses running from the Capilano 1275V helm to the stern. Make sure to allow for where you will need to route the hoses to keep them out of sight, and also remember to account for the bends and turns they will have to take at the back of the boat.
Once the primary hoses are in place and properly supported, I had to set up for two smaller hoses to connect to the hydraulic rams on each side of my boat. When measuring for these hoses, it’s imperative to account for the extra length needed for the motors to move back and forth while turning.
Fortunately my boat had previously had a Capilano hydraulic helm unit in the dash, so the bolt pattern was already cut and drilled for me. I installed it with a pair of bolts and by backing nuts through the dash. I used as big a washer as possible to support the helm. When installing the helm, make sure that there is a high point on the dash of your boat for a place to install the fluid fill kit. The inlet for this kit must be higher than the fluid intake port on the top of the helm unit itself.
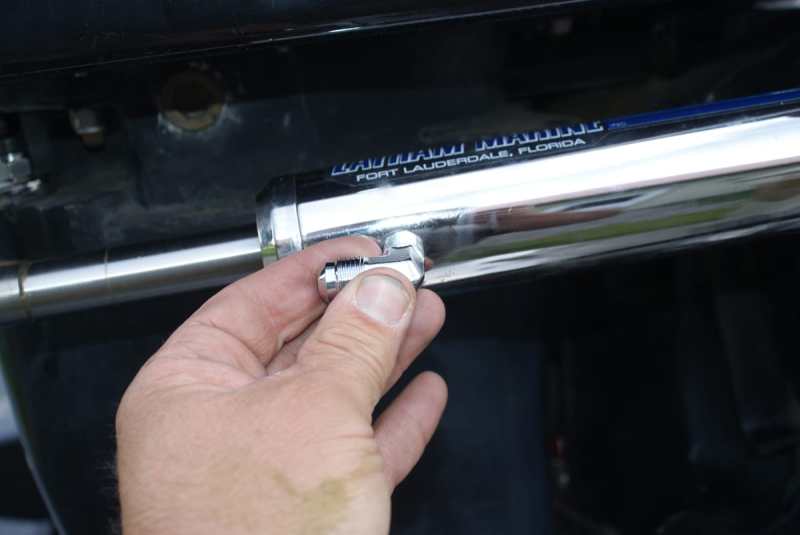
Latham provides all the fittings. I installed the flared fittings on the back of the helm and positioned them so that the hoses can’t be seen beneath the helm. I ran the hoses to the stern of the boat. Next came the side-mount ram tilt pins. For this part of the installation, Latham insists that the motor be supported at two points before removing the stock tilt tube. I used ratchet straps around the base of the powerhead to hold the upper half of the motor forward and a floor jack with a block of wood beneath the skeg to support the lower end. It takes a little trial and error to get the old pin out. This is a two-person job, with one in the boat working the power trim and the other outside working the jack. You’ll know when you’ve got everything in the right position because the old pin pulls out with minimal effort.
Video Tips for Installing and Sealing Hydraulic Fittings
When you have the old pin out, make sure that the washers between the engine housing’s hole and the one in the clamp bracket are in place. Then you can insert the new pin, which is a nicely machined substantial piece. Make sure you have it oriented correctly for attaching the hydraulic ram. Each pin comes with a 1¼-inch backing nut that should be torqued to 20 foot-pounds and then backed off a quarter turn.
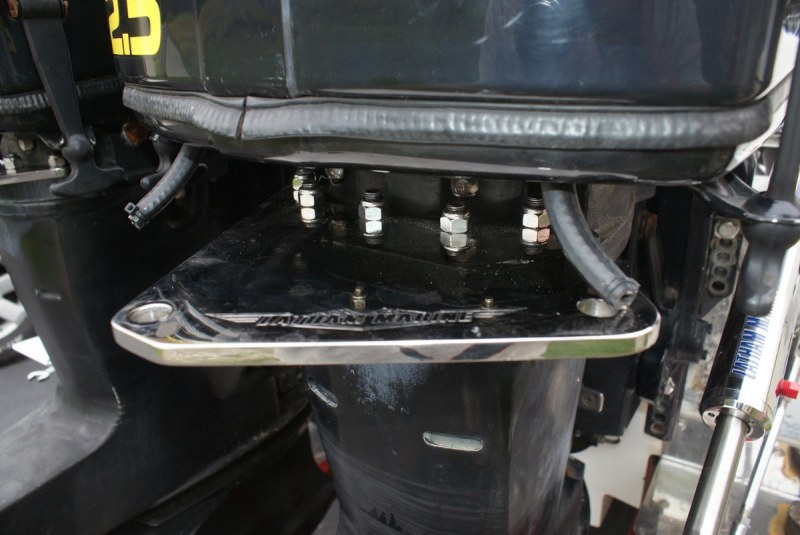
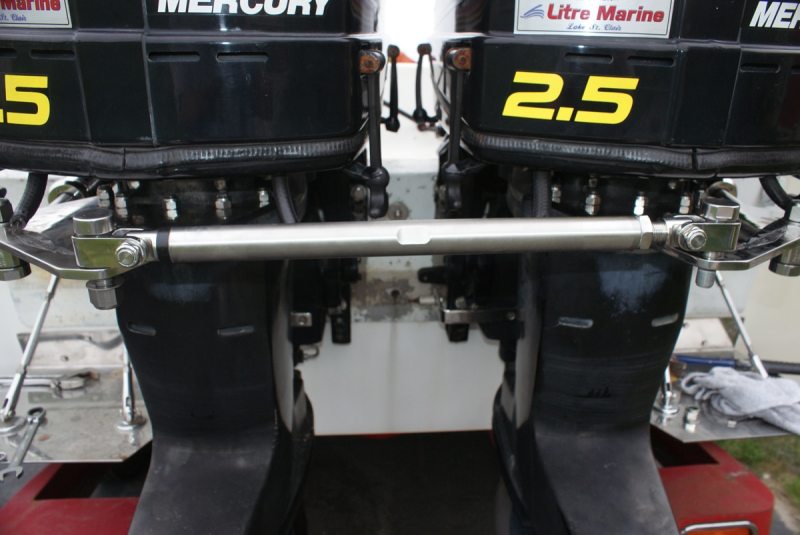
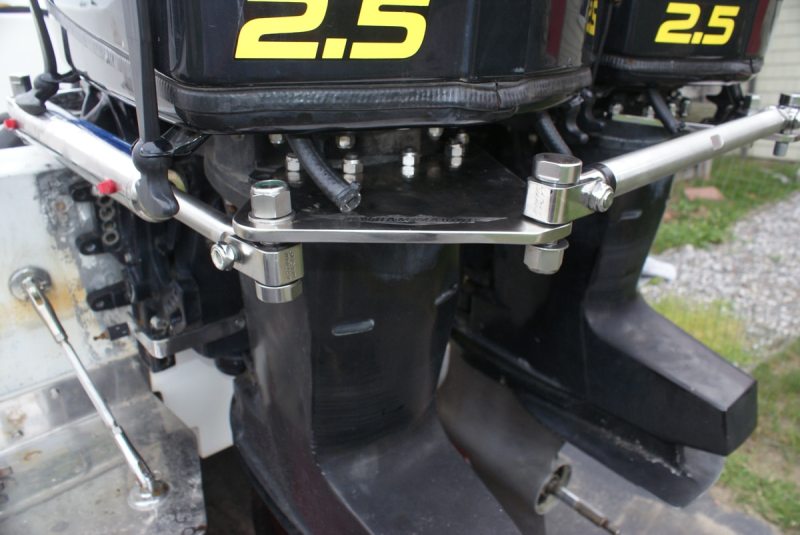
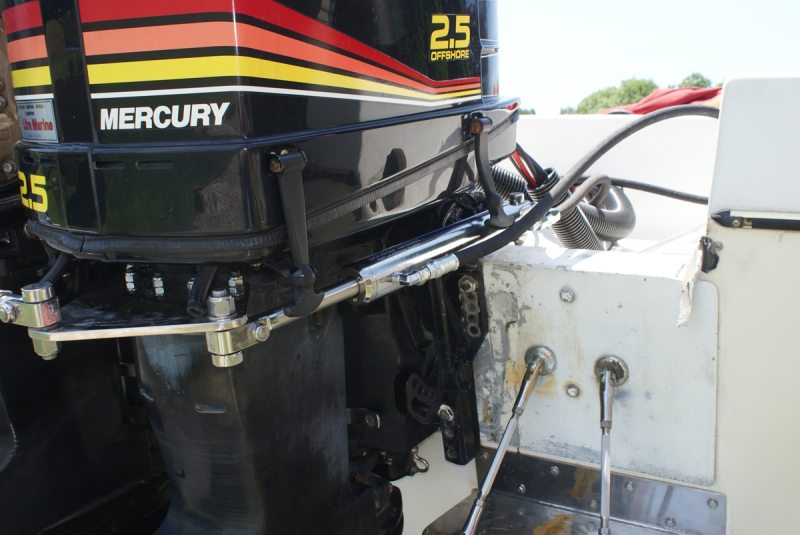
Next it was time for the wing plates that bolt to studs at the rear of the engine’s exhaust adapter plate. Fortunately, my motors already had these studs in place, which saved some time. I installed the half-inch-thick stainless-steel plates to the bolts and tightened the nylon-lined locking nuts. The hydraulic rams can be positioned above or below the plate. Just make sure that there is clearance and that the ram can move freely. Each ram comes with plastic plugs on the outside. Remove these plugs and you can pull out the ram to extend it aft to connect the plate with the hardware that Latham provides. Do the same on the other motor and you’re ready to install the tie bar that links the motors. Before you do so, make sure the motors are centered. The tie bar is adjustable if you need to refine the position.
With the tie bar and rams secured, all that was left was connecting the short sections of hose from the helm lines to the hydraulic rams. With all the connections tight, I filled the helm with automatic transmission fluid (it takes a little under 32 ounces) and bled the system per Capilano’s instructions. For more information, contact Latham Marine at 800-422-7267 (800-422-RAMS), www.lathamarine.com.


