At the end of last season, you grumbled angrily when yet another snap on your boat’s cover pulled apart in your hands.
As you cursed the idea of having to leave your boat uncovered while you waited for the local canvas shop to fix it, you started to wonder: Would it be feasible to tackle at least some canvas repair yourself?
To find out, we spent a day with John Gregal, owner of Mount Vernon Canvas Works in Arlington, Virginia, a canvas fabrication and repair company serving boaters on the Potomac River. We started with common canvas maladies, such as broken snaps or grommets, and worked our way up to the more serious stuff, such as separated seams and splits between vinyl windows and canvas. We covered the special tools you might need and if you should invest in them. Here’s a look at 13 common canvas repair jobs, with advice for when to DIY and when to leave it to the pros.
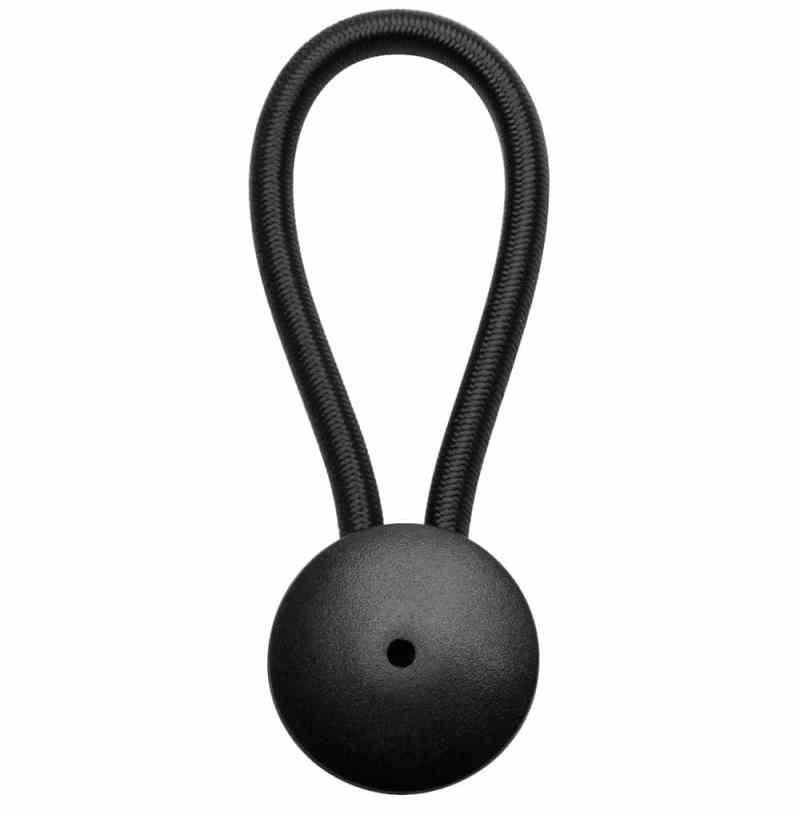
Do It Yourself: Replacing a Stayput Bungee
Stayput makes bungeelike fasteners that use tension to secure canvas. The bungees hook over small studs mounted to the back of the boat. The studs install just like the male half of a snap. The bungee half of the equation consists of the bungee fastened to two plastic halves that go through a hole in the cover. After about three years, the bungees stretch or break from weather exposure. To remove the broken bungee, pry off the backing piece with a screwdriver. Expect to break it.
To replace, sandwich the canvas between the two halves and press the barbed male side into the female side. Just make sure you position it correctly because you can’t get it apart (without destroying it) once it snaps closed. Stayput fasteners are available from Sailrite (sailrite.com) for $1.99 each.
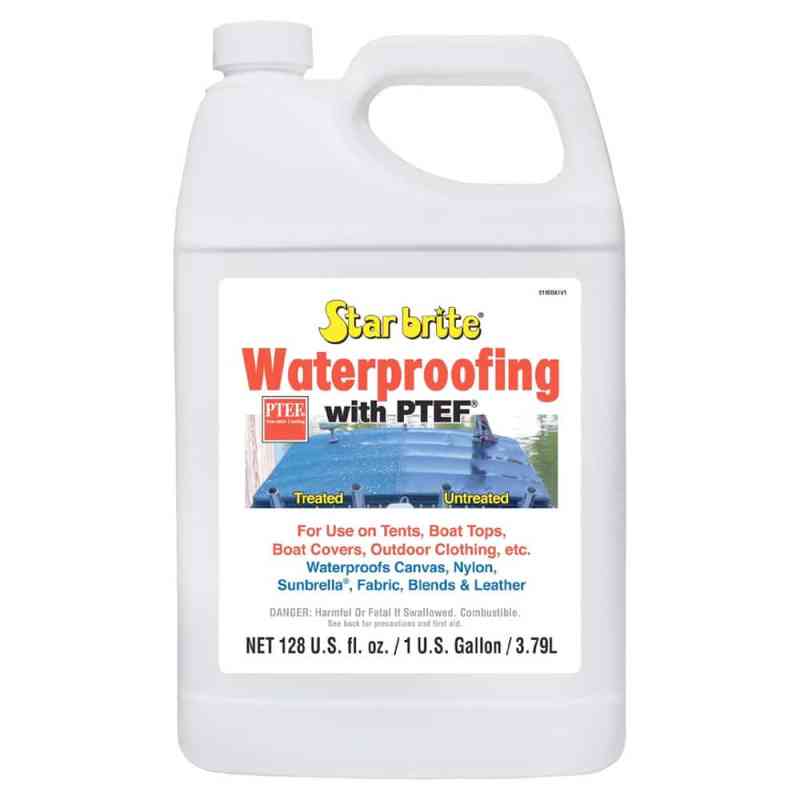
Do It Yourself: Protecting the Cover
To help the cover resist ultraviolet rays, Gregal recommends 303 Fabric Guard. Wait about a week and then apply Star brite’s waterproofing with PTEF to improve a cover’s resistance to water. When you’re putting away any cover for winter storage, make sure it’s dry, because a wet cover will promote mildew growth.
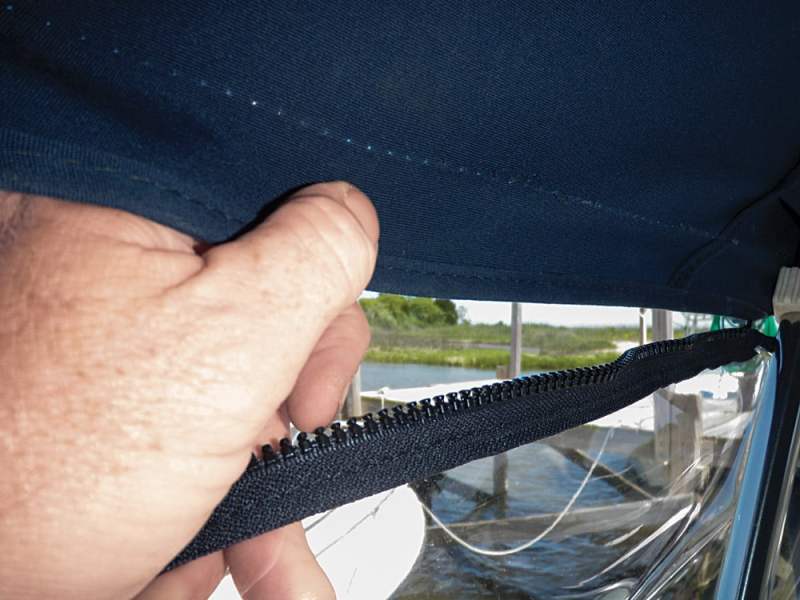
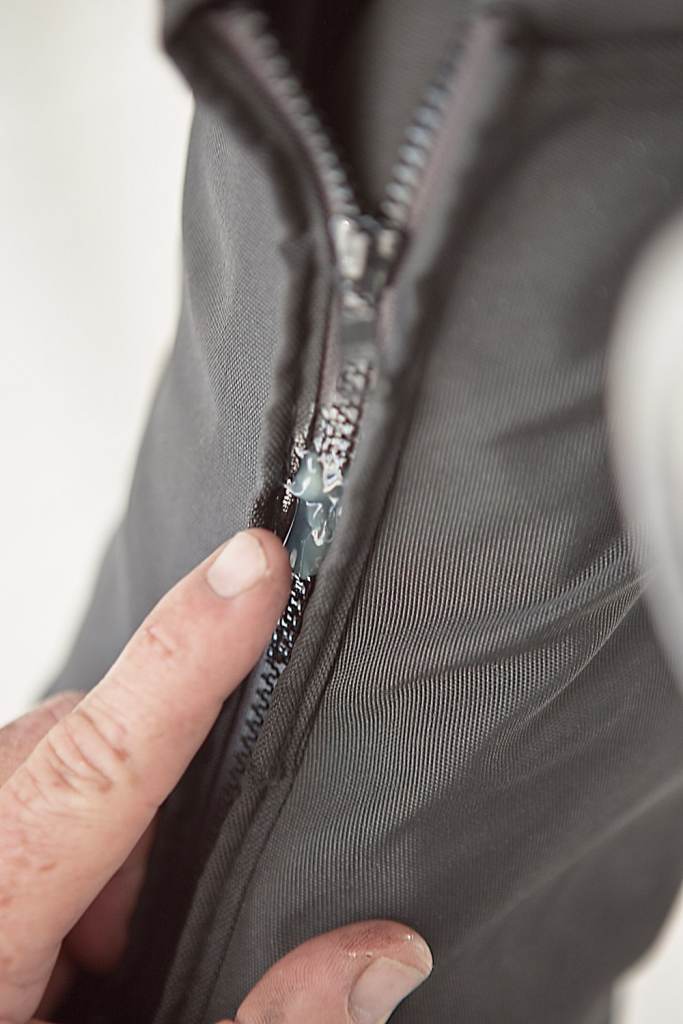
Hire Someone: Zipper Replacement
When it comes to zippers, handymen can make one repair but everything else needs to be done at the yard. If the slider tab that you pull up to close the zipper breaks, cut off the last tooth on the zipper, slide off the old tab and slip on a new one. Then melt the last tooth of the zipper or crimp a zipper stop over it to keep the new tab from sliding off. Zipper parts are available from general sewing supply houses as well as specialty marine retailers.
Unfortunately, that’s the only zipper repair you can do yourself. “Once a zipper separates behind the slider, it’s done,” Gregal said. The plastic teeth on the zipper are shaped like a mushroom, and that expanded shape holds the seam closed. As the plastic teeth degrade, they lose their grip and the zipper needs to be replaced.
You can’t replace the zipper yourself unless you have an industrial-strength sewing machine to penetrate a material such as Sunbrella and the zipper with the appropriate UV-resistant thread.
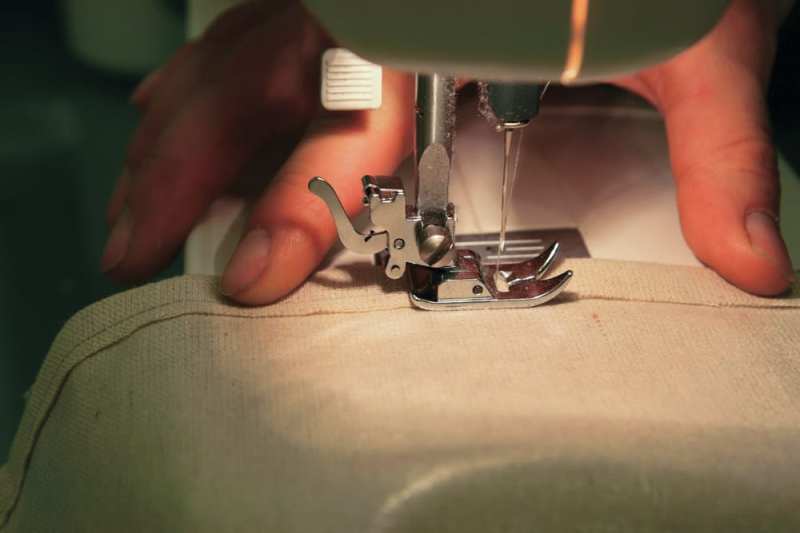
Do It Yourself: Repairing a Seam
When it comes to split seams, Gregal said, “I see a lot of homemade repairs that are done with thin thread.” You can repair split seams on your canvas, but your sewing machine has to be up to the task. “The key to canvas is a UV-resistant thread,” Gregal said. “Use the biggest gauge your sewing machine can handle.” The best seam is a flat felt stitch, in which one of the two stitches is hidden from exposure to the sun.
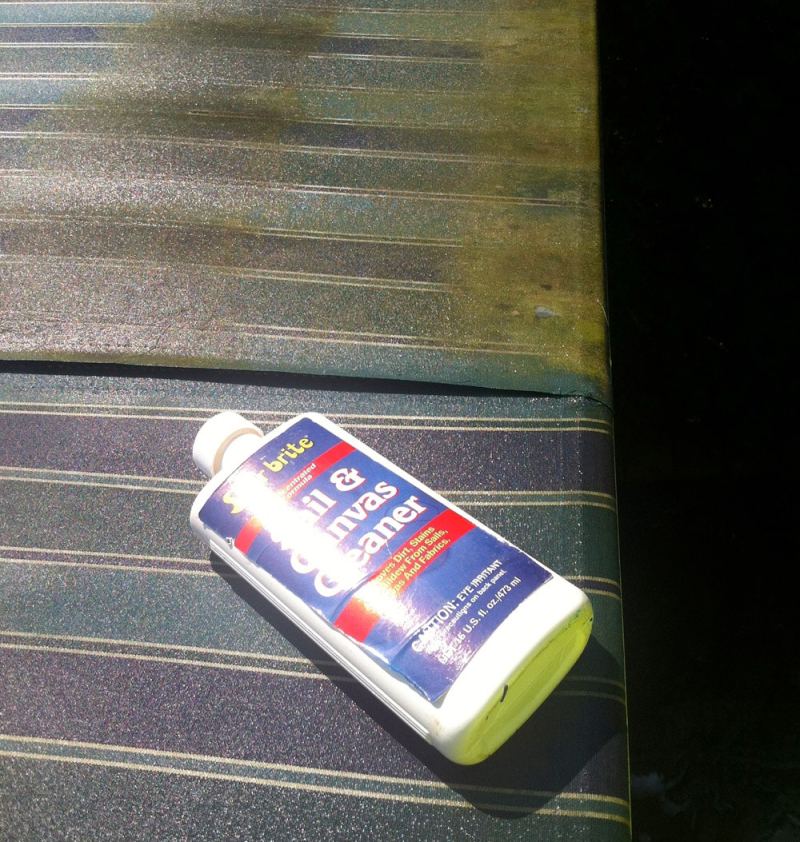
Do It Yourself: Cleaning the Cover
You can clean canvas by hand with warm soap and water or a commercial canvas cleaner, like Star brite Sail and Canvas Cleaner. You can also put it in your washing machine with a small amount of laundry detergent and clean it on the gentle cycle. Hang out the cover to dry. If your Sunbrella cover has stains and you know what caused them, go to sunbrella.com to look at a table to determine how to clean each one.
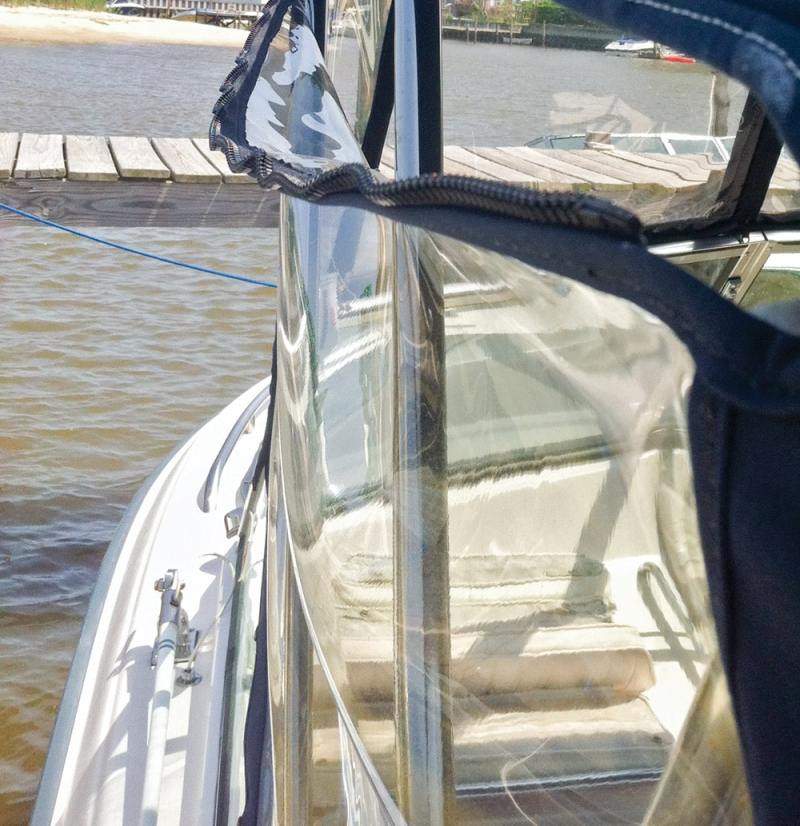
Hire Someone: Replacing Clear Vinyl
Many boaters have watched their clear vinyl get foggy or brown over time. Most boaters don’t even realize that a shop can sew new clear vinyl panels onto the existing canvas, which saves money. The first time the repair is made, you need to pin down the new vinyl to maintain the shape of the window. This requires an industrial-strength sewing machine to punch through the canvas and the two layers of vinyl. With the new vinyl in place, cut out the old cloudy stuff and you’ll see clearly again. Gregal estimated that replacing the clear vinyl would cost about 70 percent less than getting all new canvas.
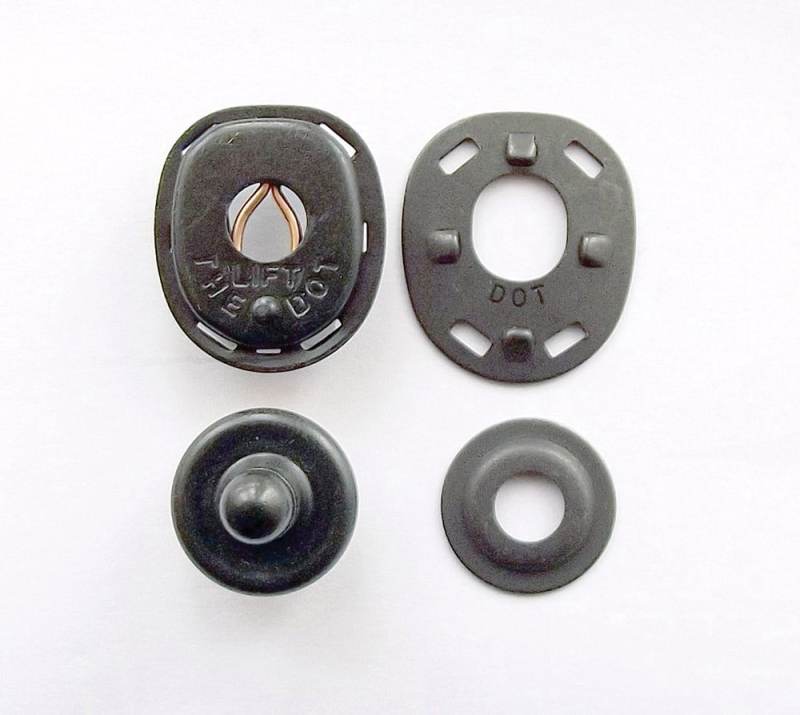
Hire Someone: Replacing Common Sense and Lift-the-Dot Fasteners
Common Sense and Lift-the-Dot fasteners are high-tech snaps used where a conventional stud and female combination won’t hold. The Common Sense and Lift-the-Dot fasteners cost less than a buck each and have locking mechanisms that secure the cover in place. The Common Sense fastener has a twisting rectangular stud on the bottom and a grommetlike female fastener in the cover. Slip the female side over the male stud and spin the latter to lock it down.
A Lift-the-Dot fastener is similar with male and female halves, but they snap together instead of having any twisting parts. Gregal said that both are installed similarly to a snap and that a layman could handle them, but the press/pliers cost about $300, which would make it cost-prohibitive. Take it to the pros.
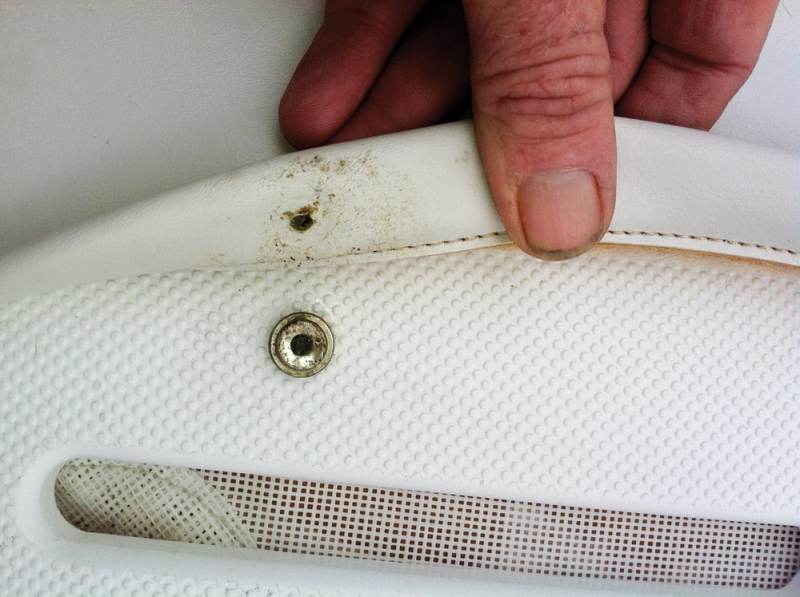
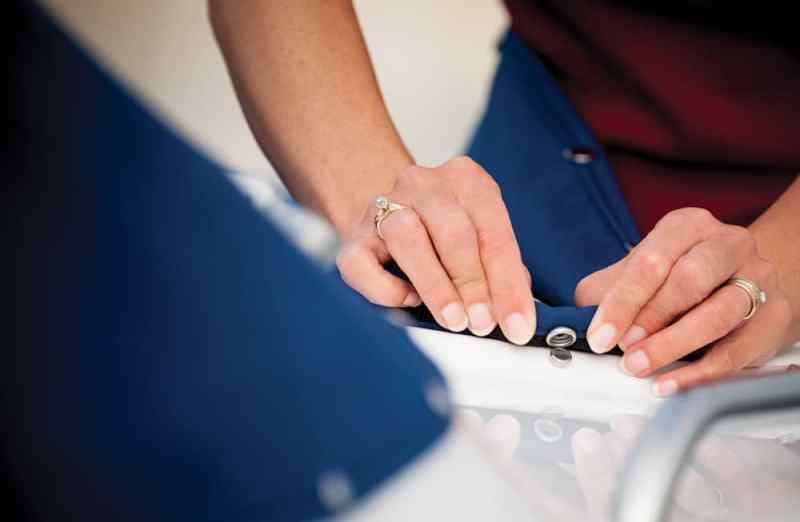
Do It Yourself: Pulled Snap
More often than not, the female part of the snap on the cover breaks, not the male part that’s screwed into the boat. (Be a captain and instruct your crew not to yank the cover to try to release all the snaps at once!) You can get replacement snaps at chandleries like Overton’s and West Marine. Female snaps come in either brass or stainless steel. Stainless steel is better, but don’t mix metals, especially if you boat in salt water. Gregal recommends doing the work yourself if you need fewer than 10 snaps replaced. To get an idea of pricing, Overton’s sells its 73-piece snap kit (chrome-plated brass) with snaps plus crimping pliers for $24.99. You squeeze together the two halves of the female cap onto the fabric. Higher-quality crimpers will mushroom the cap properly. Cheaper tools will split it, which can lead to premature failure. That’s why Gregal noted that the Hoover Pres-N-Snap is the professional’s preferred snap installation tool ($201.95 on amazon.com). For boaters who have difficulty removing snaps, the Top-Snapper ($20, overtons.com) is a spatulalike tool that you slide under the snap to pry it up without tearing the snap free.
For the male side of a snap (the stud), which is on the boat, you just need a screwdriver, but some less expensive boats have their snaps riveted in place. To replace these, you need to drill out the rivet and replace it with a screw-in stud. To keep the gelcoat from cracking when drilling, Gregal uses a one-eighth-inch countersink bit to flare the hole. A countersink is used to broaden a hole so that a screw will sit flush or below the surface of the material into which it is driven. With the hole drilled, it’s just a matter of bedding the screw with marine sealant and driving it into the fiberglass. Coat snaps with lip balm to make them easier to use.
Do It Yourself: Replacing Grommets
A grommet is a reinforced metal ring about the size of a quarter in a cover or T-top. It’s used to pass cords through. Much like on a snap, you use a die to press a grommet into fabric. Gregal said that, if you’re only replacing a couple, you can press it into the cover by placing the die in the cover and positioning it on a block of wood. Then you pound it with a hammer to close the grommet around the fabric. If you’re replacing a series of grommets in a T-top or similar application, Gregal suggested having a professional do the work. The best grommets are corrosion-resistant stainless steel.
Hire Someone: Repairing a Split Between Canvas and Clear Vinyl
Where vinyl is concerned, even a short split-seam repair is more difficult to do than a repair in an all-fabric seam. “It’s harder to stitch the vinyl because it’s thicker, so this one should be left to the yard,” Gregal said. “When the clear vinyl comes into play, it takes a stronger machine to punch through the thicker vinyl of the windows.”
Do It Yourself: Sticking Snaps and Zippers
For both snaps and zippers, apply a light coat of Teflon lubricant, such as Star brite Snap and Zipper Lubricant ($9.99, overtons.com) to keep scale and corrosion at bay. You can also use a crayon to “draw” a waxy protective film onto the snap or zipper. Make this part of your spring commissioning and fall layup regimens.
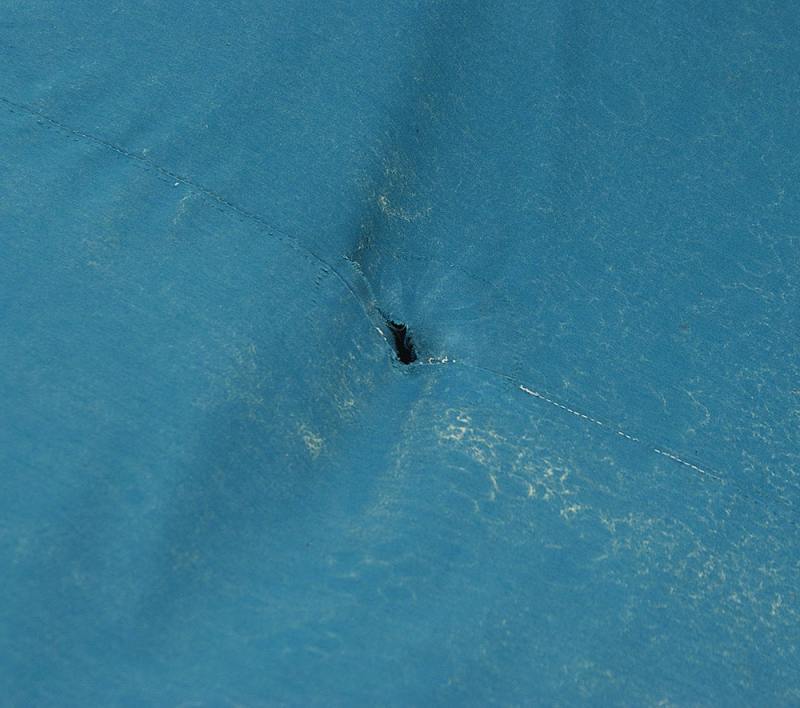
Do It Yourself: Patching a Hole
Gregal considers Sunbrella the best material for boat covers because of the fabric’s composition; professionals cut it with a hot knife. Most laymen don’t own such a knife, but if there’s a small hole that you want to patch, seal it off with a carefully wielded cigarette lighter or soldering iron, and then sew a patch over it. Use a sewing machine whenever possible. “It would look pretty well butchered if you tried to stitch it by hand,” Gregal said.

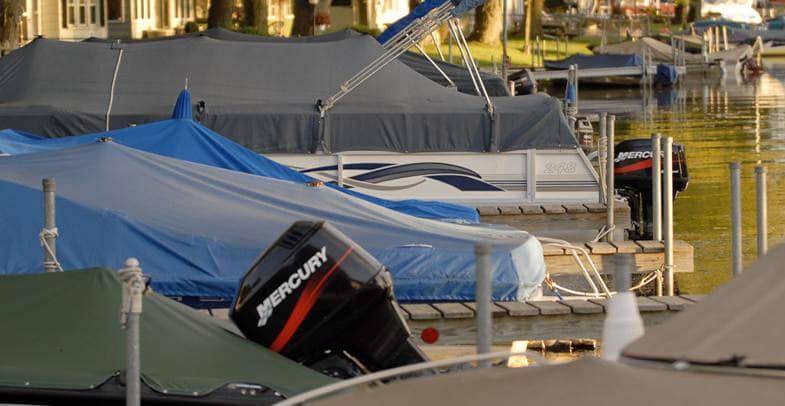
Do It Yourself: Bimini Top Care
To make your Bimini top last longer, make sure it’s dry, retract it at the end of the day, and store it in the zippered boot. Additionally, use the same protectants for your cockpit and bow covers on the Bimini top. Finally, upgrading to quick-release “grenade” pins in the deck hinges does away with thumbscrews and makes removal easier.
New Canvas Buying Tips
If your canvas needs to be replaced, Gregal has some tips for what you should look for. First, make sure the new cover is made from Sunbrella, or if you boat down South and want a light-color material, he recommends Stamoid, which is plastic-based. Light-color Sunbrella gets dirty easily, though. Make sure the company making your cover uses UV-resistant oversize thread. It comes in two primary sizes, 92 and 138. The higher number is the thicker thread, and if you’re planning to keep your boat, request Tenara thread, which Gregal calls “Gore-Tex on a spool.” It’s impervious to rot. For zippers, select No. 10 large-tooth, and make sure they’re double-stitched. Ask that the binding be positioned on the outside to protect the plastic zipper from the sun. Snaps should be stainless steel, and to anchor the poles that support the cover, ask for a Vent-So-Port, a plastic cap about five inches in diameter that better distributes the weight of the canvas.


