The most ubiquitous hydraulic steering system for outboard-powered boats is made by SeaStar Solutions (previously known as Teleflex). Helms for the company’s BayStar (helm model HH4314-3), SeaStar (helm model HH5271-3) or SeaStar Pro (helm model HH5770-3) are among the most common and durable on the market today. Yet after years of hard use, the helms of these systems might begin to leak.
If the leak emanates from the front seal of the steering-wheel shaft, you can easily and quickly fix it without removing the helm, as long as the helm is installed in a standard front-mount configuration, or with a back-plate kit, or with a round-bezel kit. If the helm is installed completely behind the dash, removal of the helm is required for this project. Otherwise, consider this a project that you can undertake in the field. Before getting started, order the SeaStar Helm Service Kit, No. HP6032 (for pumps manufactured from 1990 to present). This kit includes a new quad ring seal, nyloc nut for the steering wheel, Woodruff key, and a top plate to cover the seal. You will also need to purge the lines of air after you finish the replacement phase, and that will require the addition of SeaStar hydraulic fluid to the system using a filler kit during the “bleeding” process.
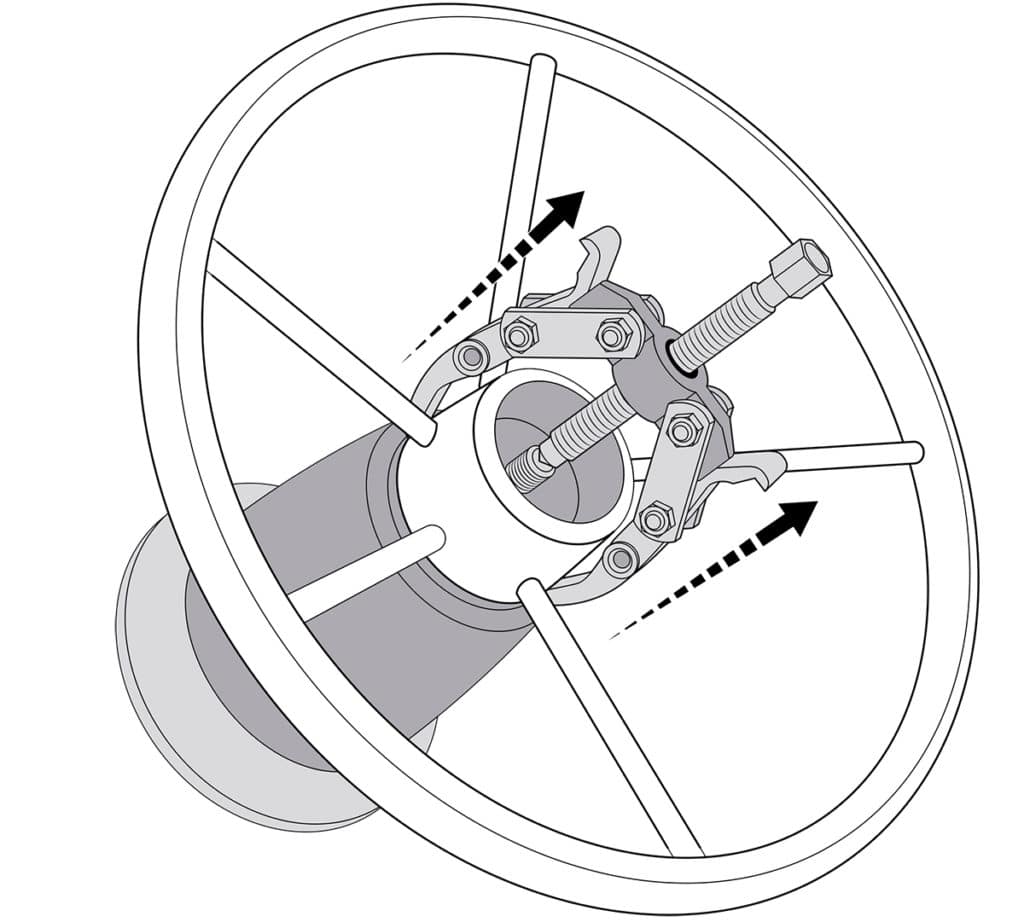
Tip: Avoid banging on the wheel or using a punch and hammer on the center of the shaft (a common technique for loosening wheels) because this might damage components of the helm and/or the steering wheel
Skill Level: 1/5
Finish Time: Approx. 2 hours
Tools and Supplies
* SeaStar Solutions Helm Service Kit, No. HP6032 ($9.99, westmarine.com)
* SeaStar hydraulic fluid ($24.99 per quart, jamestowndistributors.com)
* SeaStar Steering Fill Kit, No. HA5438 ($15.92, wholesalemarine.com)
* Socket wrench and deep socket set
* Torque wrench
* Box/open-end wrench set
* Phillips-head screwdriver
* Phillips-head socket (for torque wrench)
* 4-inch wheel puller ($31.80, lowes.com)
* Cup and clean shop rags (to catch and clean up spilled hydraulic fluid)
* Marine grease
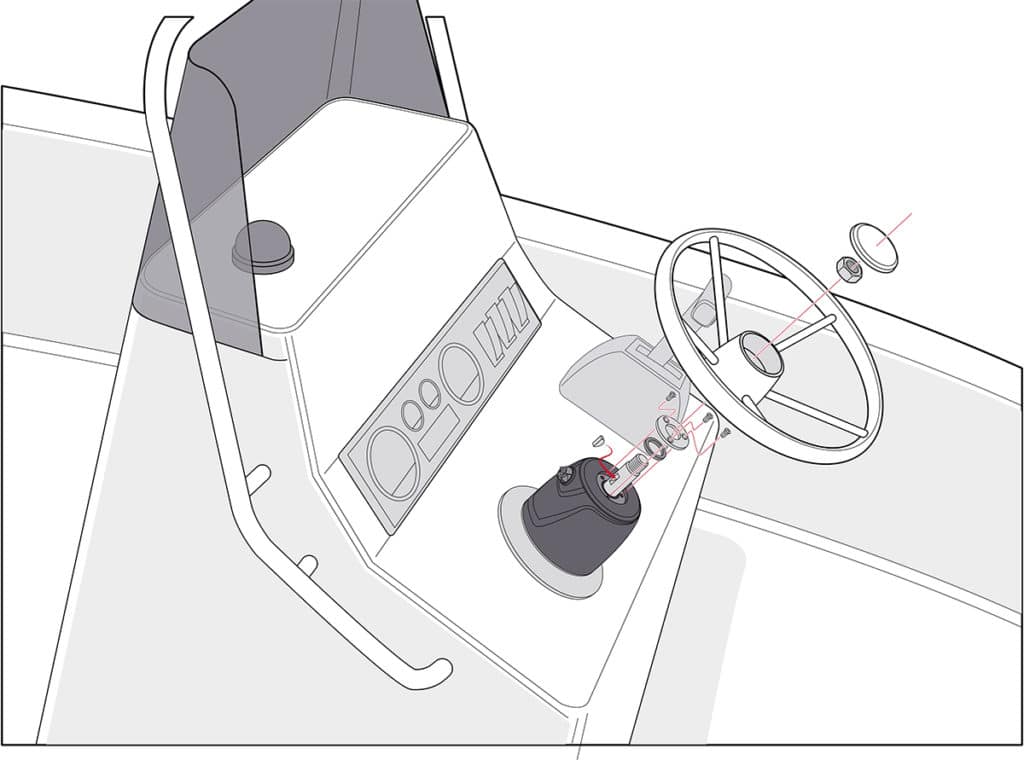
Pull the Wheel
You might need to remove the hub plate concealing the nut that holds the steering wheel in place. Hold the steering wheel while you use a long socket wrench to loosen and remove the nyloc nut holding the wheel in place. The wheel might not want to come off easily if it has been subject to corrosion. If this is the case, use a puller such as the K-Tool International KTI-70304 4-inch wheel puller to remove the wheel. Remove the Woodruff key from the steering shaft.

Remove the Old Seal
Use a Phillips-head screwdriver to remove and retain the three screws holding the top plate in place. Save the screws; new ones are not provided in the service kit. Remove the plate. To minimize the mess, use a cup to catch hydraulic fluid that might pour from the helm as you gently loosen and remove the old quad ring seal from the helm face. Draping a rag in the flow path is a good idea too. Use a dental pick or other nonscratching implement if you need to pry loose the old quad ring seal from the helm.
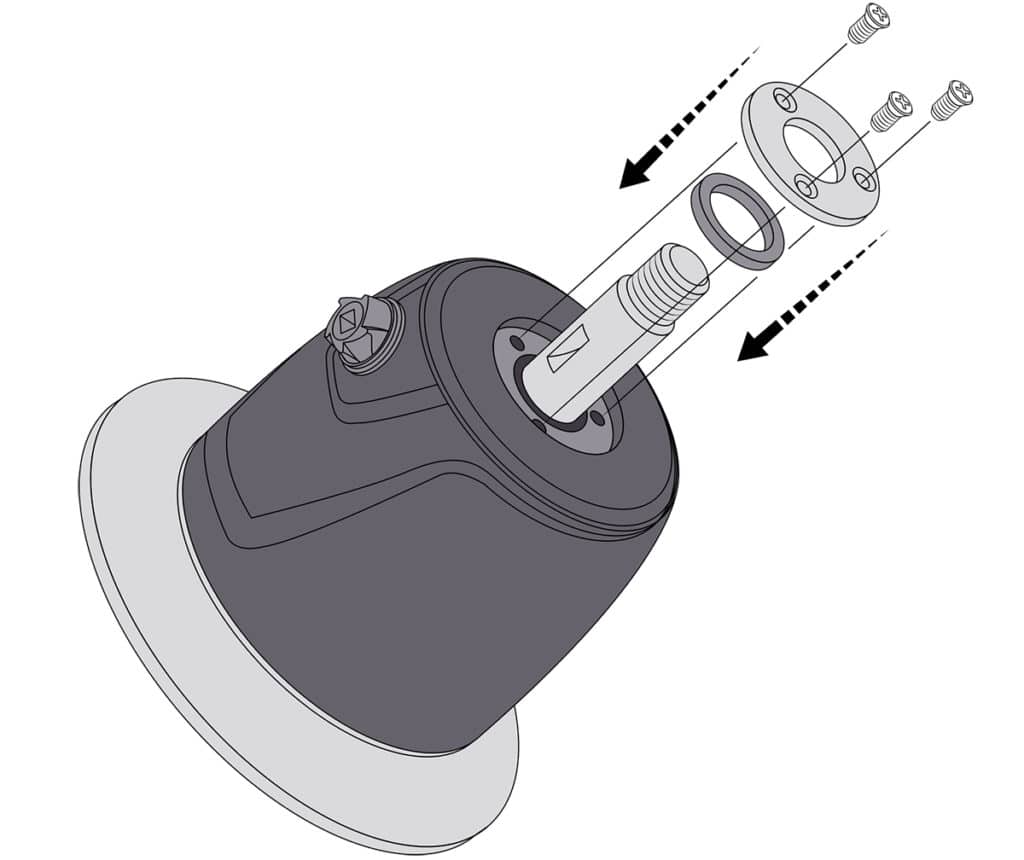
Install the New Seal
Wipe off the steering shaft with a clean rag, then lightly lubricate the shaft with a bit of fresh oil or hydraulic steering fluid. Also, lightly lubricate the new quad ring seal, then gently slide it over the steering shaft into position at the face of the helm. Make sure it fully seats in the groove at the front of the helm. Install the new top plate, making sure the CE mark is placed dead center at the top. Thread and tighten the three Phillips-head screws to a torque of 6 to 9 inch-pounds.
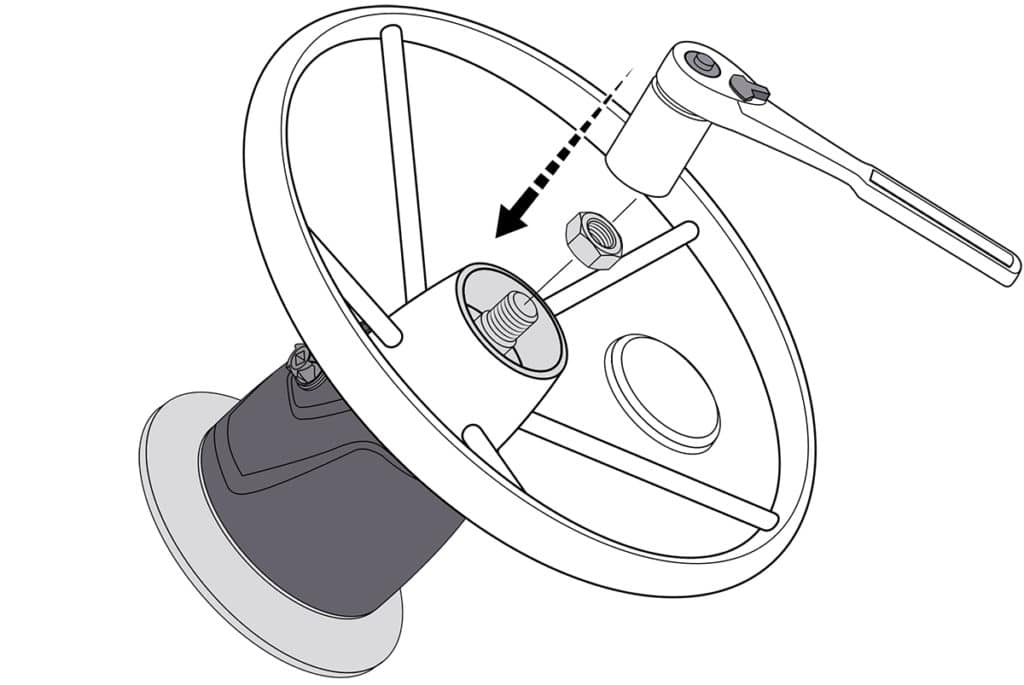
Reinstall the Wheel
Lubricate the steering shaft with a coat of marine grease. Place the new Woodruff key in the groove in the shaft. Turn the shaft so the groove is facing upward; this will help keep the key from falling out. Then align the slot within the wheel hub with the Woodruff key as you slide the wheel into position over the shaft. Thread on the new nyloc nut. Hold the wheel in place while you use a torque wrench to tighten the nut to 150 inch-pounds. Reinstall the hub plate on the steering wheel.
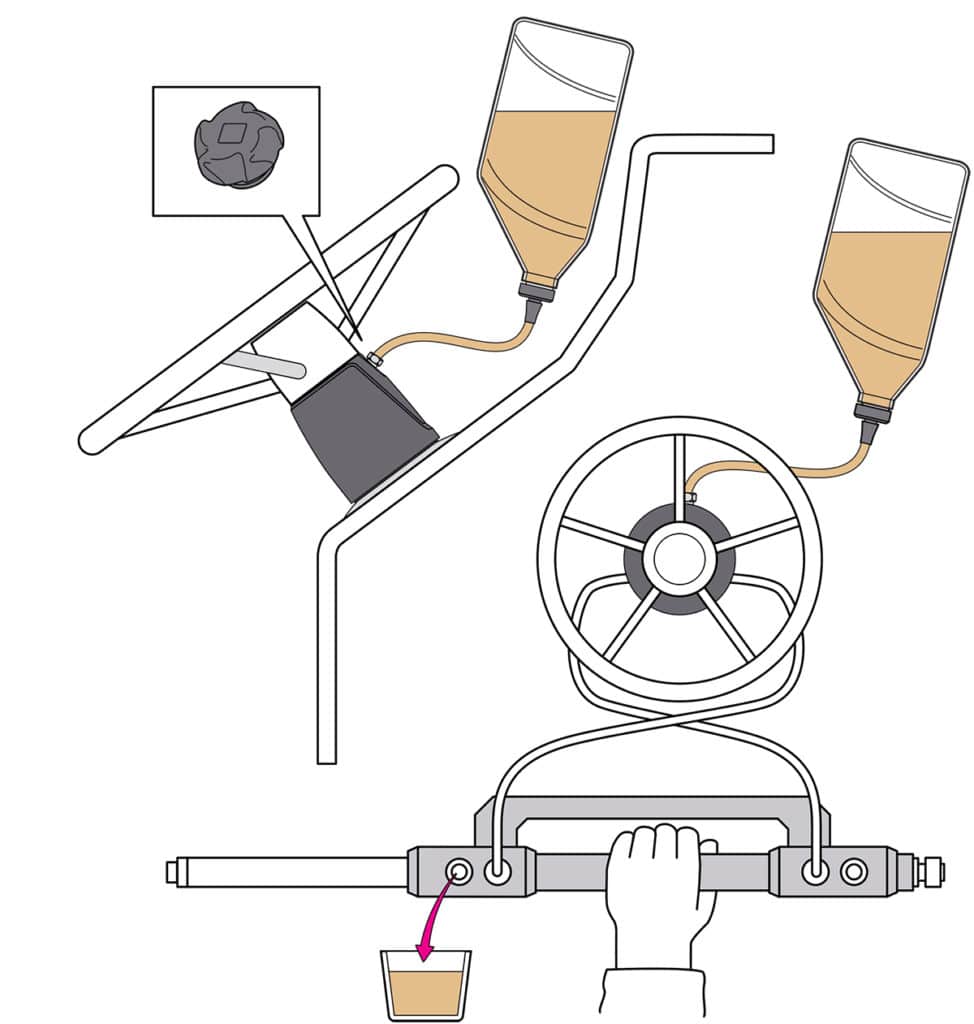
Fill and Bleed the System
With the new seal and the wheel installed, remove the cap on top of the helm pump and use a SeaStar filler kit and a quart of hydraulic fluid to fill the system. You need the help of a friend to properly bleed the system of air; one should be at the helm and the other at the hydraulic steering cylinder by the motor with a wrench to open and close the bleeder valves. Here are the steps:
- Turn the steering wheel hard to starboard.
- Open the starboard bleeder nipple located on the steering cylinder.
- Turn the steering wheel to the port side, pumping air/fluid out of the bleeder fitting.
- When an air-free stream is seen, close the bleeder nipple.
- Continue turning to the port side until the engine comes hard-over.
- Open the port bleeder nipple located on the steering cylinder.
- Turn the steering wheel to the starboard-side, pumping air/fluid out of the bleeder fitting.
- When an air-free stream is seen, close the bleeder nipple.
For more on how to fill and bleed a SeaStar Solutions hydraulic steering system, visit boatingmag.com/how-to-add-fluid-to-hydraulic-steering.