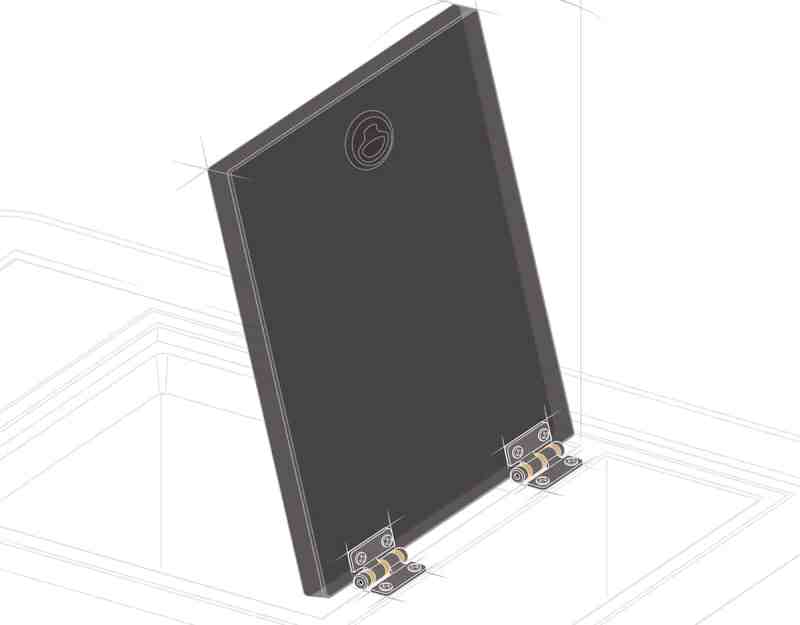
1. Install the hinges on the frame portion first so you can reach through the compartment opening to attach the frameside fasteners. Then carefully pivot the other side of the hinge upward to make it easier to bolt on the hatch or lid. 2. The hinges come packaged in the open position. Do not pivot the hinge before installing because you might not be able to easily open them back up. Tim Barker
Hatches and lids possess an annoying trait of slamming shut at the wrong time. Worst case, you smash a finger or toe.
Gas struts and hatch springs represent the traditional way of holding hatches open, but now you can add a new, even more elegant solution — friction hinges. Inspired by hinge mechanisms on laptop computers, these hinges keep hatches open at any angle throughout arcs ranging from 100 to 180 degrees of swing.
Offered by makers such as Gemlux and Southco, stainless-steel friction hinges have found widespread application on hatches for baitwells, where anglers need to hold the lid open while loading or retrieving live bait without snagging cast nets and dip nets on struts or springs. Friction hinges also work equally well on cabin doors, built-in coolers, underseat lockers, fish boxes, glove compartments, overhead electronics boxes and bilge hatches.
Getting Started
Skill Level: 1/5
Finish Time: Approx. 2 Hours Per hatch
Tools and Supplies
* Pair of Gemlux 1½-inch top-mount friction hinges ($21.61 per hinge; gemlux.com)
* Eight stainless-steel No. 8 oval-head machine screws, nuts and washers
* Marine Formula by DeBond Corp. ($19.95 for 4-ounce spray can; debondcorporation.com)
* 3M 5200 adhesive sealant
* Denatured alcohol
* Putty knife and/or razor scraper
* Phillips screwdriver
* 11/32-inch box/open-end or socket wrench
* Clean rags
1. Find a Match
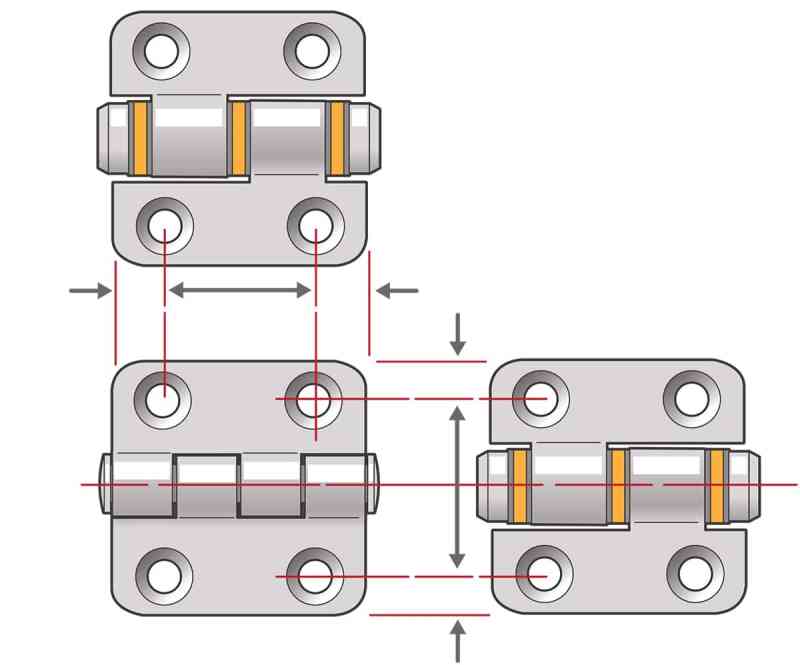
Unlike conventional hinges, friction hinges must support a load. Gemlux, a major supplier of marine hardware, has made it easy to select the correct friction hinge for any particular load. Simply replace the conventional hinges with Gemlux’s patented friction hinges of the same size and bolt pattern, and it should support the hatch. There are currently 12 different sizes of Gemlux friction hinges. We chose 1½-inch square hinges, part No. FH-1172, which correspond to the Gemlux 1172 conventional hinges. Also, take into account the hinge’s knuckle design. Gemlux offers four choices in each size to suit different installation requirements (see “Knucklehead”).
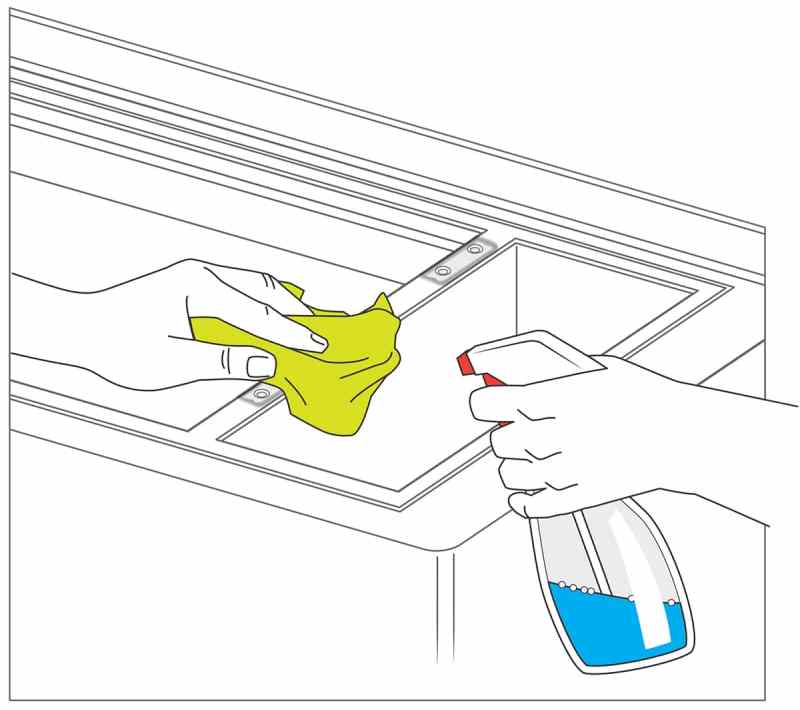
2. Remove the Old Hinge
Unbolt the old hinges — in this case, a pair of Gemlux top-mount hinges. If the hinges were bedded with a high-strength adhesive/sealant such as 3M 5200, use an adhesive solvent such as Marine Formula by DeBond Corp. (see boatingmag.com/marine-solvents-for-removing-5200) to unstick them. Clean the mating surfaces by meticulously scraping away any residual sealant with a putty knife or razor, being careful not to scratch or gouge the gelcoat finish. Once the old sealant is removed, wipe the surfaces clean with a solvent such as denatured alcohol. Replace any corroded fasteners with fresh, stainless-steel hardware.
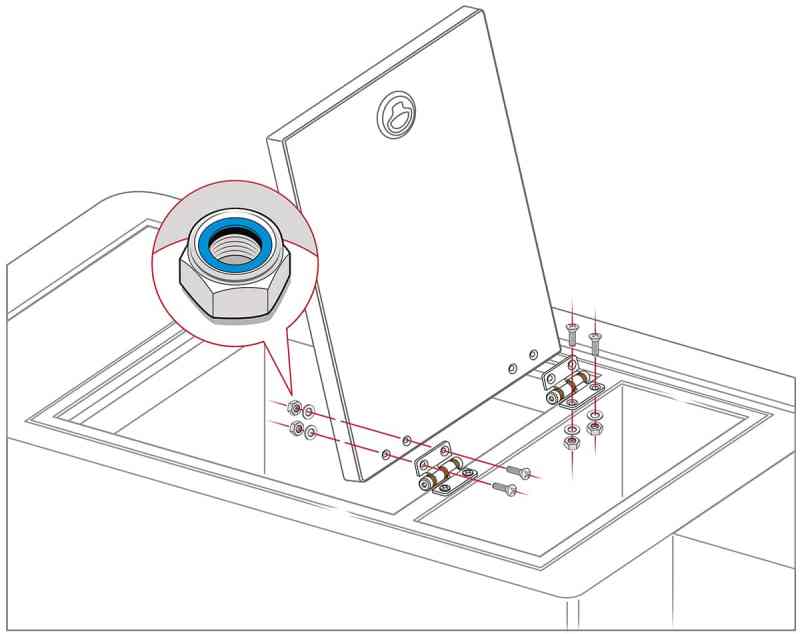
3. Bed and Through-Bolt
Use No. 8 stainless-steel, oval-head machine screws (eight of them for this project) long enough to through-bolt the hinges without creating clearance issues between the underside of the hatch and frame. Use matching nyloc nuts. If there is not enough clearance for these, use conventional nuts and a product such as Loctite Threadlocker. Select the largest washer possible for under each nut to accommodate the additional pressure with friction hinges. Dry-fit to make sure the hatch closes properly. Then remove the hinge, bed all mating surfaces with a high-strength sealant, and bolt it back up. Wipe away any excess bedding compound, and then allow it to cure for the recommended time period.
Knucklehead
Gemlux offers 12 models of stainless-steel friction hinges in various sizes and shapes. Each is also available in four different knuckle (aka barrel) configurations for different applications.
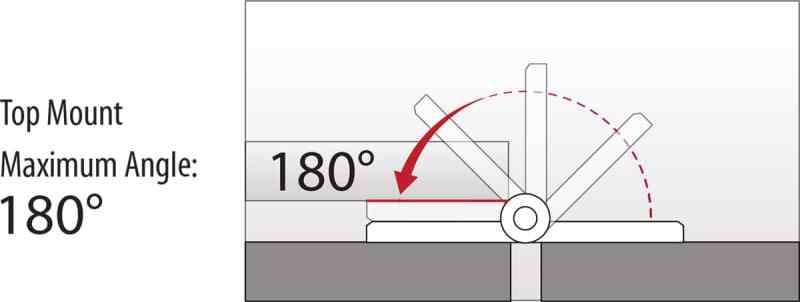
Top-Mount > Opens 180 degrees; good for lids on elevated baitwells and built-in coolers > Hardware protrudes above panel, so avoid using for deck hatches
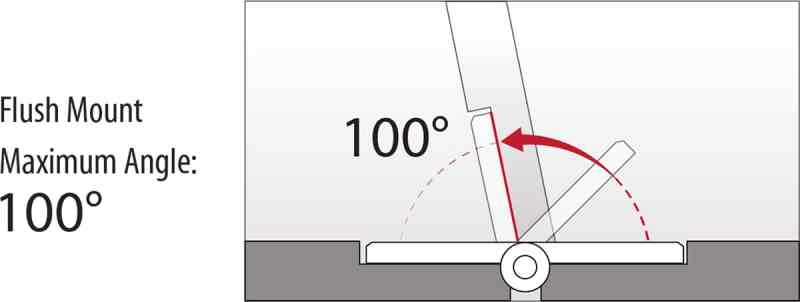
Flush-Mount > Hardware mounts flush when recessed; good for deck hatches > Tooling needed for recesses; swing limited to a 100-degree arc
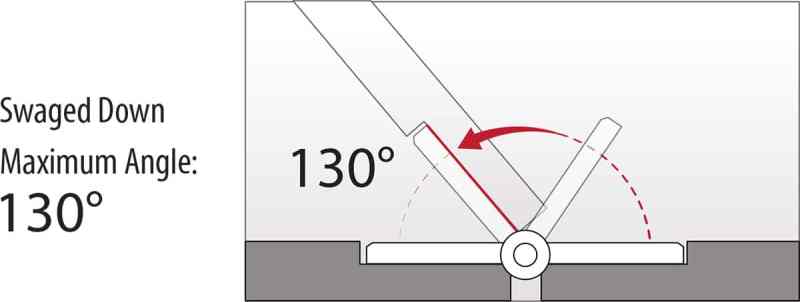
Swaged Down > Minimal protrusion; opens 130 degrees; good for deck hatches > Tooling needed for recesses; minor amount of protrusion above the deck
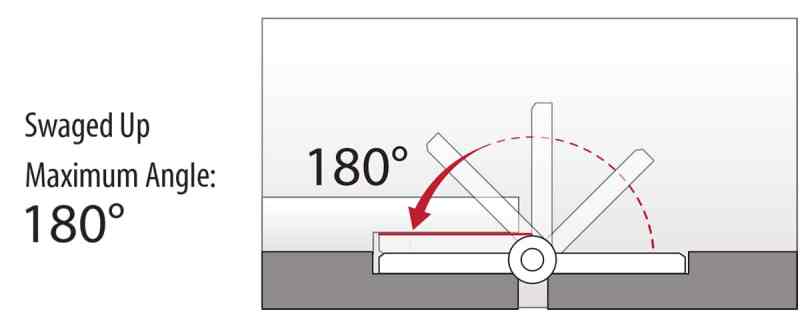
Swaged Up > Opens 180 degrees; good for internal hinges in which the hatch is closed with the hinge closed > Tooling needed for recesses; some protrusion


