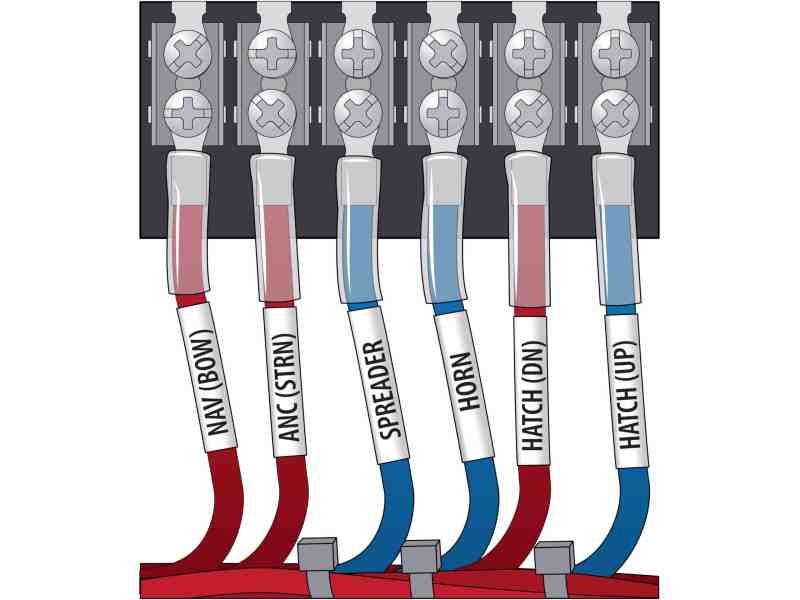
Precision crimping techniques prove crucial to the optimal performance of heat-shrink electrical connectors. A poor crimp can lead to a loose wire that draws excessive amps and overheats. A punctured collar can let in moisture that promotes corrosion and electrical failures, or worse.
For greater insight, we talked with Jason Braun, associate product manager for Ancor Marine Products, a leader in the manufacture of marine crimp connectors. Braun pointed out the importance of using the right materials. “I prefer crimp connectors with heat-shrink collars,” Braun says. “When properly installed, these seal the connection from moisture.” Ancor uses a polyolefin heat-shrink with an adhesive lining over tinned-plated copper connectors and terminals, and this eliminates the need for additional -heat-shrink tubing.
The polyolefin is translucent (versus the opaque heat-shrink tubing), so you can keep an eye on the barrel within, in case it shows the telltale green crud of corrosion and warrants replacement.
Braun emphasizes the proper crimping tool, citing the ABYC standard 11.14.3.8: “Solderless crimp-on connectors shall be attached with the type of crimping tools designed for the connector use, and that will produce a connection meeting the requirements of (ABYC) E-11.14.3.3.” For heat-shrink connectors, use a crimper such as the Ancor single-crimp ratchet hand tool (No. 703010) with four oval-shaped cavities for different wire sizes.
Read Next: More DIY Projects
Finally, be sure to use marine-grade wire and cable that meets or exceeds UL 1426, ABYC and US Coast Guard charter boat (CFR Title 46) standards. Most such wire is tinned, stranded copper with vinyl insulation that resists salt water, battery acid, oil, gasoline, heat, abrasion and ultraviolet radiation. Here are Braun’s tips for crimping with wire sizes ranging from 22 to 10 AWG.
Skill Level: 1 of 5
Finish Time: Approx. 1 minute per crimp
Tools and Supplies
- Marine heat-shrink crimp connectors ($63.55 for a 160-piece assorted kit of Ancor terminals and connectors, hodgesmarine.com)
- Marine-grade wire meeting US Coast Guard charter boat (CFR Title 46) standards
- Wire strippers ($12.37, homedepot.com)
- Crimping tool ($58.59 for Ancor’s single-crimp ratcheting tool, amazon.com)
- Heat gun ($14.99, harborfreight.com)
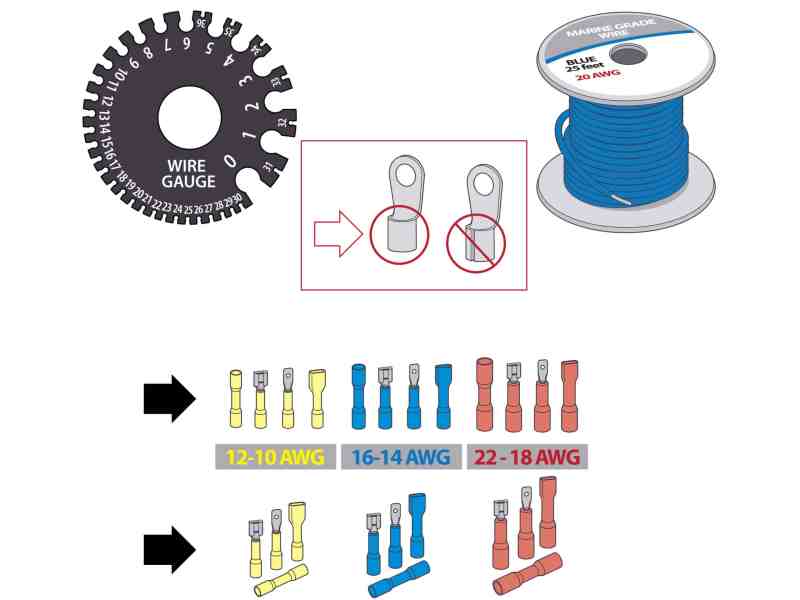
For a crimp that’s strong, the wire diameter must match the connector using the AWG (American Wire Gauge) standard. The wire size is marked on the spool and the insulation. To make matchups easy, the crimp connectors are color-coded for a range of AWG wire sizes: red for 22 to 18, blue for 16 to 14, and yellow for 12 to 10. The translucent heat-shrink material turns the colors somewhat pastel (e.g., red becomes pink), but the size ratings remain the same.
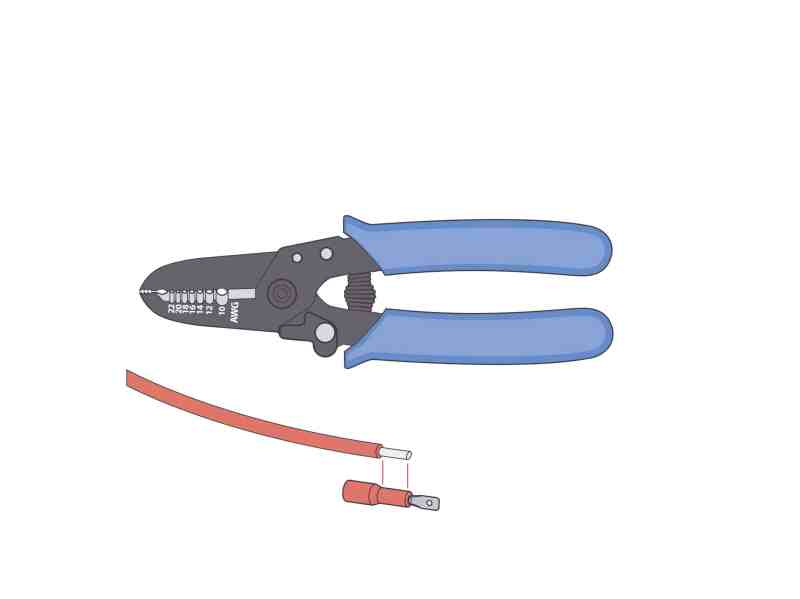
Carefully stripping the insulation from the wire is just as important as crimping. Use a device such as the Ancor cut/strip tool (No. 702008) with stripping stations for 22 to 10 AWG wire. Be sure not to nick or cut any of the wire strands in the process. Telltales include wire strands inside the removed insulation or visible shiny copper in the wire bundle. If so, start over. The length of exposed wire should be the same length as the crimp barrel within a tolerance of about 1/16 inch.
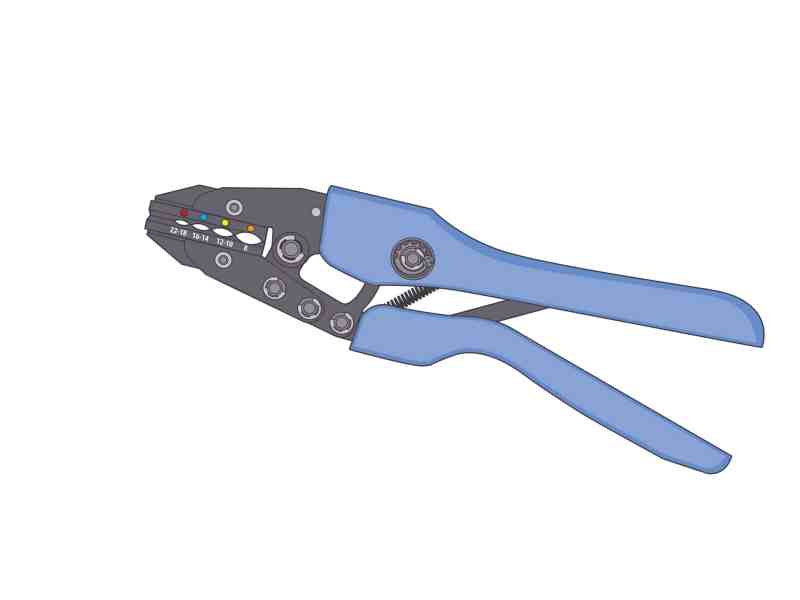
Crimpers usually have jaw dies with three or more oval stations to match the various wire/connector sizes. The Ancor single-crimp ratchet tool, for example, has four ovals, each with color codes that correspond to the connector size ranges outlined above. They are also engraved with numerals outlining the sizes. Place the barrel of the connector in the proper oval and align it perpendicular to the jaws so they will crimp the middle of the barrel.
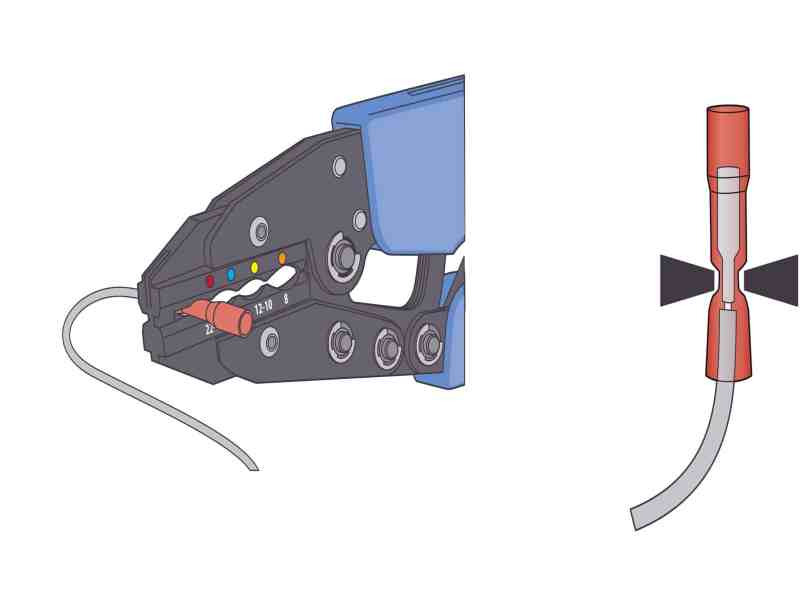
The Ancor single-crimp ratchet tool is calibrated at the factory to apply the correct amount of pressure to crimp the barrel of the connector without cutting or tearing the heat-shrink material. It also has a ratcheting mechanism that holds the crimp securely while you insert the wire into the barrel. Once you’re ready, close the handle firmly to make the crimp. The ratchet releases after you close the handle so you can easily remove the crimped connection.
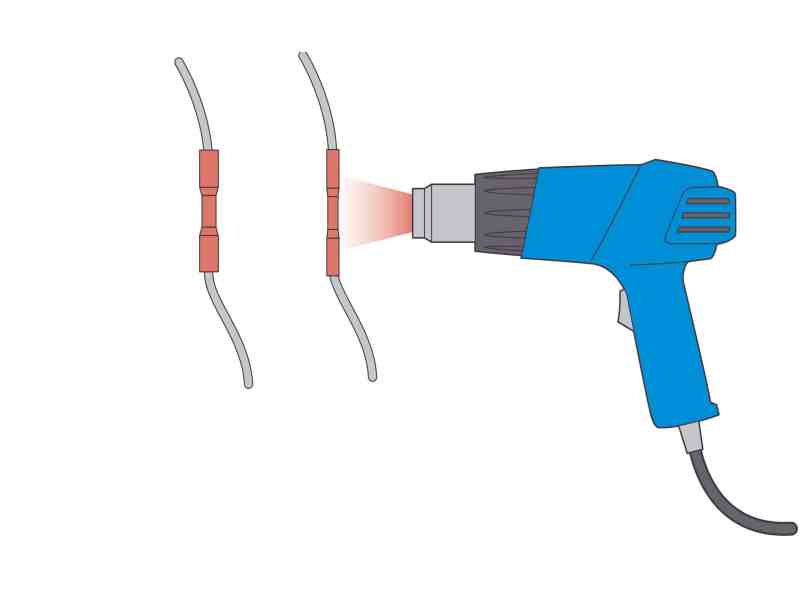
To shrink the collar, use a heat gun on the low setting. The material will shrink at 275 degrees F. Too much heat can damage the collar and wire insulation. Slowly spin the connector (holding the wire about 4 to 6 inches away) as you apply heat, starting at the farthest point from the open end and working toward it to force air out and prevent trapping air bubbles inside the collar. Once the shrinks are tight, remove the heat and allow the connector to cool before touching it.
If you’re having trouble stripping away insulation without damaging the wire strands inside while using conventional strippers, consider buying the Ancor automatic wire stripper. This compact hand tool can be adjusted to handle wires sizes ranging from 20 to 10 AWG, and it is ideal for big projects and tight spaces. You simply put the end of the wire inside the jaws and close the handle. It strips away insulation perfectly without damaging any of the conductors. $41.99; boatersland.com


