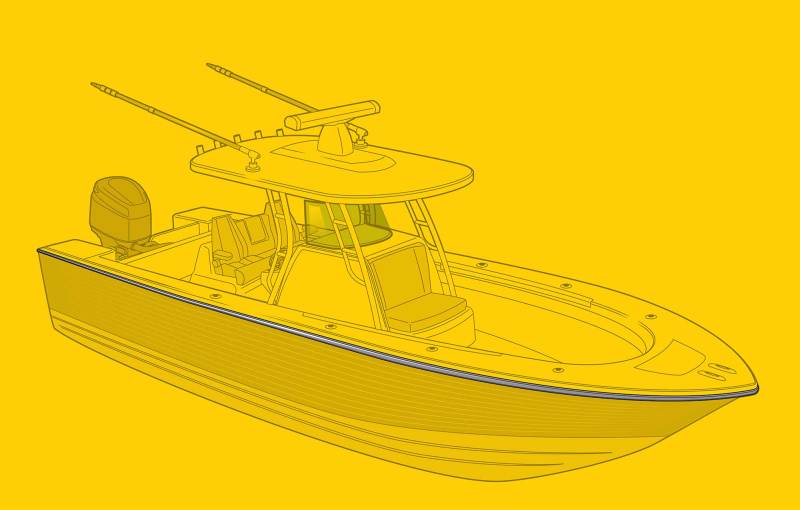
A rub rail hides the joint between a boat’s deck and hull, thus accentuating the sheerline. On a practical note, it serves as a buffer between the boat and pilings, seawalls and other objects. Hence the name, rub rail.
With enough bumps and scrapes, plus deterioration from sun exposure, a rub rail can look ratty. When it’s time to replace, a DIY option is the SuproFlex rub-rail kit from Taco Marine.
Each kit features a continuous 60- or 80-foot coil of flexible coextruded vinyl rub rail (in black or white), which features two levels of hardness: a high-durometer inner layer (with pre-drilled holes) for a durable installation, and a softer outside layer to cushion impacts. Choose from heights of 1.6 and 2 inches. The kit also includes a soft vinyl Flex Chrome insert, as well as stainless-steel truss head screws and stainless-steel end caps.
Before starting, remove the old rub rail, and clean and scrape away any residue. Fill in the old screw holes. Now is a good time to reseal the crevice between the deck cap and hull. Also mark the location of screws with pencil marks on the gunwale above to avoid drilling into these spots later.
Try to match as closely as possible the height of your previous rub rail. If in doubt, go slightly taller.
Skill Level: 1.5 out of 5
Finish Time: Approx. 5 to 6 hours
Tools and Supplies
- Taco Marine SuproFlex kit (boatoutfitters.com)
- Power drill and 1/8-inch bit
- Power driver with Phillips bit and adjustable torque setting
- Acetone and scraper to clean deck-cap mounting surface
- Epoxy filler for old screw holes
- Masking tape
- Marine silicone sealant
- Razor knife or pruning shears
- Dead-blow mallet
- Soft towels to cushion insert during installation
- Marking pencil
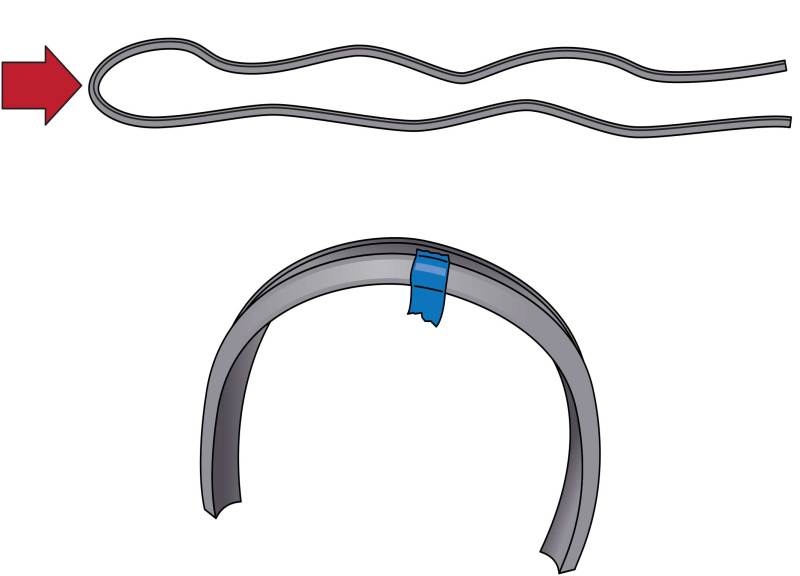
Uncoil the rub rail and fold it back on itself to the find the center point. Mark that point with a piece of masking tape. Keep in mind that the lip of the rub rail needs to be at the bottom. Place the center point of the rail against the center of the bow. With the lower lip pressed firmly against the lower edge of the deck cap at the bow, drill and install two of the No. 10 mounting screws, 2 inches apart on each side of the center point. Stretch the material and install screws through two more of the pre-drilled holes on each side.
Tip: Ask a buddy to help with uncoiling, stretching and positioning the rub rail. A warm day relaxes the vinyl. Avoid gravel, asphalt and other rough terrain that might scuff the material as you uncoil it.
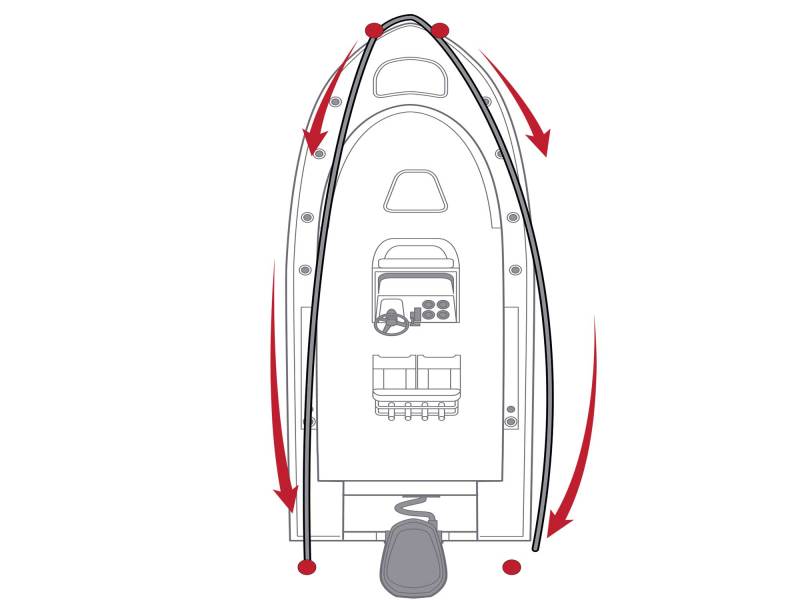
From the bow, extend the two sections of the rub rail aft over the top of the gunwales on each side. Make sure it’s not twisted and the lip is still at the bottom. Stretch the rub-rail sections to where they have just a slight belly; then drill and secure each leg of the rub rail with one of the mounting screws to the deck cap on the aft portion of the transom. This will be temporary. Then stretch the sections of rub rail outward and over the sheerline on each side. This results in a snug, straight fit.

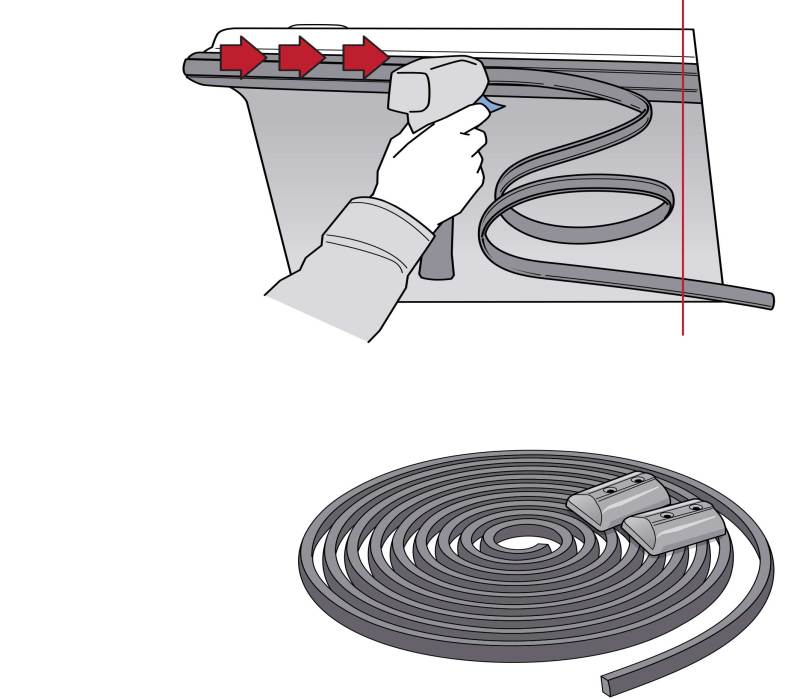
Begin at the bow and work your way aft. While holding the lower rub-rail lip against the lower edge of the deck cap, sequentially drill 1/8-inch pilot holes through the pre-drilled holes in the rub rail to create mounting holes in the deck cap. Dab each screw with marine sealant before driving it into a hole with a power driver. As you approach the transom turn, remove the screw from the transom while an assistant stretches the rail aft. Continue securing the rail around the transom turn and across the stern.
Tip: You can drill additional holes in the rub rail to avoid existing screws, or add more screws for extra security in places such as the transom turn and the end of the rub rail. To prevent puckering or damage to the rub rail, set drill torque to stop at the surface of the rub rail.
Uncoil and fold the insert in two to find the center point, as you did with the rub rail itself. Do this on a grassy area or smooth floor to avoid scratching the vinyl insert as you uncoil and untwist it. Place the center point at the bow and drape the two sections on top of the gunwales. Starting at the bow and working aft one side at a time, set the insert’s bottom leg into the bottom groove in the rail. Tap the insert with a dead-blow mallet to seat it. Work 4 or 5 inches at a time all way to the end of the transom.
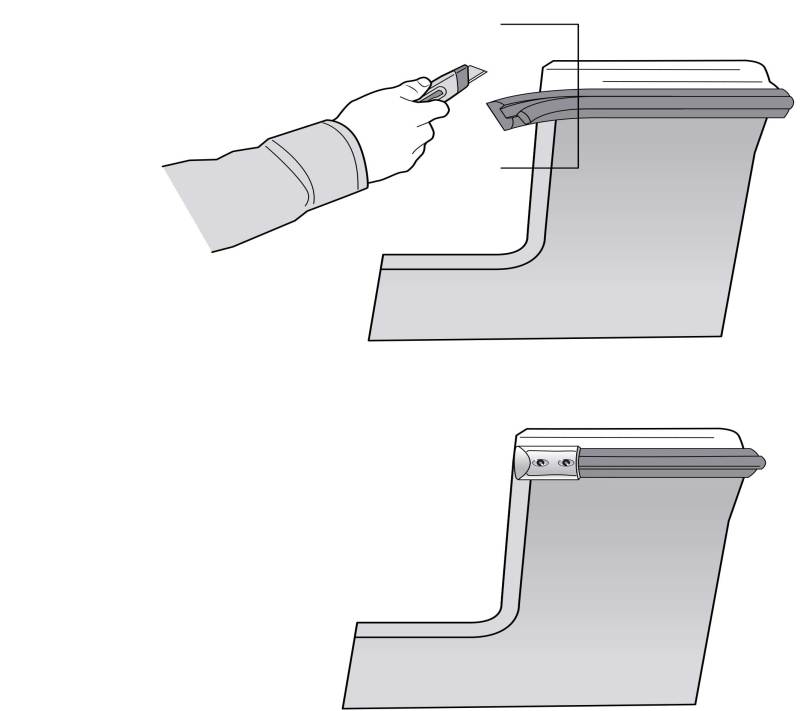
Taco provides two polished stainless-steel end caps and hardware with each kit to finish the rub rail on each end on an outboard boat with a notched transom. To install the end caps, trim the rub rail/insert about 3/8 inch short of the transom edge with a razor knife or pruning shears. Peel back the insert and install one final screw. Reinstall the insert. Position the cap. Use the mounting holes as guides to drill pilot holes with a 1/8-inch drill bit. Secure with the supplied No. 10 stainless-steel screws.
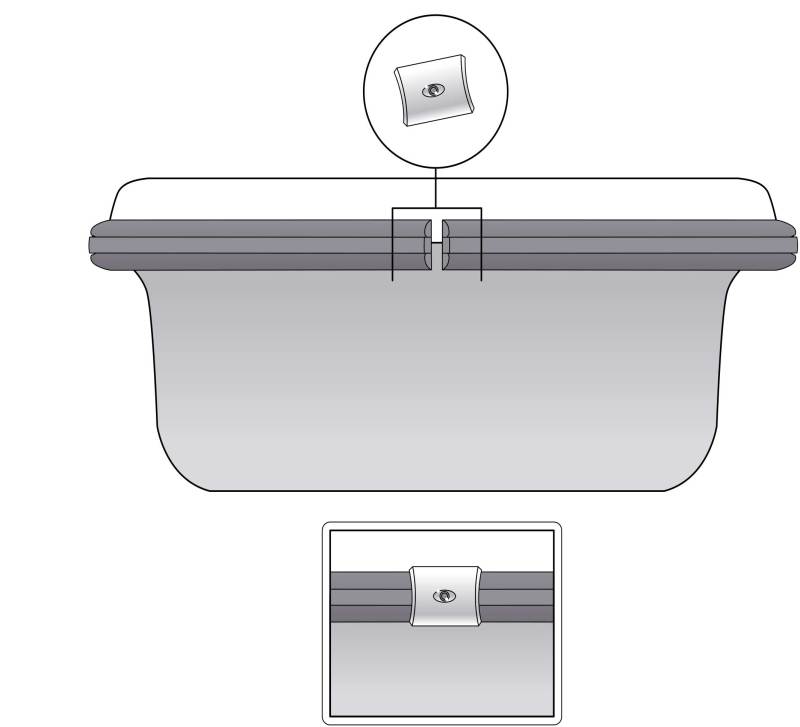
Boats without notched transoms such as inboards, sterndrives and boats with outboard brackets require a different kind of finishing piece such as Taco Marine’s 2-inch rub-rail splice cap. This polished stainless-steel cap ties together the two ends of a rub rail that meet in the middle of a transom.


