Midrange outboards—typically around 40 to 90 hp—often come equipped with cable steering (if not a tiller model), but there’s another choice. BayStar hydraulic steering from Dometic proves ideal for midrange outboards.
Rated for a maximum of 150 hp and costing $650 retail, the BayStar kits shave up to $900 off the price of a standard Dometic SeaStar hydraulic steering kit. What’s more, with the latest BayStar kit, you no longer need to order separate hydraulic hoses. BayStar kits now include two 20-foot lengths of cut-to-fit hydraulic tubing. The kit also now features the easy-to-install SeaStar ORB fittings with O-ring seals that dispense with messy pipe sealant.
A BayStar kit costs about $270 more than a cable kit, but hydraulic steering improves handling, and it eliminates feedback and the greasy sliding rod at the outboard end of a cable system.
We’ve covered this project in the past; however, with the versatile new cut-to-fit tubing and ORB fittings, we thought it was worth revisiting. Before starting, make sure the helm area is solid enough to handle the stresses applied by skippers who use the wheel as a de facto grab rail. Ours is backed by a broad area of 3/4-inch glassed-in plywood. In addition, ahead of time we installed the two ORB fittings in the port and starboard ports on the back side of the helm pump. This was easier to accomplish before bolting it in place.
Skill Level: 2 of 5
Finish Time: Approx. 3 hours
Tools and Supplies
- BayStar hydraulic steering kit, which includes cylinder, helm pump, tubing and 2 quarts of hydraulic fluid ($649.99, defender.com)
- SeaStar HO5050 spacer kit ($29.99, hodgesmarine.com)
- Marine steering wheel
- Power drill and 5/16-inch bit
- 3-inch hole saw
- Pipe cutter
- 1/2-, 9/16-, 5/8-, 11/16- and 1 1/8-inch wrenches
- Masking tape
- Rags to wipe up spilled fluid
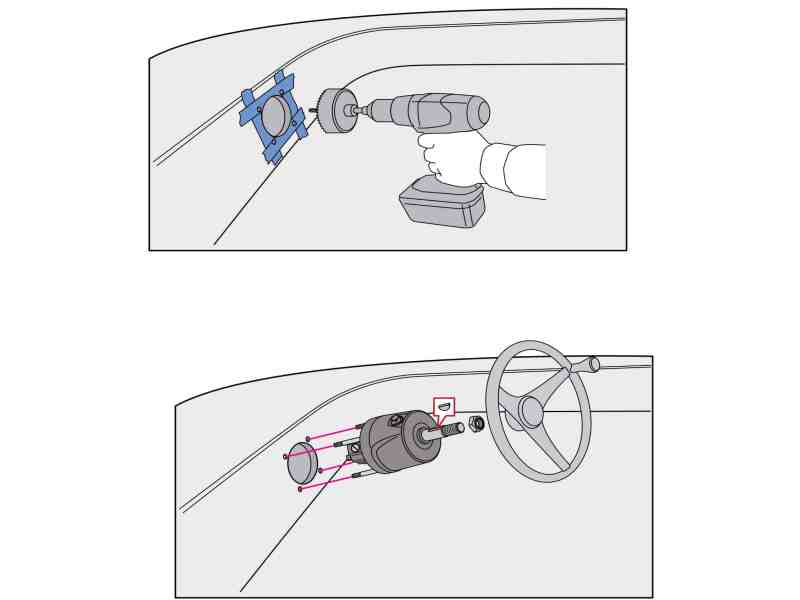
Ensure the helm pump and wheel (sold separately) are centered for the skipper and don’t interfere with elements such as the throttle-and-shift lever. You’ll need room behind for hardware and hose fittings. Use the supplied template to drill the main 3-inch hole and the four 5/16-inch holes for the mounting studs. Position the helm pump with the fill/vent plug at the top. Thread and tighten the supplied washers and locknuts on the studs. Place the supplied Woodruff key in the steering shaft, slide on the wheel, and thread and tighten the supplied locknut.
Tip: If the BayStar helm pump extends out too far from the dash, you can recess it using the BayStar HA5476 helm back-mount kit ($45.49, wholesalemarine.com), which reduces the protrusion by the same thickness as the helm. It requires a larger-diameter main hole.
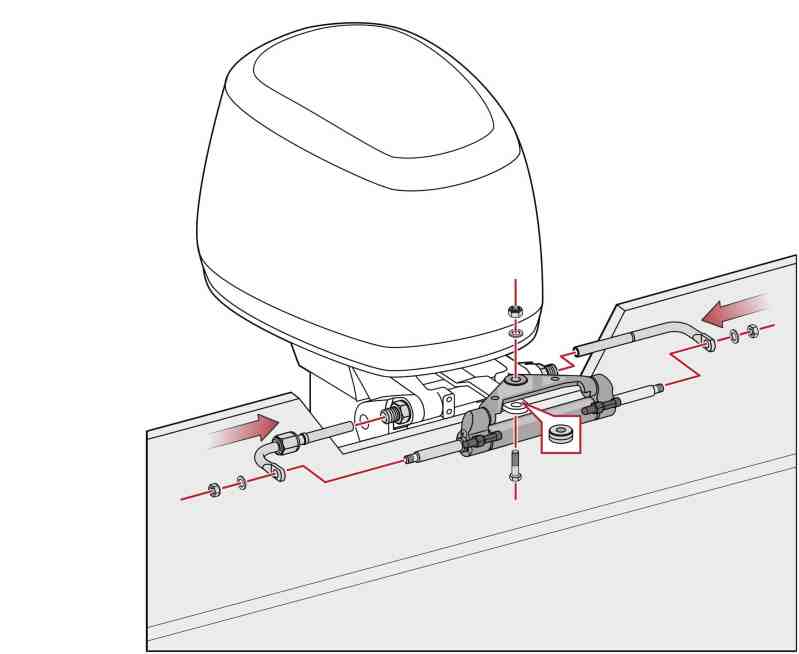
Each outboard model has a specific way of attaching the cylinder to the tiller arm using one bolt (and a nut in some cases). Some require spacers, reversing the cylinder pivot plate, or using a different pivot plate. Follow the manual for the proper method. Then insert the support bracket (with a captive nut) on the starboard side of the tilt tube; insert the other bracket on the port side. Secure the brackets to the cylinder shaft on each end with the supplied washers and locknuts. Tighten the captive nut on the starboard support bracket to the tilt tube.
Tip: Grease the tiller-arm/pivot-plate attachment point and the portion of the support brackets that insert into the tilt/support tube to help ensure smooth operation and corrosion resistance.
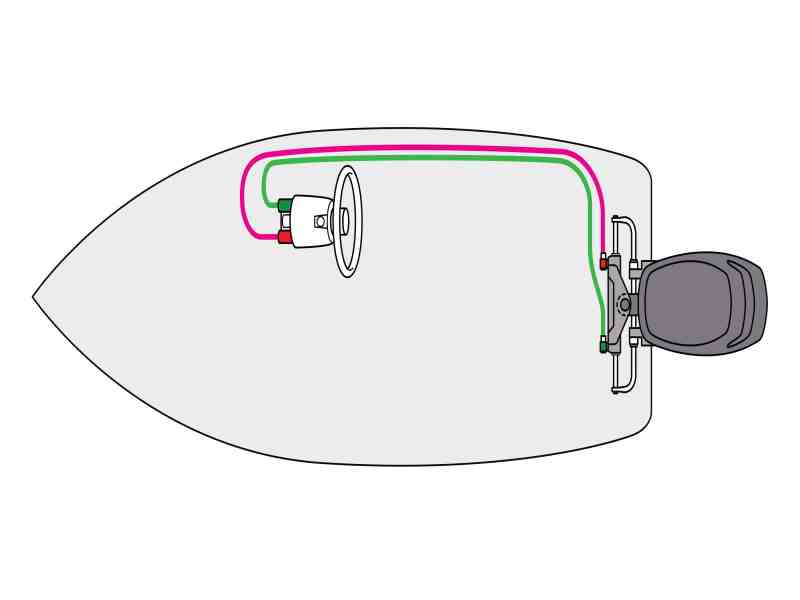
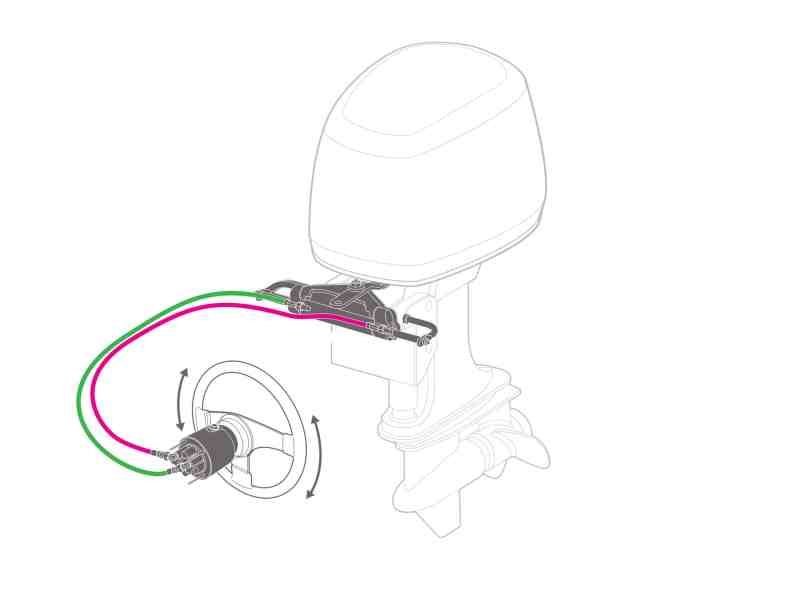
Route both sections of hydraulic tubing from the cylinder (pre-swaged ends go aft) through a motorwell rigging port and up to the helm pump. Ensure the tubing does not kink and the end caps stay on the tubes. Thread and tighten the brass end of the starboard tube (marked with a green cap) on the portside cylinder hose fitting, with the brass end of the port tube (red cap) threaded and tightened to the starboard cylinder fitting. BayStar’s cylinder ORB hose fittings let you easily change their orientation so that the tubing can attach in the most direct manner.
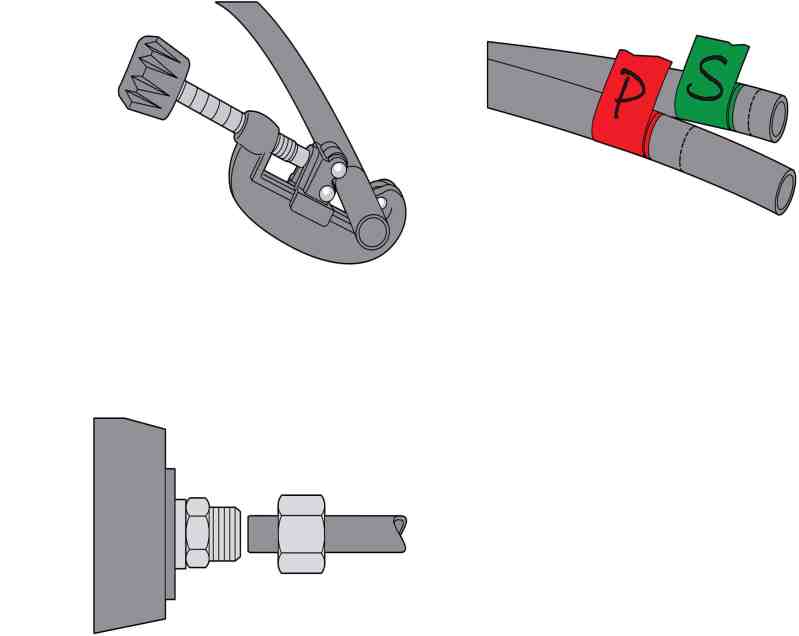
Hold up each section of tubing to the back of the helm pump and mark where it needs to be cut while allowing enough play for the outboard to turn and tilt. Use a pipe cutter with the tighten-and-turn method to create a square cut in the thick tubing. Cut one tube at a time to prevent mixing up port and starboard. Attach the starboard tube (green cap) to the “S” fitting, and the port tube (red cap) to the “P” fitting on the back of the helm pump. Slide the supplied compression nuts over the tube ends, insert the tube completely into the fitting, then tighten the nut.
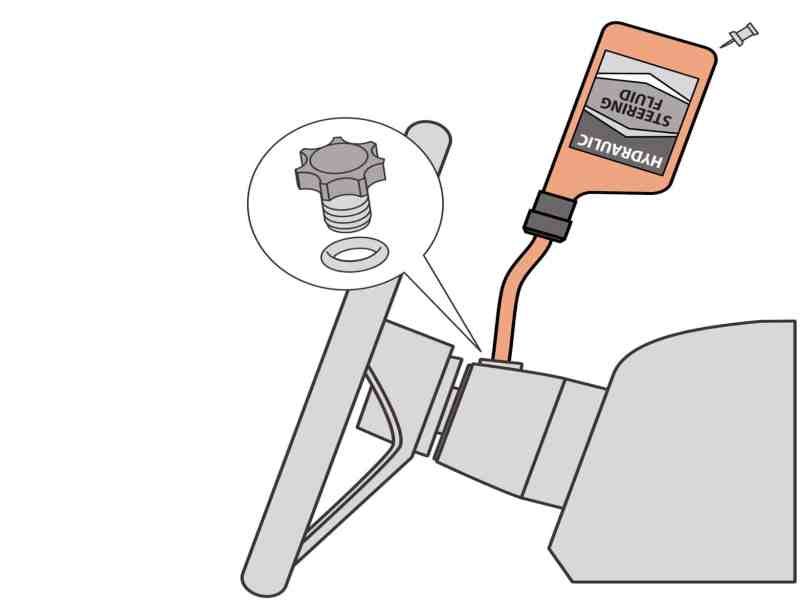
Remove the fill/vent cap and use the supplied bottles of hydraulic fluid and fittings to fill the system by turning the bottle upside down. The fitting comes with a push pin to puncture the bottom of the bottle for venting. Spin the wheel back and forth repeatedly. The outboard will gradually begin to move side to side. Once this happens, begin the purging process to bleed air out of the system. Follow the instructions to completely purge it of air. For more on bleeding hydraulic systems, visit boatingmag.com/how-to/how-to-add-fluid-to-hydraulic-steering.


