Longtime Boating contributor and marine electronics expert Ken Englert told me that the most common question customers in his store ask is: “How can I get internet reception on my boat?” Expensive satellite dome receivers such as those from KVH and Intellian, along with hefty service fees, are the most common means of connecting to internet aboard boats over 40 feet in length overall.
But large domes are not practical on many smaller boats, and that’s why Shakespeare introduced the Stream wireless booster. This compact, affordable system amplifies weak cellular signals along inshore, coastal and popular cruising waters, enabling boaters to use their existing data plans to host a reliable hotspot on their phone or other cellular device while underway, at anchor or at the dock. Ideal for unlimited data plans, the Stream is compatible with AT&T, T-Mobile and Verizon 4G, 3G and 2G, and no additional service fee is required.
To be clear, the Stream does not offer the global internet connectivity of sat service. It must pick up cell service, albeit weak, to boost connectivity. Once that occurs, you can check the weather forecast, read emails, or research marinas, fuel docks and accommodations at your next port of call, all while aboard your boat.
Skill Level: 2 of 5
Finish Time: Approx. 3 hours
Tools and Supplies
- Shakespeare Stream Wireless Booster System ($679.95, thegpsstore.com)
- Tape measure
- Power drill and drill-bit set
- Phillips screwdriver
- Tie-wraps to secure cables
- Dash-mount phone holder ($38.37, boatoutfitters.com)
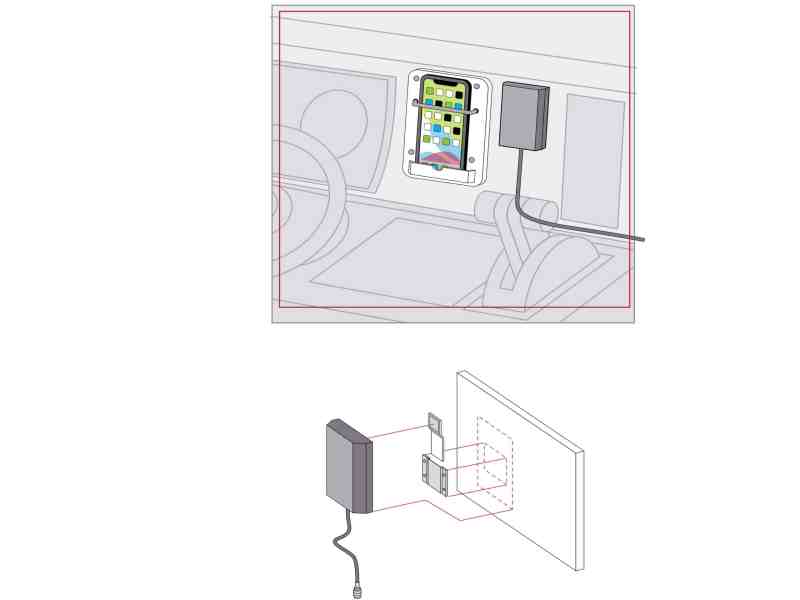
The helm antenna transmits wirelessly to your phone, and it must be within 2 inches of the phone, at least 8 inches away from any person, and 4 inches from any metal to operate properly. Use the supplied loop-and-hook fastener to secure the helm antenna next to the phone with a clear gap between the phone and antenna. Also, don’t mount the helm antenna on or near any metal surface or objects.
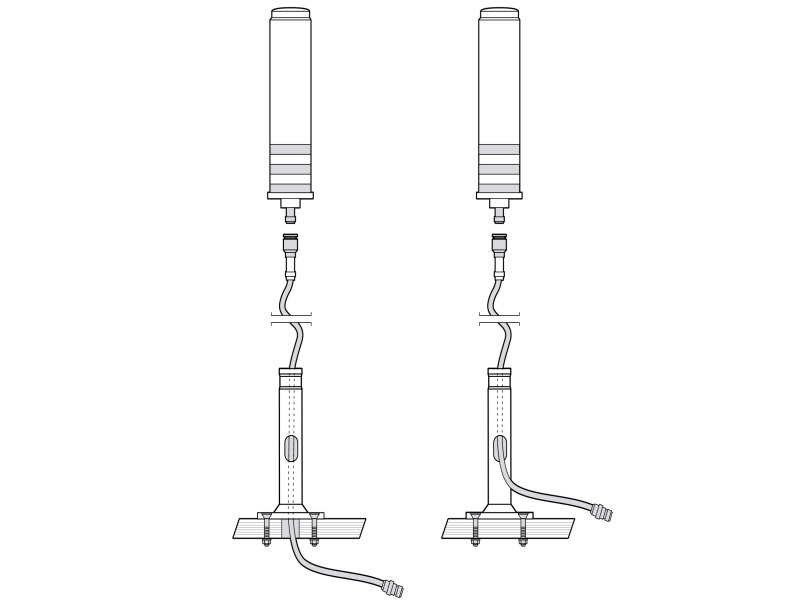
Place the outside antenna at least 12 inches from radiating elements such as a VHF antenna, as high as possible, vertically, and at least 3 feet away from the helm antenna by using the supplied hardware. Choose a location through which a hole can be drilled and the cable passed up through the base to the antenna. Alternately, a removable cap on the ferrule allows you to pass the cable through the side of the post.
Watch Next: How to Install a Quick Disconnect VHF Antenna
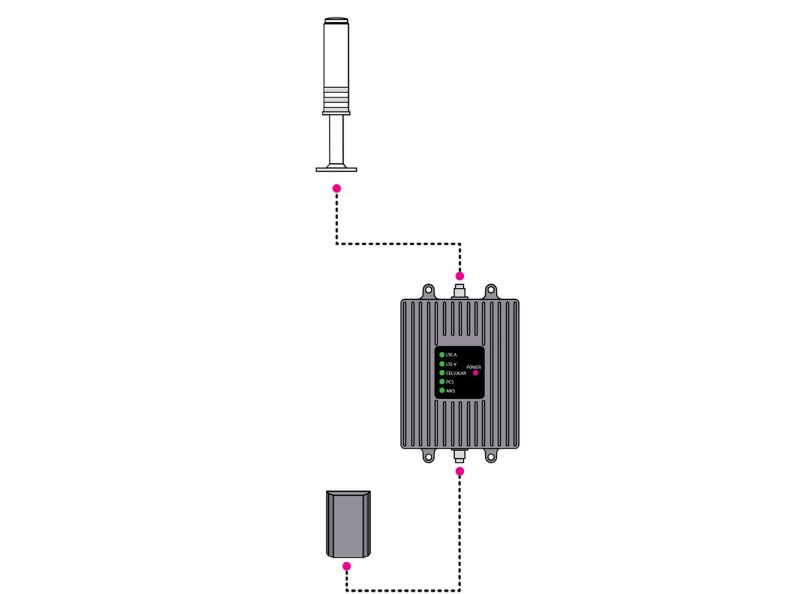
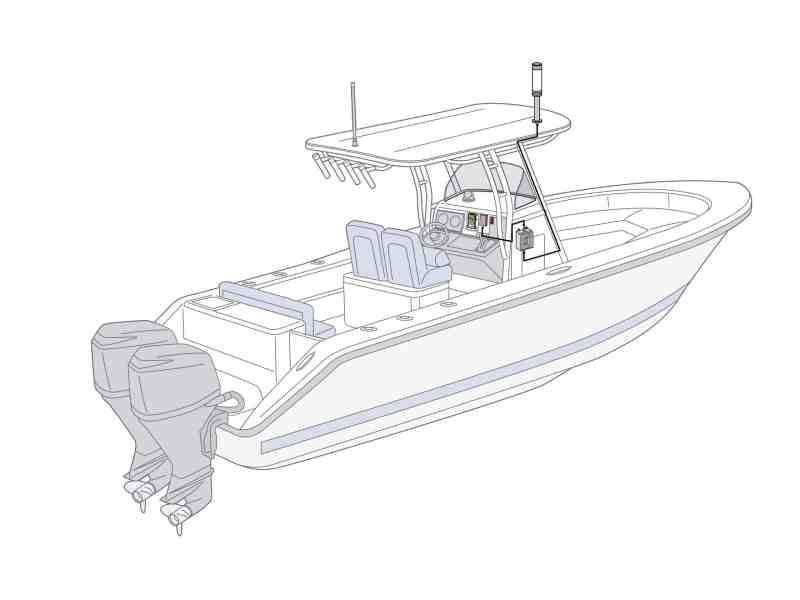
Select a dry location behind the helm, inside the center console or within a cabin interior to install the booster module. The module should be mounted vertically using screw fittings. Place the booster temporarily in the location until cables are installed. This will give you an opportunity to plan how to route the cables. If the antenna cables are not long enough, consider relocating the booster unit and/or antennas.

Route the 20-foot cable from the outside antenna to the booster and connect to the port marked outside. Next, route the 10-foot cable from the helm antenna to the port marked inside on the booster module. Tighten the connections to the booster module and secure the cables along their runs. When securing the cables, be sure to remove any kinks or loops that might lead to damage to the insulation or the wires inside.
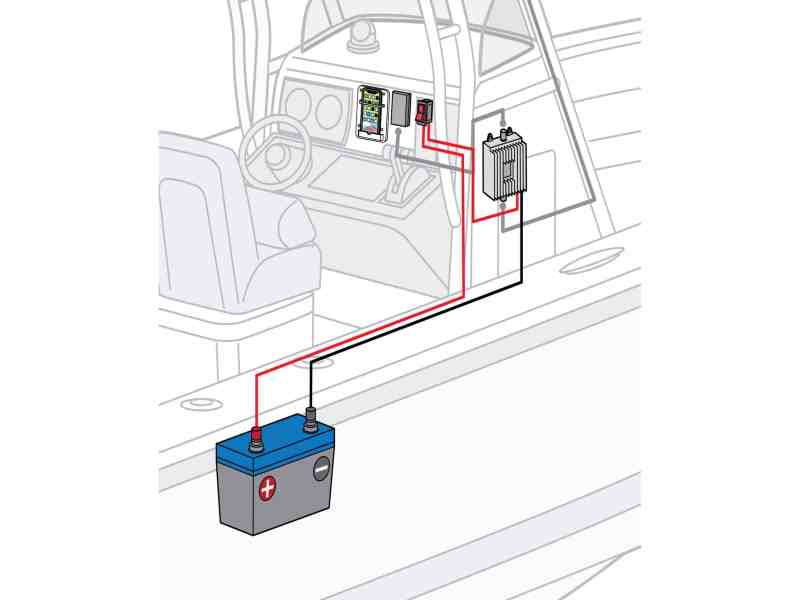
Run the power line through a rocker switch or circuit breaker to ensure power is not drawn when the system is not in use. Connect the positive (red) and negative (black) wires to the boat’s power supply—battery, ignition, bus bars or fuse box, whichever is located most conveniently. Connect the DC power cord to the booster and tighten the connection. Finish mounting the booster with the supplied hardware.
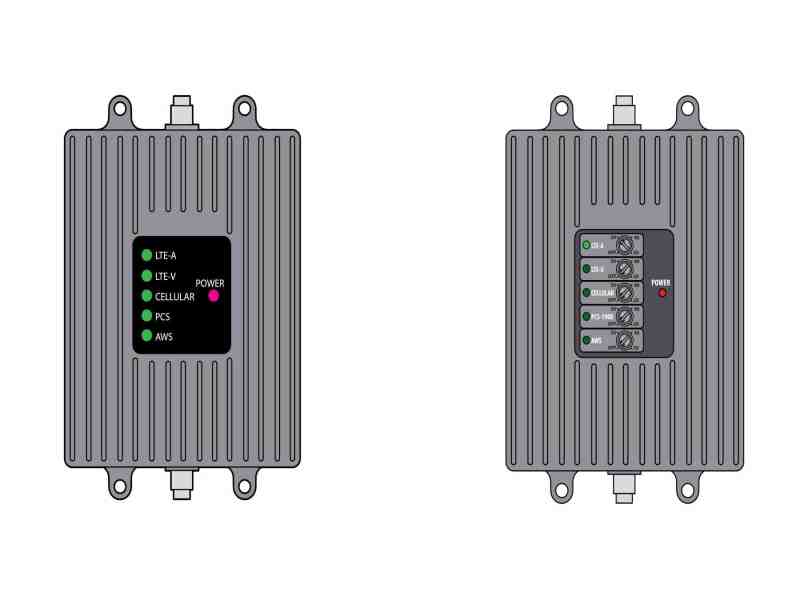
Turn on the system. Once the power LED turns on, the booster is ready for use. The alert LEDs flash up to 15 seconds to show the frequency band is operational. While in port, the alert light may flash green slowly. This means the booster is self-adjusting due to over-signal. It auto-adjusts the gain if there is a strong signal. Flashing will resolve, returning to full power once you leave the dock. If red alert LEDs appear, increased antenna separation is likely needed. If this occurs, check the troubleshooting section of the installation manual.


