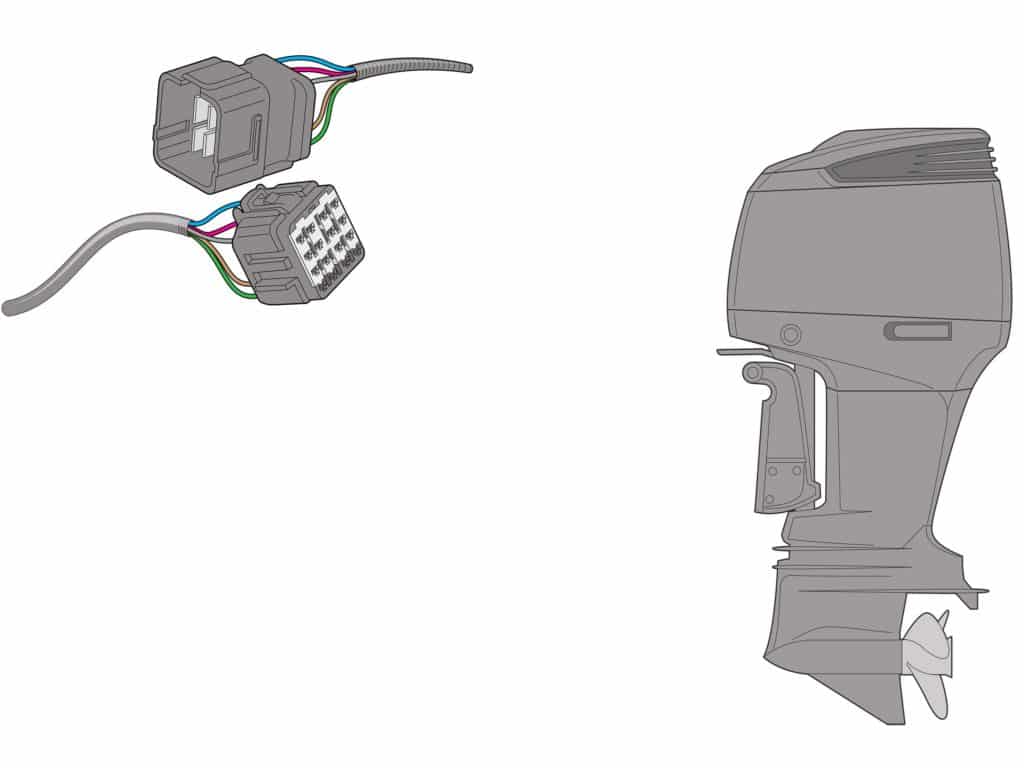
Most marine-engine harnesses and many electrical accessory wires now come equipped with plug-and-play connectors that help make short work of rigging jobs. These connectors easily snap together or into an electrical port. They can just as easily disconnect by pressing on a small tab to release the snap-lock.
Connectors from companies such as AMP, Bosch, Deutsch, Furukawa, Sumitomo and Yazaki contain multiple terminal pins—female terminals on one-half of the connector, with corresponding male pins on the other half—that are connected to wires and retained within impact-resistant, nonconductive plastic housings. Rubber seals at the wire/pin connection and on the mating surface of the connector help prevent water intrusion and keep corrosion at bay. These connectors are also designed to minimize electrical resistance, which can prove critical in digital applications.
However, sealed connectors are not fool-proof. Wire insulations can chafe and corrode. And in extremely damp conditions, moisture can eventually seep inside the connectors and corrode the terminal pins. If this occurs, you can replace the damaged pins inside the connector, saving the expense and trouble of buying and installing an entirely new harness.
Repinning a connector is an easy job once you have the right terminal pins, wire seals and tools, though it requires patience, good lighting and perhaps a magnifying glass. Here’s how we proceeded after discovering corroded pins inside the female side of a Sumitomo DL 090-series 16-pin sealed connector on the main electrical harness of a Suzuki DF200AP outboard engine.
Skill Level: 2 of 5
Finish Time: Approx. 15 minutes per terminal pin
Tools and Supplies
- Terminal pins ($0.24 each for DL 090-series female, $0.19 each for DL 090 male, cycleterminal.com)
- Rubber wire seals ($0.17 each for DL 090-series for 18 to 22 AWG wire, cycleterminal.com)
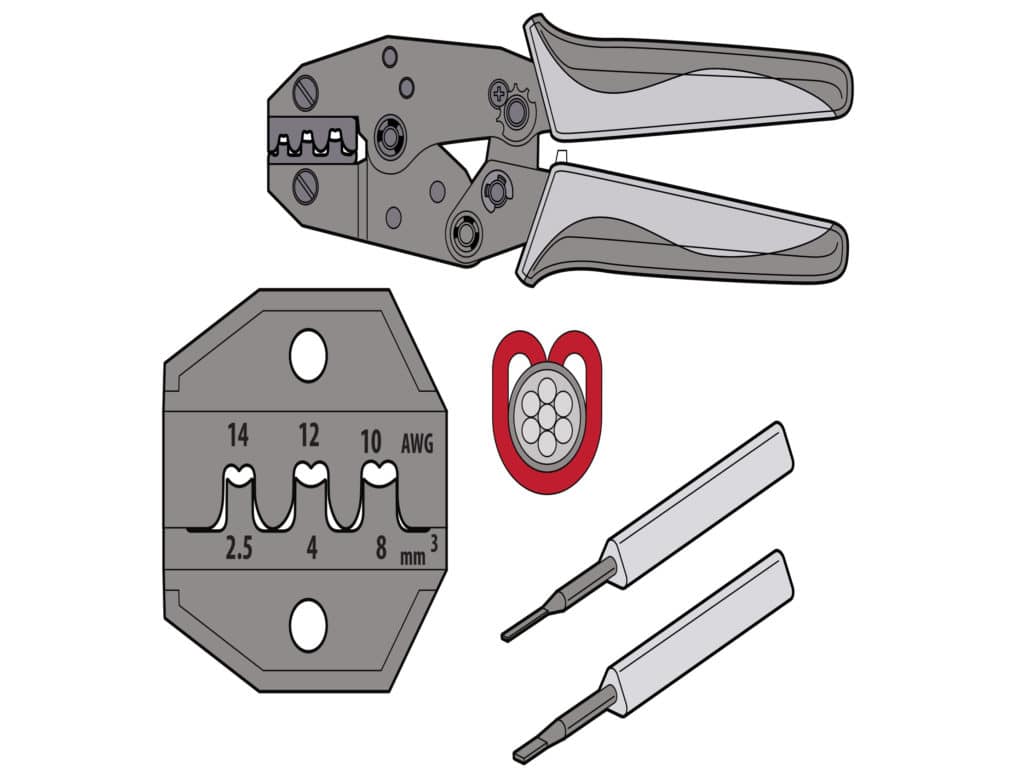
- Terminal extractor tool ($7.85, tecratools.com)
- Terminal pin crimping tool ($33.95, cycleterminal.com)
- Wire cutters/strippers
- Magnifying glass

Matching Pins and Seals
There are myriad sealed connectors using different styles of plastic housings, terminal pins and rubber wire seals. To find the right items, ask your boat dealer, who might order them for you. In our case, we searched online and found cycleterminal.com. By perusing the photos on the website, we found the same two-part connector, as well as the male and female terminal pins and rubber seals that fit the 18 AWG wire on the electrical harness. Within four days, the parts arrived, and we were almost ready to proceed.
The Correct Tools
In order to move ahead, you will also need a couple of comparatively inexpensive tools to repin a connector. One is a terminal extraction tool, a narrow flat blade that inserts inside the small terminal hole and lifts the tiny plastic tab that snaps over the pin to hold it in place. We ordered cycleterminal.com’s ET120 for this. The other tool is a special crimper with B-shaped dies for the bare wire crimps. We ordered the ECT47 to crimp the pins to the exposed wire and crimp the rubber seal to the wire insulation.
Tip: Before creating a final crimp, it pays to get some spare wire (the same size as the harness wire) and a few extra terminal pins and wire seals to practice and perfect your crimping technique.

Pin Removal
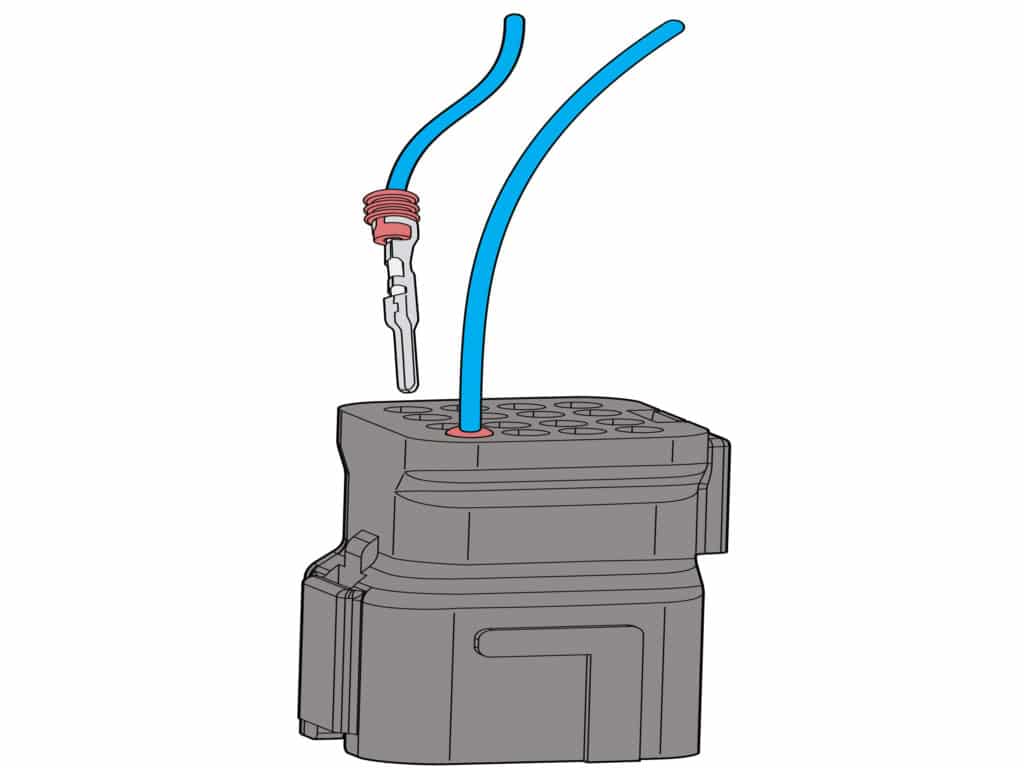
With the two-piece connector snapped apart, use a pair of needle-nose pliers to gently pull out the white plastic secondary retainer inside the plastic female connector housing. This will give you access to the terminal pins within the connector. Insert the terminal extraction tool blade between the affected pin and the small plastic tab holding it in place. Apply gentle lifting pressure to the tab while carefully pulling out the corresponding wire from the back of the connector. It might help to have a friend pull on the wire while you lift the tab.
Read Next: 14 Tips for Avoiding Electrical Problems

New Pin and Seal
If practical, pry away the old crimp to avoid cutting the wire. Inspect the wire for corrosion and fraying. If needed, cut the wire and strip the insulation to expose 5 to 6 mm of bare wire for the new pin. Slide the seal over the wire insulation with the more slender collar toward the bitter end, where it will be crimped in place. The DL 090 pins require a two-step crimp on the bare wire using a 1.25 mm die for a pre-crimp and a 0.5 mm die for the finish crimp. A third 2.5 mm round die is for crimping the seal’s collar to the wire insulation.
Tip: Take note of the orientation of the terminal pin as you pull it out from the back of the connector. This will help ensure that when you insert the new pin, it will be right-side up. Also note if it’s a male or female version, and replace with a like terminal pin.
Insert the New Pin
Gently insert the new terminal pin through the same hole in the back of the connector that the old terminal pin previously occupied. Make sure the pin is in the correct orientation because the top and bottom of the terminal pins are different. Carefully push with your fingers behind the rubber seal while listening attentively for a click inside the connector, indicating that the pin has seated properly. Visually check inside the connector to confirm the correct positioning of the pin. Once finished, snap the plastic secondary retainer back in place.