Navigating unfamiliar, crowded and confined waters at night can prove tricky. Chart plotters and radar can take you only so far. Eventually, you need to eyeball potential hazards, be it a row of mooring buoys, a protruding pier or a rock jetty. That’s where a spotlight comes in handy. You can light up objects that you might not otherwise see, including low-lying hazards such as floating timbers that marine radar can’t pick up.
Read Next: How to Choose Boat Spotlights for Boats
If you do much boating at night, you need a spotlight. Permanent-mount models are available from a host of brands, including ACR, GoLight, Guest, Jabsco and Marinco. For this project, we chose a -state-of-the-art GoLight Stryker LED spotlight with a wireless handheld remote that lets you pan full circle and tilt the beam over a vertical 135-degree arc to illuminate targets. Occupying a 7-inch-square footprint, the compact, lightweight 12-volt DC light draws 2.8 amps and produces 410,000 candela of peak beam intensity.
Skill Level: 1 of 5
Finish Time: Approx. 3 hours
Tools and Supplies
• GoLight Stryker LED Spotlight with wireless handheld remote ($599.99, westmarine.com)
• Power drill and set of drill bits
• Phillips screwdriver
• Marine-grade tinned wire for 12-volt DC positive and ground connections (length and size depends on length of run)
• Electricians snake for running wires through rigging tubes
• Assorted marine crimp connectors with heat-shrink collars
• Crimping tool and wire stripper
• Heat gun (for heat-shrink connectors)
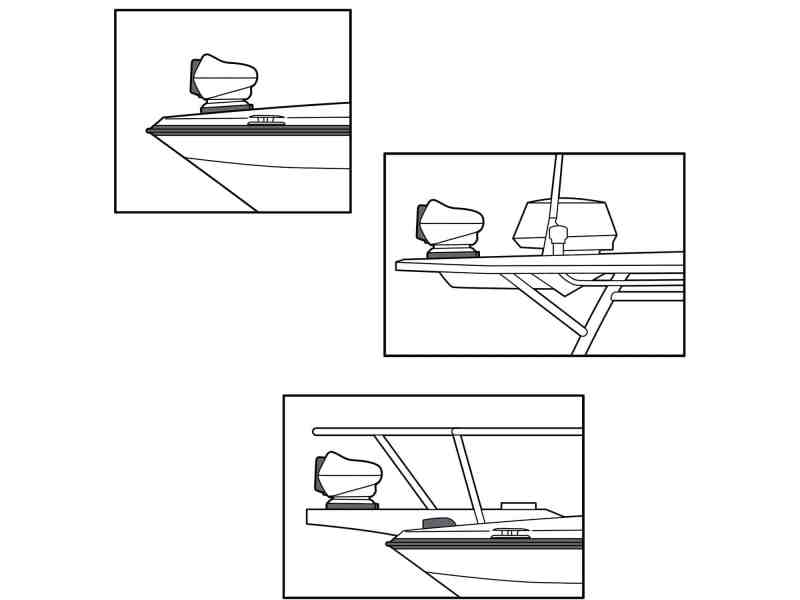
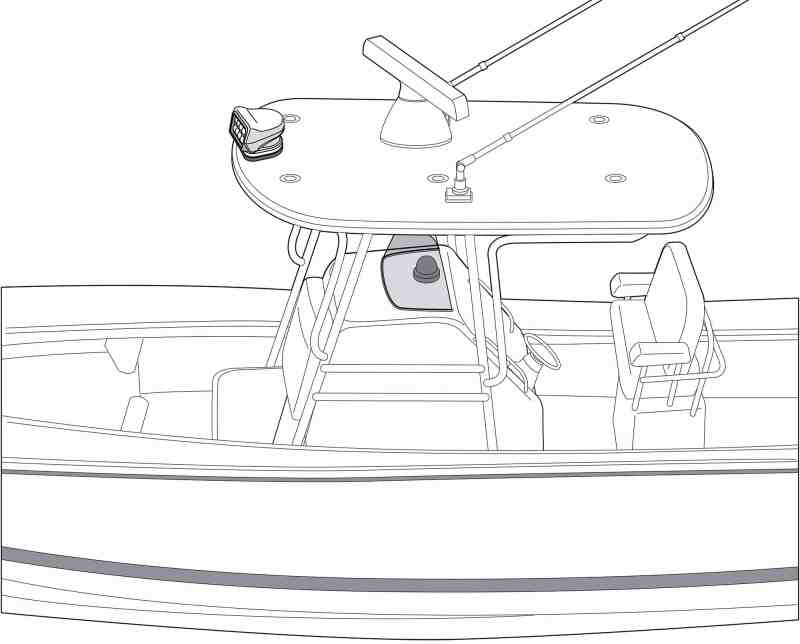
Most spotlights are mounted on a hardtop, the tip of the bow or the end of a pulpit. GoLight also offers bar clamps ($94.50) for mounting the light on a bow rail. Bow mounts help reduce reflected glare from the foredeck, but this location effectively limits the degree of rotation to roughly 180 degrees forward. Hardtop mounting lets you pan 360 degrees, but can result in blinding glare when aimed down and forward at the bow area of the boat.

Remove the mounting plate from the light. Center the mounting plate with the vise screw to the back on the mounting plate. Mark the hole locations for the three mounting screws and drill a pilot hole for each with a 1/8-inch bit. Fasten the stainless-steel mounting plate with the three supplied No. 10-type AB cross-recessed pan-head self-tapping screws. Drill a 1/4-inch hole in the center of the mounting plate’s opening to accommodate the 12-volt DC positive and ground wires.
Tip: Spray the mounting-plate surface with a light amount of silicone lubricant for easier installation.
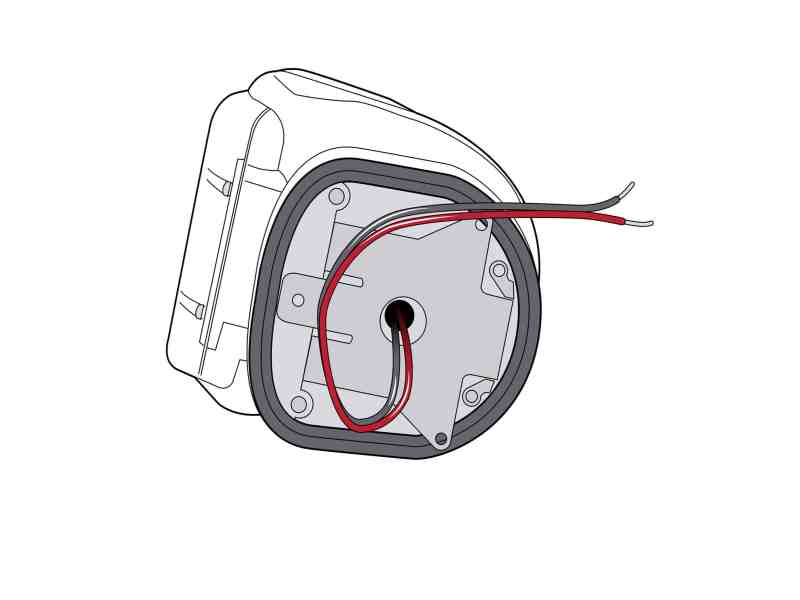
Slide the positive and ground wires through the 1/4-inch hole, and apply some silicone sealant around the wires to seal the drilled opening from water intrusion. Place the light over the mounting plate by sliding the front of the light over the front of the mounting plate, then pull the light backward and seat the back of the light on the mounting plate. Displace the back of the gasket and install the vise screw (provided). Tighten the vise screw using a Phillips screwdriver. Reposition the gasket.
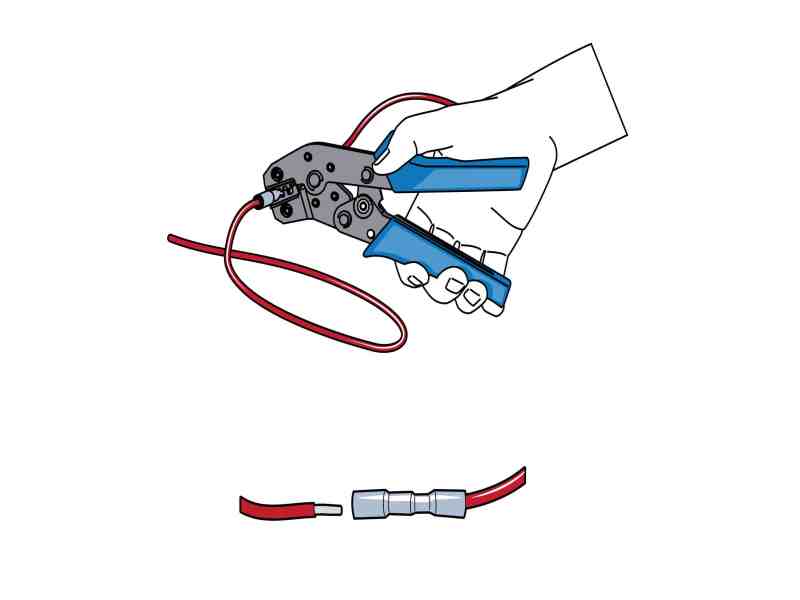
Run marine-grade tinned positive and ground wires to the mounting location using the appropriately sized wires based on the 2.8-amp demand of this spotlight and the length of the wire run (see Blue Sea Systems Circuit Wizard at circuitwizard.bluesea.com). Install an in-line 5-amp fuse in the positive wire, and then connect the wires using marine crimp butt connectors with heat-shrink collars. Run the ground to a negative bus bar and run the positive wire to a switchable 12-volt DC positive power source.
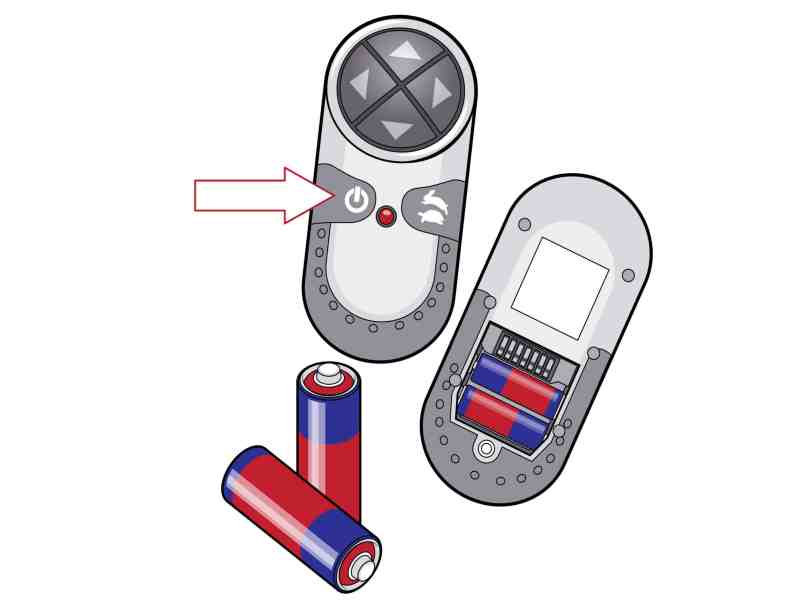
Turn off the power to the light. On the remote, remove the Phillips-head screw to remove the cover. Insert the supplied GP 23 12-volt batteries according to the correct polarity, and replace and secure the cover. Depress the on/off button and hold it down. A red LED will illuminate. While holding the on/off button down, switch on the power to the light. Keep the on/off button depressed for five to six seconds, and then release to program the light. You should be able to move the light using the remote.


