Tour a boat show, and you’ll see a lot of ways to shade the deck, with an increasing emphasis on the bow area, spurred by the popularity of forward seating on center- and dual-console models.
A number of canvas bow shades are available from brands such as Boat Canvas Factory, Gemlux, SureShade, T-Top Boat Covers, TaylorMade, Taco Marine and others. There are a number of ingenious designs, but many include poles—or some come with special bases or use gunwale rod holders for bases—for securing the forward section of the canvas, with the aft portion of the shade secured to a hardtop or canvas T-top frame.
You’ll need to know how to install gunwale mount rod holders to complete this task. Here are instructions.
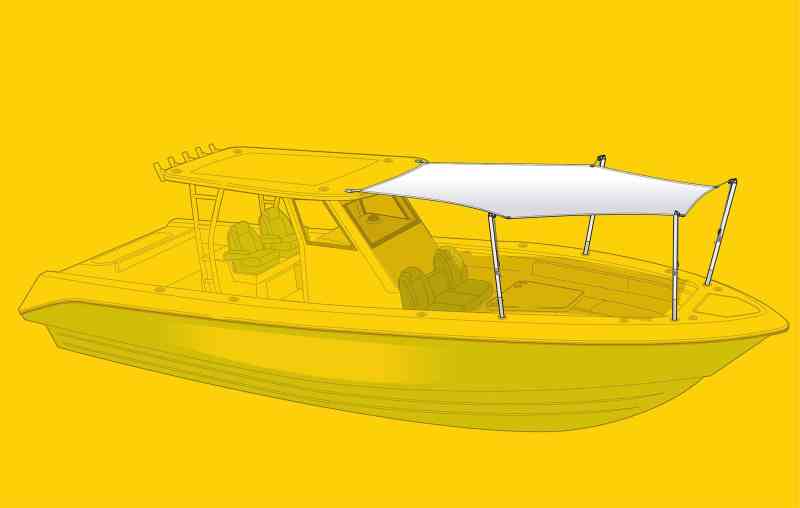
For this project, we chose the new four-pole bow shade from Boat Canvas Factory based in Pompano Beach, Florida, and used the Everglades 335 center-console as the subject boat. This white Stamoid canvas shade is designed to fit a boat with a hardtop, and it is neither the simplest nor most complex DIY shade installation. Neither is it the least expensive, but we like it for the amount of shade it casts, the ease of putting it up, and the abilities to cruise at a moderate pace and stow it in an onboard locker when not in use.
Skill Level: 2 of 5
Finish Time: Approx. 1 hour (excluding rod-holder installations)
Tools and Supplies
- Boat Canvas Factory four-pole bow-shade assembly ($3,400 plus shipping, boatcanvasfactory.com)
- Four gunwale rod holders with 15-degree tilt, unless boat is already equipped with forward rod holders ($40.98, boatoutfitters.com)
- Power drill and drill-bit set
- Hole-saw set (for rod-holder installation)
- Phillips screwdriver
- Marine sealant
- Marking pencil
- Rags to wipe away excess sealant
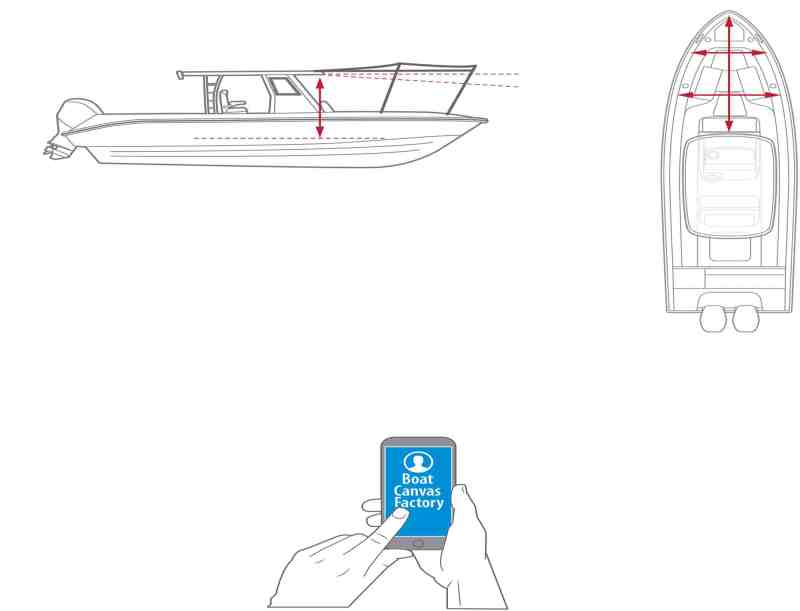
The first step is to call Brian Crist, owner of Boat Canvas Factory (954-781-1970), who will ask for key measurements, including the width of the hardtop, length of the bow, and width at two points. He will also want to know the height of the hardtop and whether you want the shade to be level or slope downward toward the bow. This will determine the heights of the four stainless-steel support poles. The company can ship your shade anywhere and answer any follow-up questions.
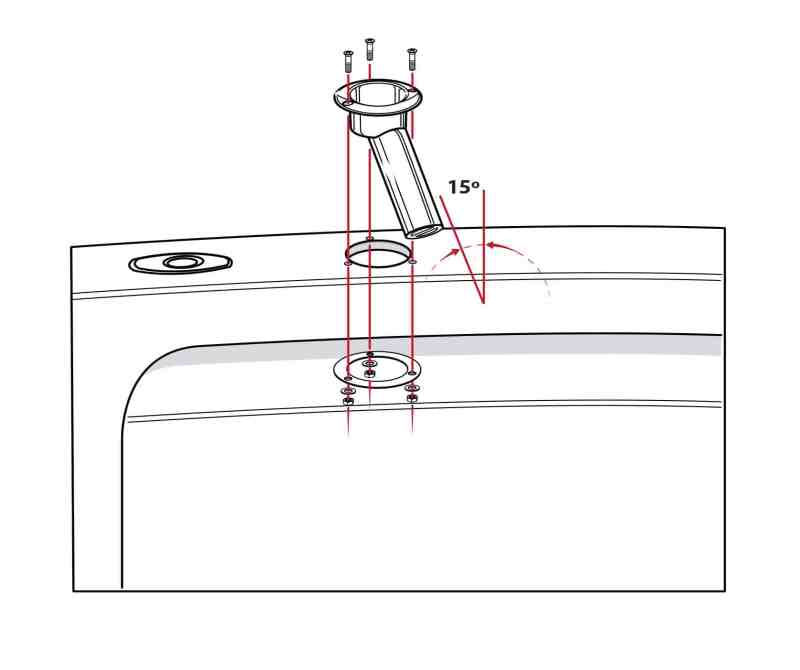
Two pairs of forward gunwale rod holders with 15-degree tilt angles are required for the four support poles. If you don’t already have such holders, install them at the locations and angles specified by Crist. Consider Mate Series rod/drink holders (see boatingmag.com/retrofitting-with-mate-series-rod-holders). Make sure they feature sturdy stainless-steel construction, are through-bolted with backing plates, and are properly bedded with marine sealant to prevent water intrusion.
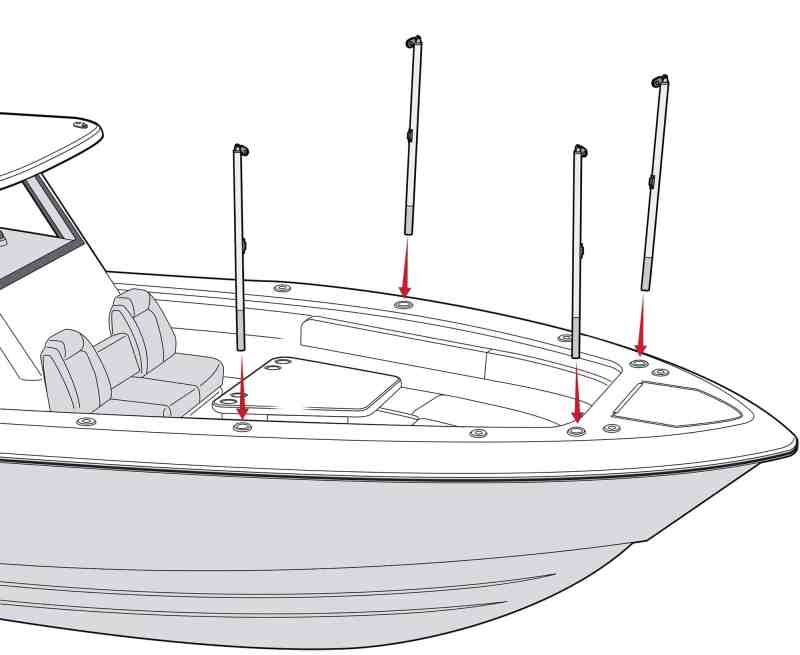
Place the poles in the rod holders. A vinyl sleeve creates a snug fit, and the notch in the bottom locks into the rod gimbal. Thread the forward lines of the shade through the pulleys atop the forward poles and then down through cam-lock fittings near the base of each. Attach the aft two lines to the back poles in the same manner. Leave about 10 to 12 inches of line between the canvas and pulleys for now. You will tighten these lines to bring the shade taut after completing the last step.
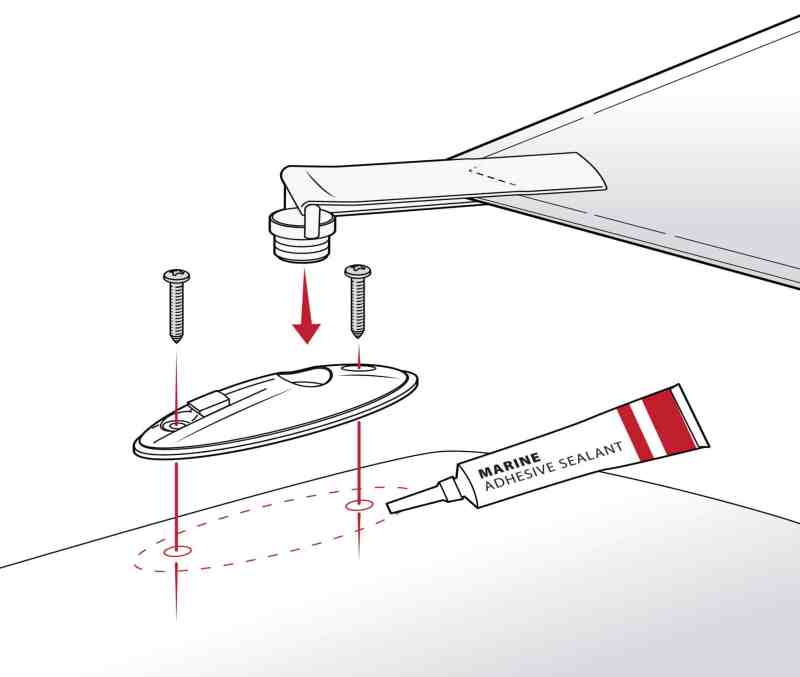
This shade uses a pair of low-profile, quick-release stainless-steel mounts atop the forward portion of the hardtop to secure the aft corners. Stretch the aft side of the shade back symmetrically and taut across the front of the top and mark the two corners, each of which is equipped with an insert for the quick-release mount. Mark the location for the mounts symmetrically on each side of the top. Drill the mounting holes for each, bed with marine sealant, and secure the screws.
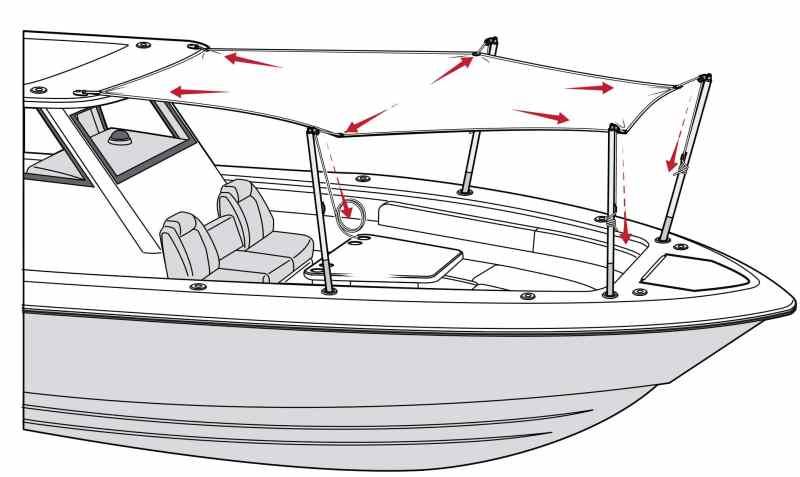
Attach each insert on the corners of the canvas in the appropriate quick-release mount, then tighten the forward lines by pulling down through the cam-lock fittings. Then tighten the two middle lines by doing the same. The result should be a taut canvas that extends to the sides to increase the shaded area (versus a two-pole shade) and provides plenty of headroom. The design allows wind blowing into the bow area to escape through the gap between the hardtop and canvas, negating any parachute effect.


