Whenever working on your boat’s electrical system, always work safely, taking especial care where batteries are concerned.( Wear eye protection, take care to avoid sparks, remove all jewelry). Also, it is good practice to adhere to the guidelines set down by the American Boat and Yacht Council. If after reading this article, you feel uncomfortable working with electricity, contact an ABYC-certified marine electrician
Many boats function nicely with a single-switch panel at the helm to control 12-volt systems. Yet you might need more switches, such as when adding marine electronics. One of the best solutions is adding a distribution panel that routes power from the battery to various components or secondary switch panels. These are available from a number of brands, including BEP Marine, Blue Sea Systems, Paneltronics and Sea-Dog, in a wide range of configurations. Before you start, disconnect all DC and AC power.
Quick Tip: Use Blue Sea Systems’ DC Circuit Wizard at circuitwizard.bluesea.com to guide you in suitable wire size and fuse/breaker selection for the main DC feed, as well as branch circuits.
Getting Started
Skill Level: 4/5
Time to Complete: 5 Hours
Tools and Supplies
*Blue Sea Systems 360 Series No. 1200 eight-position distribution panel ($219.95; shop.pkys.com)
*Blue Sea Systems panel back insulation cover, No. 4027 ($24.99; overtons.com)
*In-line fuse or circuit breaker for main cable for DC feed
*Jigsaw
*Phillips screwdriver
*Drill motor and bits
*Masking tape
*Wire stripper and crimper
*Marine-grade tinned electrical wire and cable
*Assorted ring connectors with heat-shrink collars
*Heat-shrink tubing
*Electrician’s snake (to run main cable and accessory wires)
1. Choose a Location
Since the panel we installed would distribute 12-volt DC power to marine electronics with built-in on/off switches — and because we had limited space at the helm station — we looked for a vertical surface inside the cabin of our walkaround cuddy project boat. We chose a carpeted wooden bulwark behind the helm station spanning 6 inches in width, 9 inches in height and 6 inches in available depth.
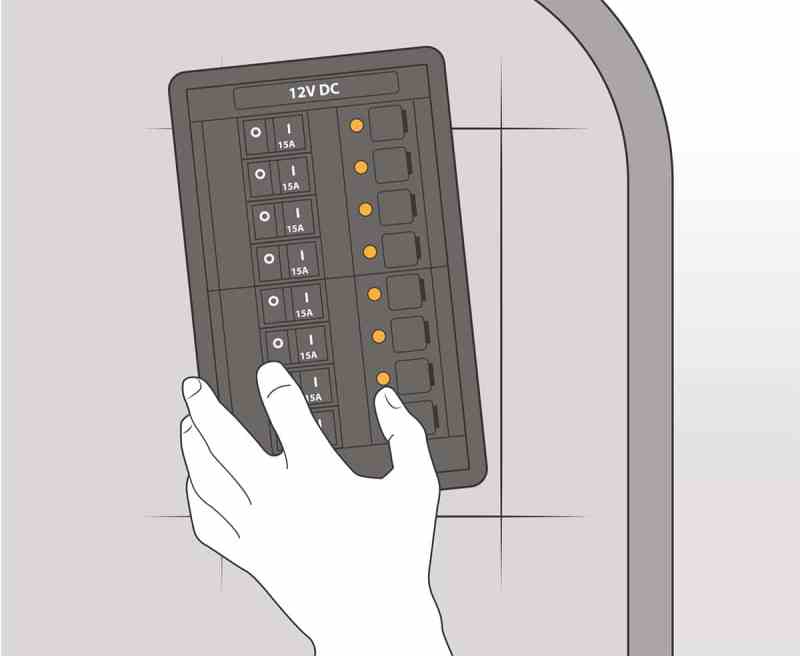
2. Select the Panel
We picked the Blue Sea Systems 360 Series No. 1200 eight-position panel (4.88 inches wide by 7.75 inches high). Each rocker switch includes a 15-amp breaker (higher amps available), an LED indicator and recesses to prevent inadvertent tripping. Backlighting lets you read the labels at night. An interior installation precludes the need for a waterproof model such as Blue Sea WeatherDeck panels designed for exposed areas.
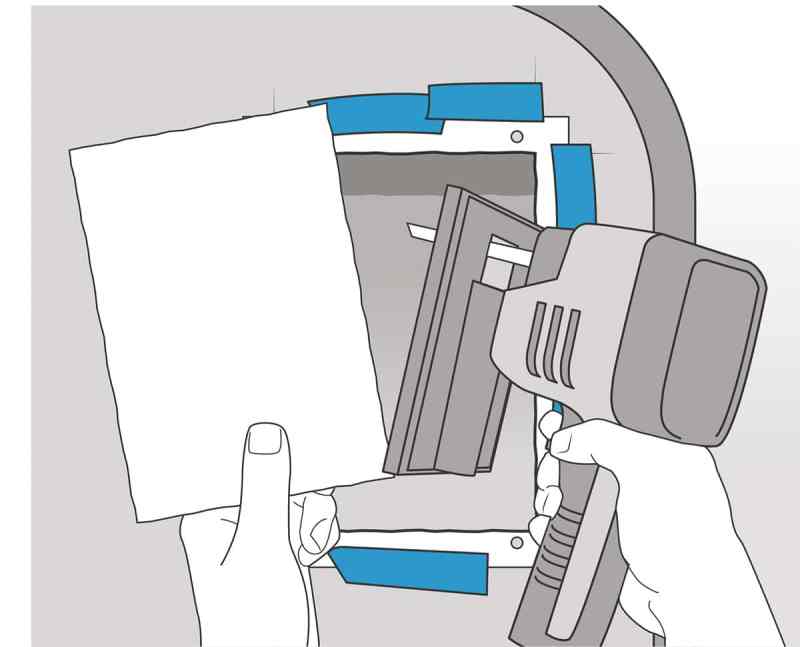
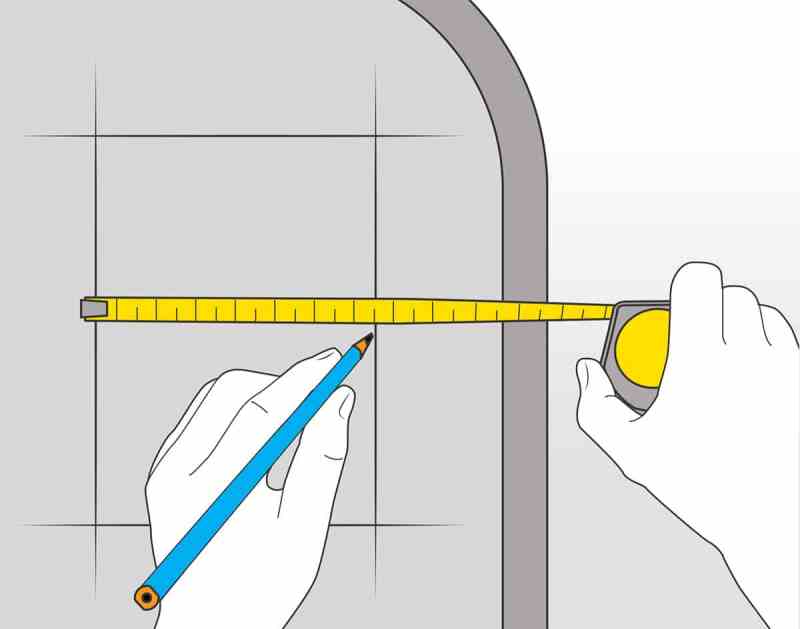
3. Make the Cutout
Tape the supplied template in position, making sure there’s nothing interfering with the 3-inch depth of the panel behind the mounting surface. Start the 47/8-inch by 7¾-inch cutout by drilling just inside each corner. Then cut along the lines with a jigsaw, taking care not to damage any wires or hoses behind the mounting surface. Also use the template to mark and drill the holes for the mounting screws.
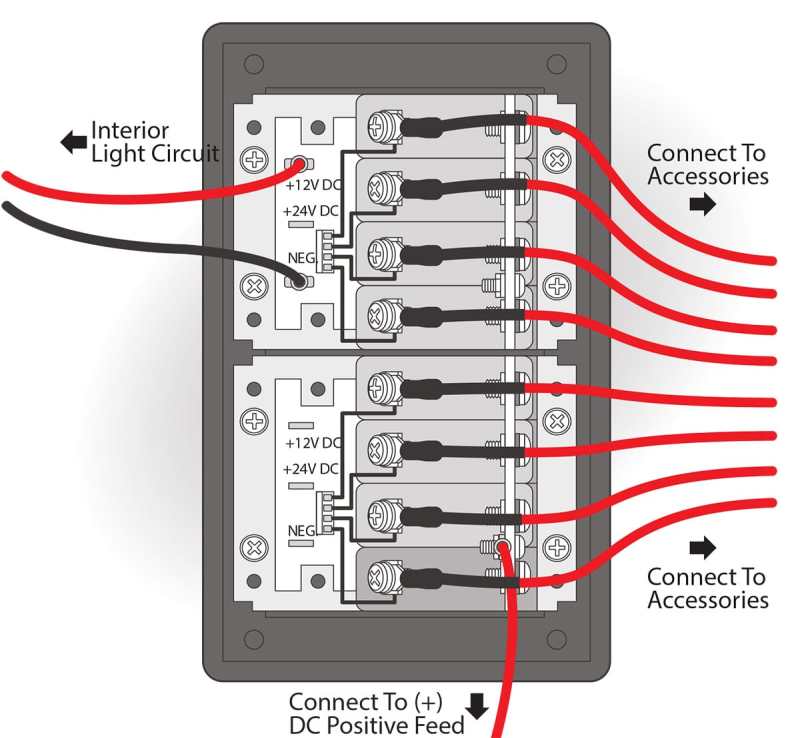
4. Run the Wiring
Route a fused positive cable from the battery or battery switch to the panel’s positive feed, and run positive wires from each accessory to each switch. Use crimp-on marine ring connectors with heat-shrink collars and a second layer of heat-shrink tubing to connect all wires. Dedicated positive and negative wires from the interior light circuit will activate the backlighting and serve to ground the LED indicators.

5. Install the Panel
Before securing the panel, energize each switch to ensure proper operation. Then remove the top and bottom cover plates and use the supplied self-tapping screws to mount the panel. Recheck the switches. To guard against short circuits, install a Blue Sea panel back cover on the rear of the distribution panel with four small self-tapping screws. Use the supplied adhesive labels to designate switch functions.


