Select the application surface; it could be the underside of the hatch or the frame of the hatch. If you stow heavy gear, using the underside of the hatch protects the seal from damage when pulling equipment out of the locker. Measure the width of the mounting surface — this will help guide your selection among the many types of adhesive seals. Make sure you have enough for the perimeter of the hatch.
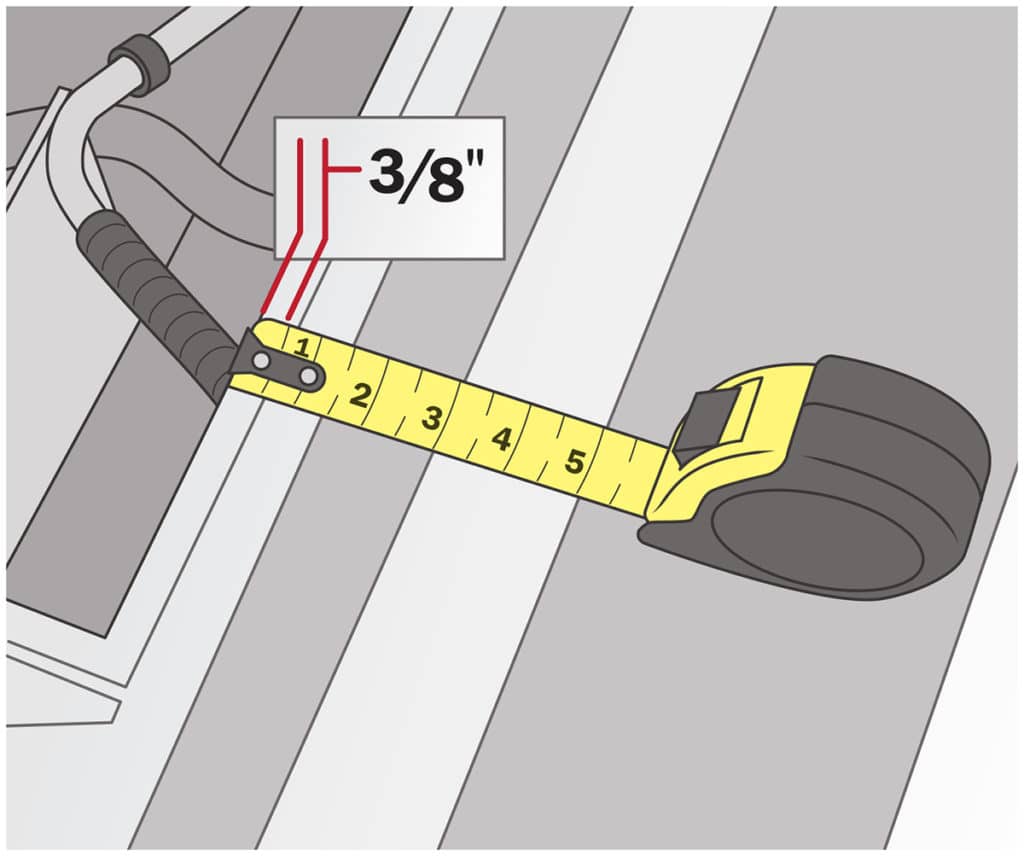
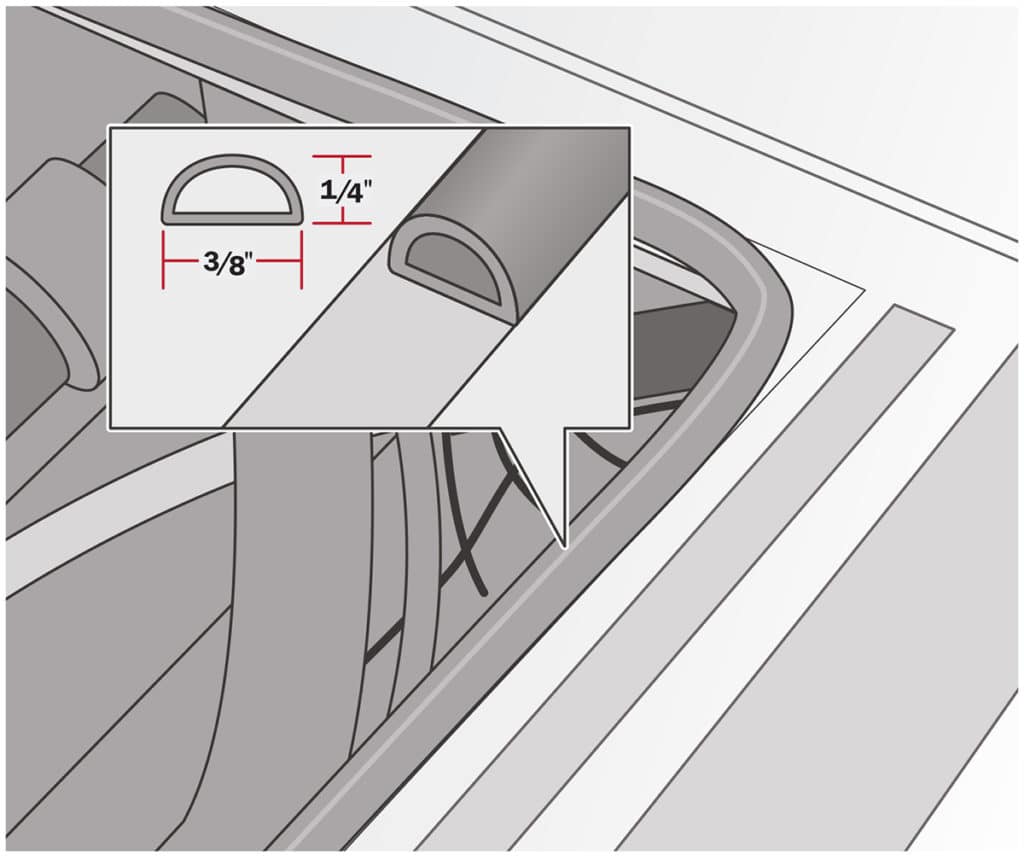
Place a strip of modeling clay in each corner, close the hatch, and then carefully open it. Insert the depth-measuring blade of a caliper into the clay in each corner. Add the dimensions together and divide by four to get the average. Add 25 to 50 percent to compensate for compression. Based on this, we chose Taco’s No. V30-1333 that’s 3/8-inch wide and ¼-inch thick, has a D-shaped profile and comes in a 10-foot roll.
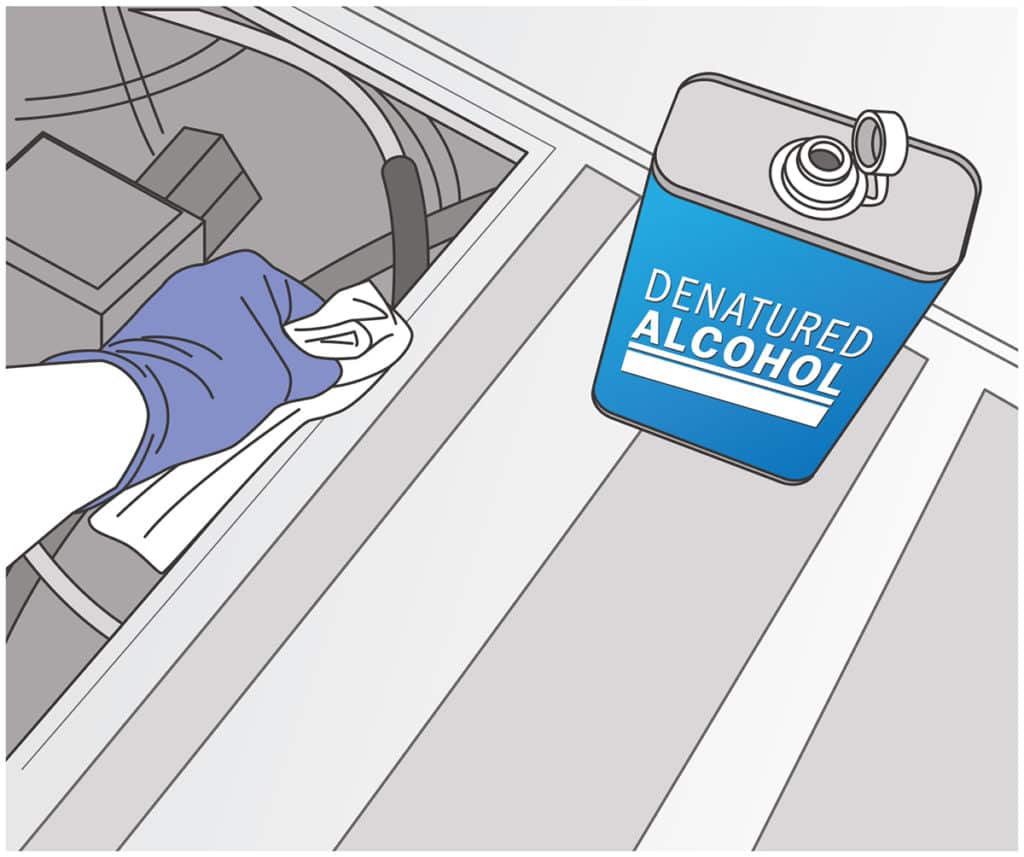
Scrape away any residual material or old glue with a putty knife, and use a solution of one part denatured or isopropyl alcohol and one part water with a clean rag to thoroughly cleanse the surface immediately prior to installing the seal. Do not use acetone, because this solvent leaves a residue that can interfere with proper adhesion. Make sure the surface is dust-free before beginning installation.
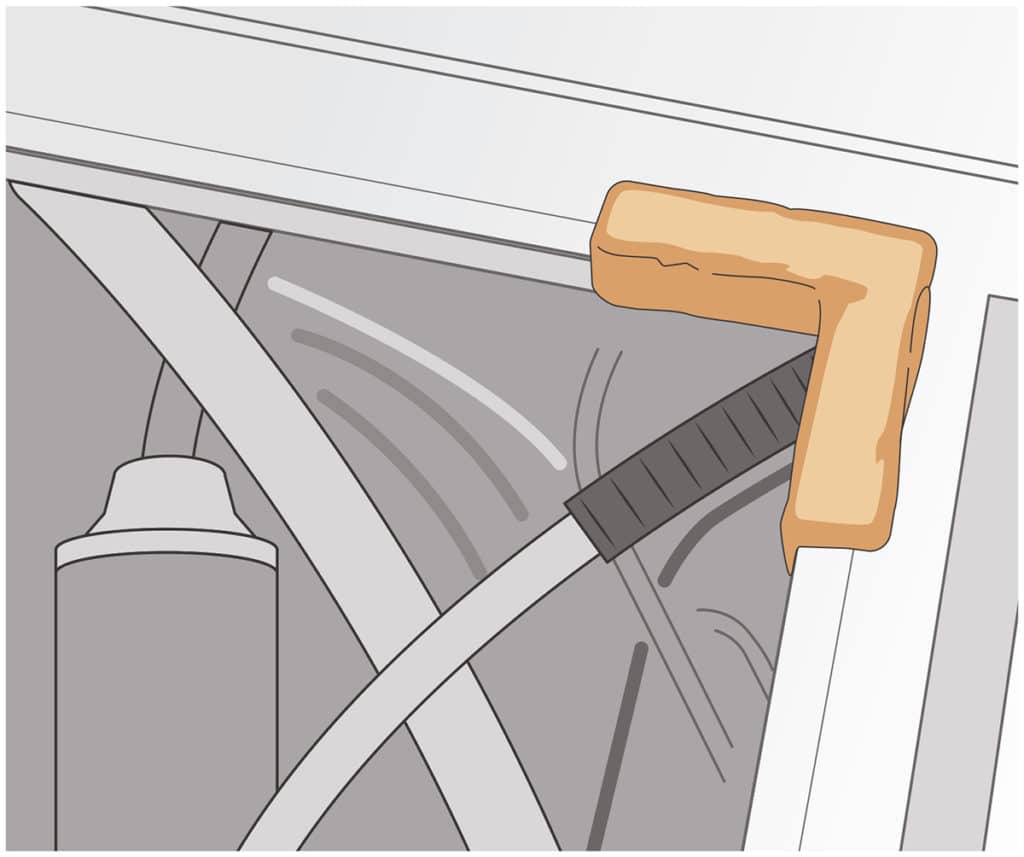
Apply in 6- to 8-inch sections. Avoid peeling away too much of the protective backing at one time. Do not stretch the seal. It’s OK at this stage to peel it off and realign. Feed the seal around corners, being careful to minimize kinks. If the radius is too sharp, miter the material at a 45-dgree angle with a sharp pair of scissors. Butt the ends together so there’s no gap. Close the hatch for 72 hours to cure the adhesive.
Boat interiors can get wet from spray and also when you wash down. Keeping that water from draining into the bilge and lockers requires hatches that are watertight. Most new boats today feature foam-rubber-like gaskets that, when battened with a compression latch, seal out water. They also help reduce annoying rattles.
Yet many boats of yesteryear didn’t feature these seals. Or, if they did, the seals may have worn out by now. Installing a fresh seal is easy, as we demonstrate here on a bilge hatch of a 1986 center-console using a closed-cell medium density rubber seal from Taco Marine, which features a durable self-adhesive backing. This seal is made for Taco by Trim-Lok, a leading supplier of seals for cars and boats. Trim-Lok’s marketing director, Dan Whitener, helped us with this project.
Quick Tip: On vertical hatches, start and stop the seal installation at the bottom of the hatch or frame, since this is the least likely location for water leaks. Apply a few drops of cyanoacrylate adhesive (i.e., Super Glue) to all seams to bond the two butted ends.
Getting Started
Skill Level: 2/5
Time to Complete: 2 hours per hatch
Tools and Supplies
*Taco Marine No. V30-1333 adhesive weather seal ($18.99/10 feet, westmarine.com)
*Tape measure
*Caliper with depth-measuring blade ($36.97, homedepot.com)
*Putty knife (to scrape off old seals)
*Denatured or isopropyl alcohol
*Clean rags
*Modeling clay ($4.99, officemax.com)
*Sharp scissors
*Cyanoacrylate adhesive
*Rubber gloves