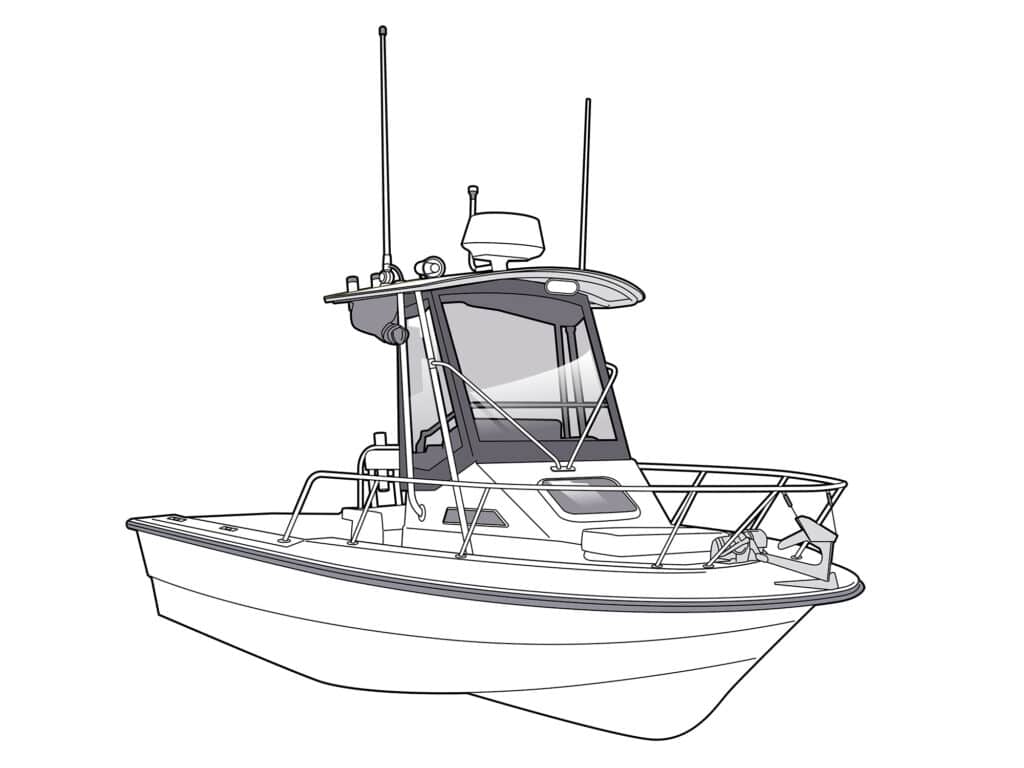
The higher a marine VHF antenna is mounted, the greater the distance its VHF radio can transmit and receive. That means one of the best installation locations for top radio performance is overhead on a boat’s hardtop, an increasingly popular feature on today’s boats.
This location on the roof of a hardtop can also result in high stresses on the mounting surface and the antenna base, especially when using an 8-foot-long fiberglass VHF antenna, one of the most popular styles on today’s boats. There can be wind resistance on the antenna while the boat is at speed or in stormy conditions. Also, rough seas can induce a whipping motion of the antenna as the boat pitches and rolls while traversing waves, or even while just sitting still in a beam sea.
The higher the mounting location and the taller the antenna, the more this motion is accentuated. All that force transfers down to the base and mounting surface. This calls for special mounting techniques to ensure a rock-solid installation to prevent the antenna from breaking loose from its base or damaging the hardtop surface in the process.
In addition, routing the coaxial cable from the elevated position down to a VHF radio can be complicated when mounting an antenna on high. This may require running the cable through the hardtop and down a rigging tube, which can turn frustrating if the tube is already jammed with existing wires and cables. For more on VHF antennas, visit boatingmag.com/vhf-antenna-tips.
Let’s take a look at some of the factors to consider and techniques that ensure a proper VHF antenna installation on a hardtop.
Skill Level: 2.5 of 5
Finish Time: Approx. 2-3 hours
Tools and Supplies
- Shakespeare Phase III 6224R 8-foot, 6 dB VHF antenna ($399.99; westmarine.com)
- Shakespeare 6187 stainless-steel ratchet-antenna mount ($85.84; hodgesmarine.com)
- Shakespeare 20-foot coaxial cable kit ($61.99; boemarine.com)
- Blue Sea Systems Cable-Clam, part No. 1002100 ($44.99; westmarine.com)
- 1/4-inch aluminum plate or 3/4-inch King Starboard to create a backing plate
- Stainless-steel hardware for installing the ratchet mount
- Power drill/drill-bit set
- Screwdriver and wrench set
- Electrician’s snake ($9.99; harborfreight.com)
- Pull cord
- Electrical tape
- Marine sealant
- LanoCote (to prevent galvanic corrosion if bolting the mount into an embedded aluminum plate)
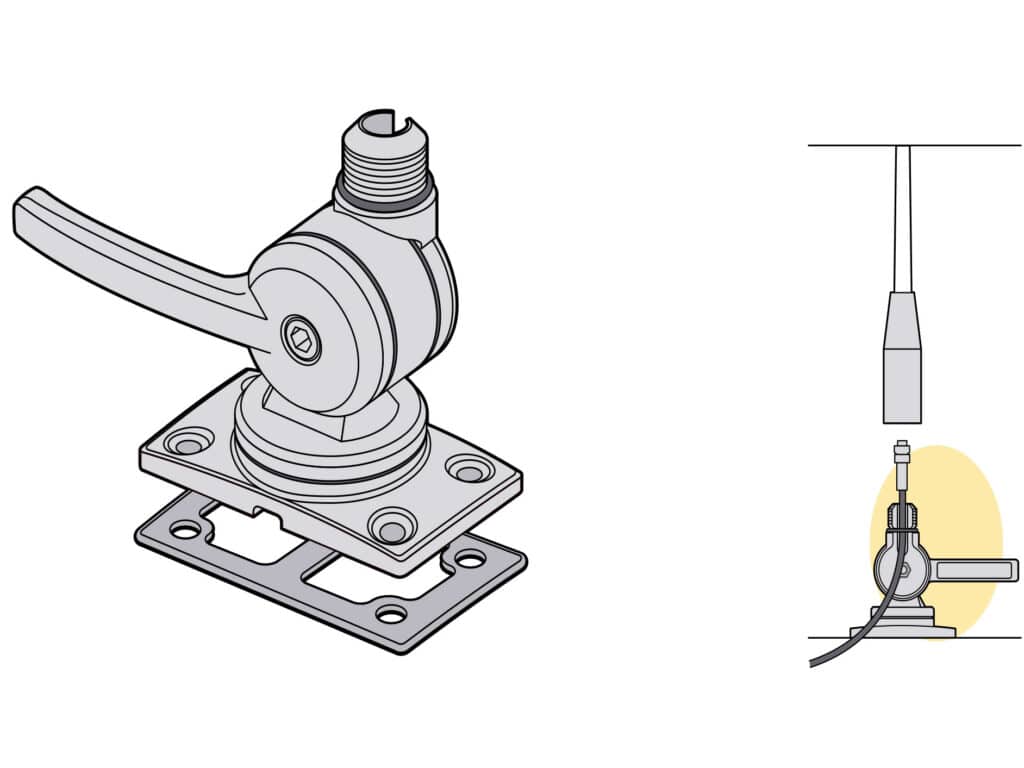
Most VHF antennas are installed using a versatile ratchet mount like the Shakespeare 6187. Mounts feature threaded bases for attaching antennas and enable angle adjustment from side to side and fore and aft to make the antenna as vertical as possible. A quick-release lever allows folding down the antenna for low bridges, trailering and storage. For hardtops, use a robust stainless-steel ratchet mount, rather than the plastic versions that might break in rough seas or degrade over time from UV exposure.
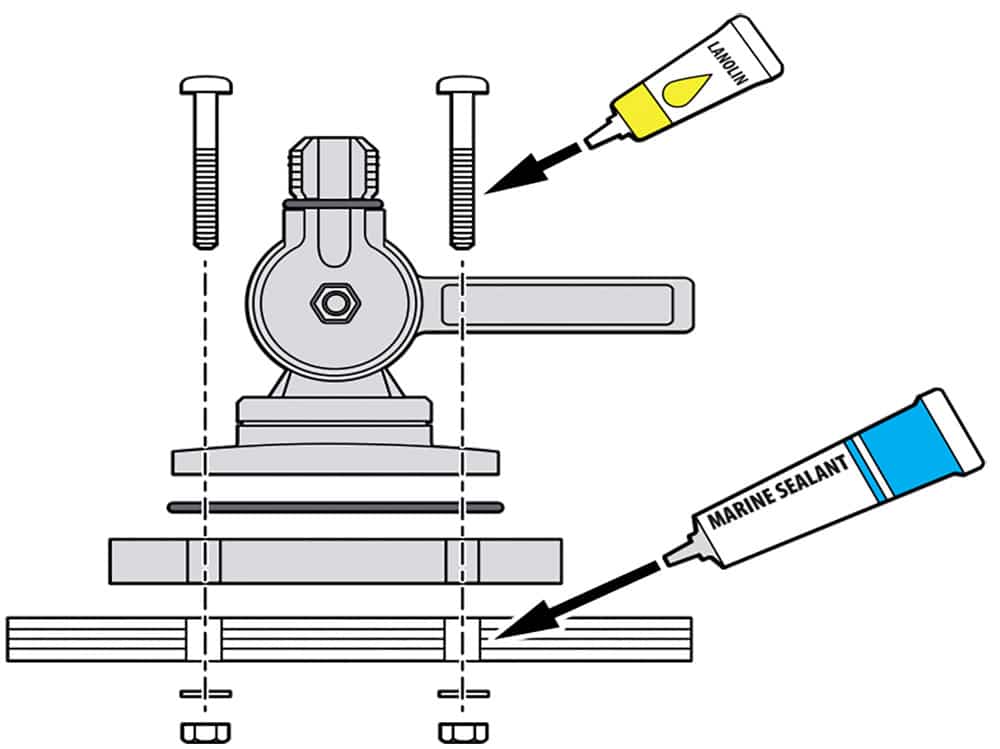
Antenna ratchet mounts use four mounting holes sized for 1/4- or 5/16-inch-diameter oval-head fasteners. Through-bolt the base with stainless-steel machine screws, nylon locking nuts and washers. Some hardtops, particularly hollow foam-filled tops, may come with antenna mounting plates glassed under the roof. In these cases, it is necessary to drill the mounting holes through the plate, then tap each hole to accept the mounting bolts. Use LanoCote on the bolt threads to prevent galvanic corrosion, and bed the holes with marine sealant.
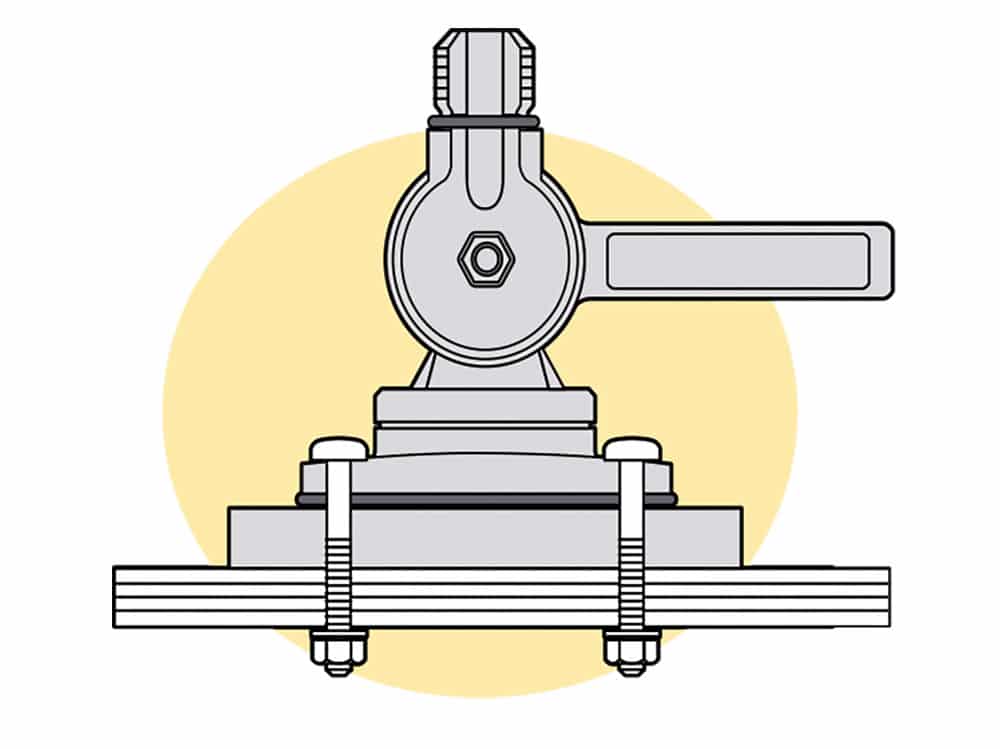
With solid fiberglass hardtops, it is a good idea to brace the antenna mount from underneath to help ensure a solid installation and prevent cracking or damage to the structure or finish, no matter how thick or strong the construction appears. Some aluminum or stainless-steel hardtop frames integrate welded-in backing plates into hardtop construction to facilitate antenna installation. If your hardtop lacks this, use fender washers or make a backing plate from 1/4-inch-thick marine aluminum or 3/4-inch-thick King Starboard.
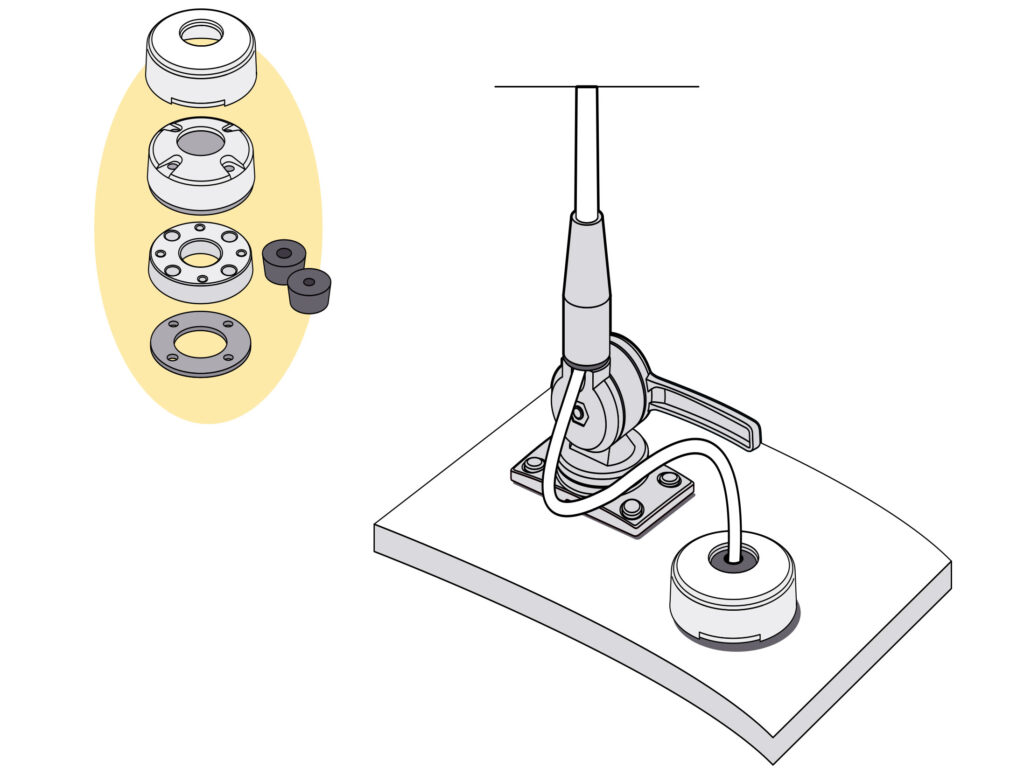
In addition to installing the antenna mount, you’ll need a fitting for the antenna’s coaxial cable to pass through the roof of the hardtop, and you’ll want it to be watertight so that spray, rain or morning dew does not drip through. There are a variety of marine cable fittings, but we used the Blue Sea Systems CableClam (part No. 1002100) with a stainless-steel dress cap. The rubber seal is pre-drilled and slit to fit around the cable, and the stainless cap looks sharp and protects the nylon housing from UV degradation.
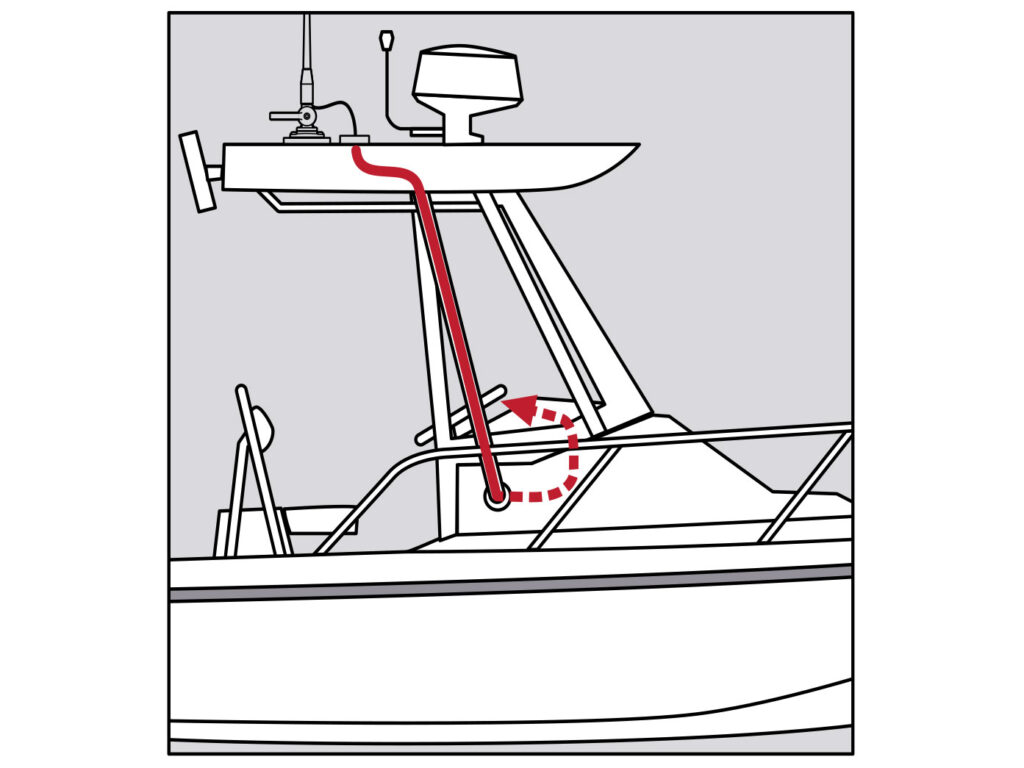
Rigging tubes from a hardtop to the helm vary in design and degree of difficulty. Running a cable though depends on the number of bends and existing cables. Start by pushing an electrician’s snake through from the top down, then attach a cord to the end and pull it back out. Tightly secure the end of the coax to the cord with electrical tape, then coat the taped end with liquid dish soap. Pull the coax down while a buddy feeds the cable through the upper opening. It might bind at the bends, but the dish soap will help it slide through.