Like it or not, mobile phones have become indispensable appendages in our lives, even while boating. More than just a way to converse with family, friends and business associates, and check in on social media platforms while afloat, mobile phones also offer useful boating apps that provide wind and wave forecasts, weather radar, tide tables, navigational data and more.
The upshot is that mobile phones have become part of the boating lifestyle, and as such we need to keep them charged while on the boat.
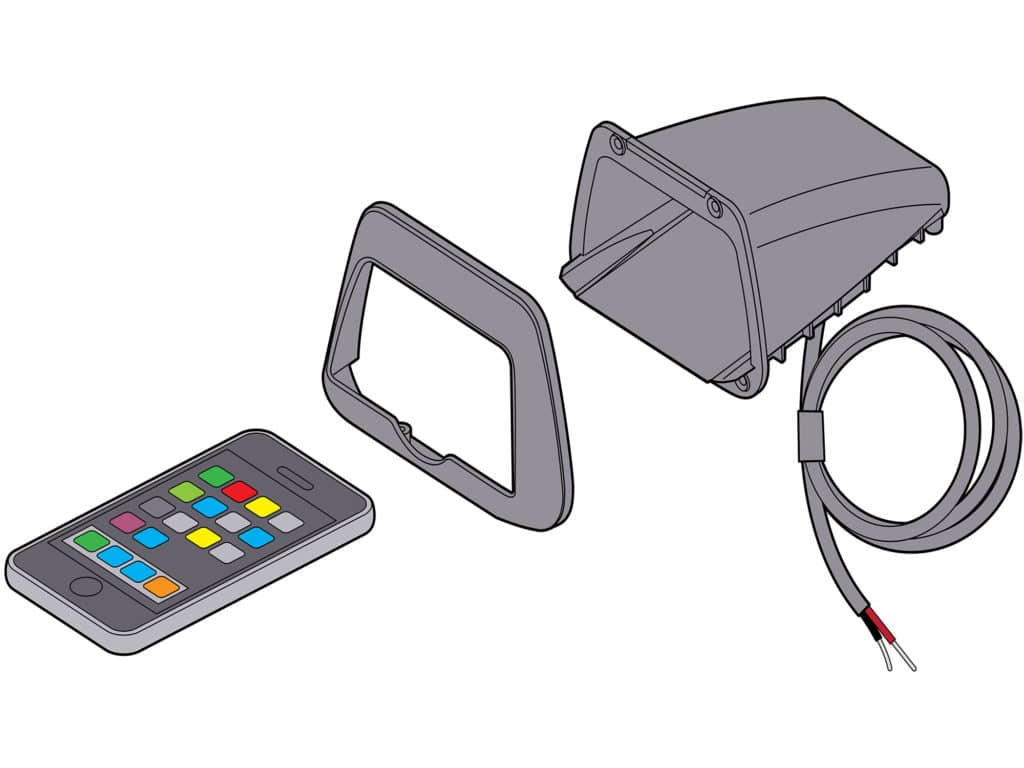
A cottage industry has sprung up in the field of marine phone chargers, but most require that you plug them in. However, a growing number of marine phone chargers are wireless, and one of the latest is the Rokk Nest SC-CW-06E wireless charger from Scanstrut.
Designed for Q1-compatible devices, this IPX6 waterproof charger allows you to tuck away a phone inside a convenient flush-mounted nook with a nonskid pad inside and a fiddle on the faceplate. That helps shield your phone from the elements and prevents it from sliding out of its nook while the Nest inductive charger wirelessly transfers power to your phone.
The Nest can mount on just about any vertical or slightly forward-angled surface with room for (at its widest) the 5.13-inch-by-3.22-inch-tall rhomboid cutout and slightly wider faceplate, as well as the 6.18 inches of unfettered depth behind the surface. Here’s how it can be installed.
Skill Level: 2 of 5
Finish Time: Approx. 2.5 hours
Tools and Supplies
- Scanstrut Rokk SC-CW-06E Nest wireless phone charger ($93.15; amazon.com)
- Phillips screwdriver
- Jigsaw
- Power drill/drill-bit set
- Marine silicone sealant
- Scissors (to cut out template)
- Inline fuse
- Additional marine wire
- Assorted crimp connectors with heat-shrink collars
- Masking tape (to cover surface while cutting hole with jigsaw)
- Shop rags to wipe up excess sealant
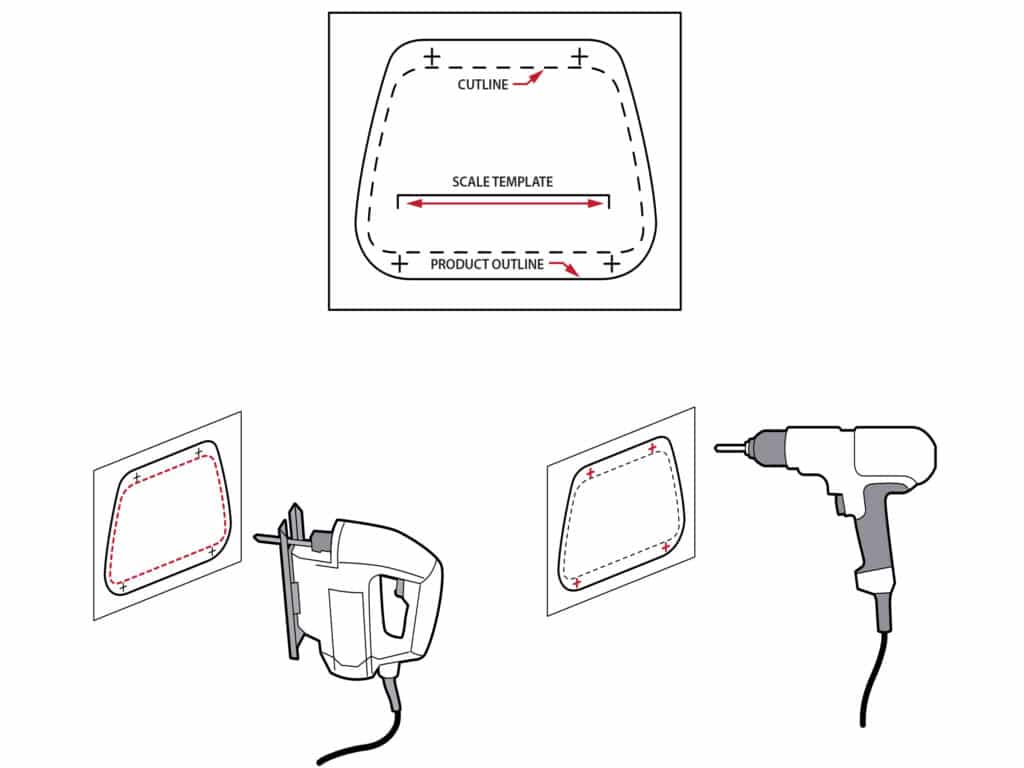
Choose a vertical or slightly forward-angled surface (such as those found on many helms) with convenient access and enough room to accommodate the cutout and faceplate, and adequate space behind the surface. Ensure no wires, hoses or other objects will be damaged while cutting and drilling. Use the supplied paper template to mark the cutout area and four mounting holes. Make the cutout with a jigsaw, then drill the pilot holes. For plywood, use a 3/32-inch drill bit; for fiberglass or acrylic surfaces, use a 1/8-inch bit. Chamfer the pilot holes to inhibit gelcoat cracking.
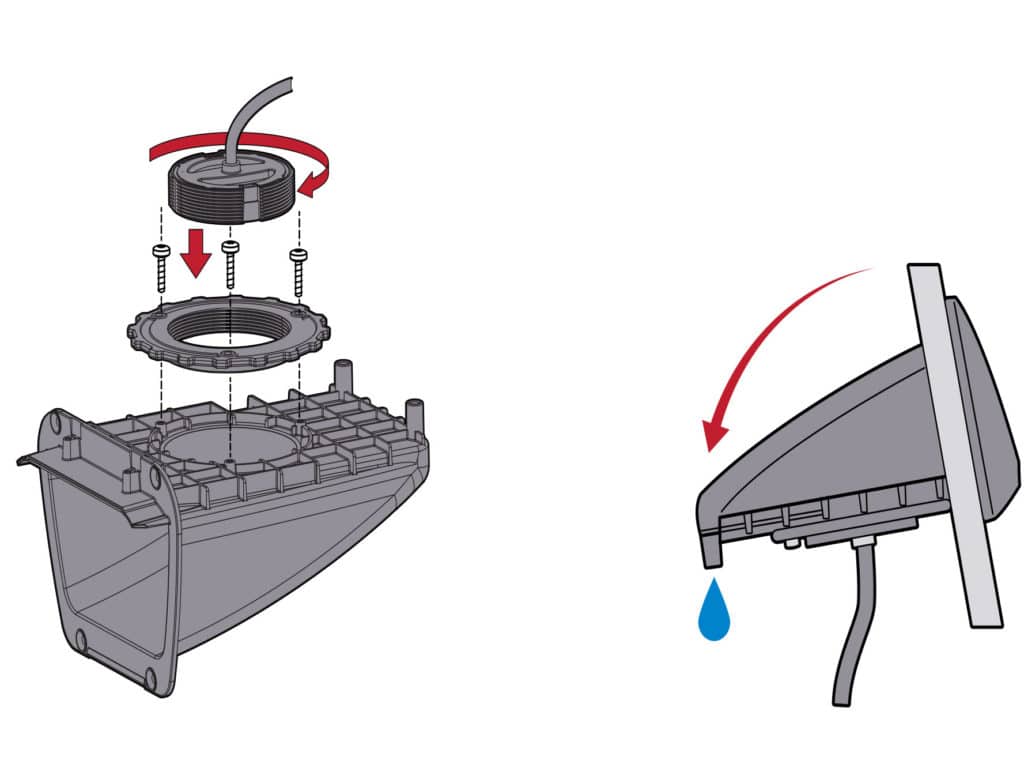
The Nest uses the Scanstrut SC-SW-01E-005 inductive charging element that must be installed on the bottom of the pocket. Use three of the supplied 3 mm thread-forming screws to attach the retaining ring for the element; be careful not to overtighten and crack or break the plastic on the bottom of the Nest. Then screw the wired charging disc, wire side down, into the center of the retaining ring until it is snug against the outside bottom of the plastic pocket. Again, be careful not to overtighten the inductive charging disc.
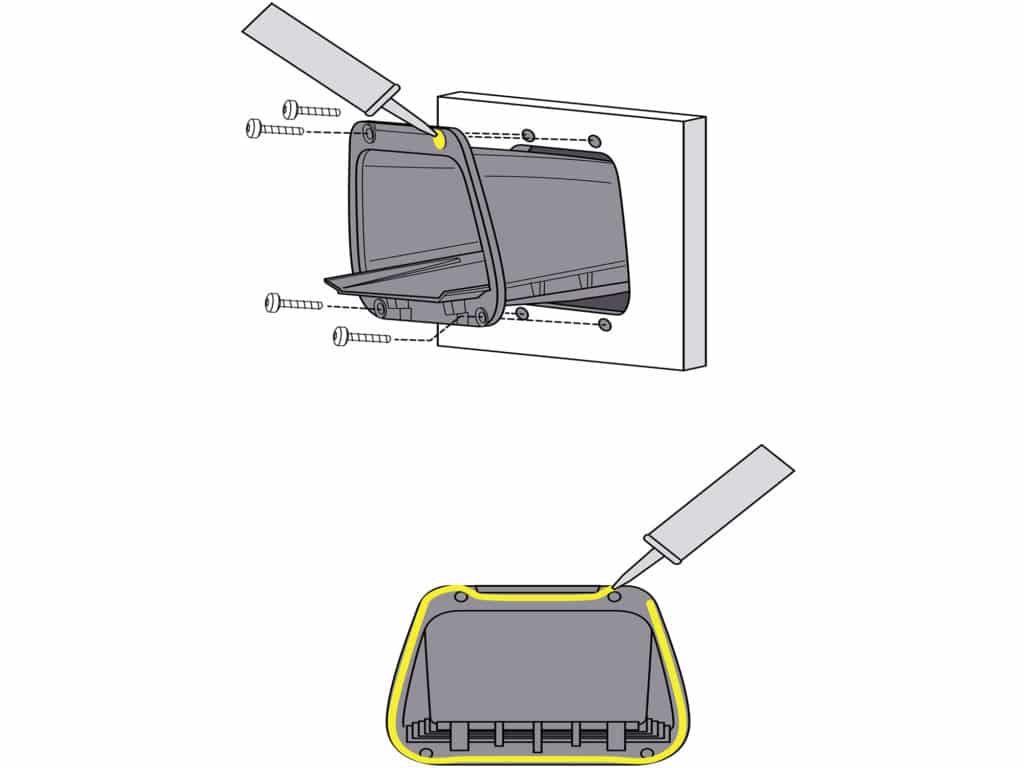
First, dry-fit the plastic Nest pocket to make sure it fits and that everything is straight and aligned. For the final install, apply marine silicone sealant generously around the perimeter of the mating surface of the flange. Then slide the Nest into the cutout, being careful that the wire for the inductive charger does not get pinched or damaged. With the Nest in place, squeeze some marine silicone sealant into the four screw holes. Then use the supplied No. 6 self-tapping Phillips screws to secure the flange to the surface. Wipe away any excess sealant.
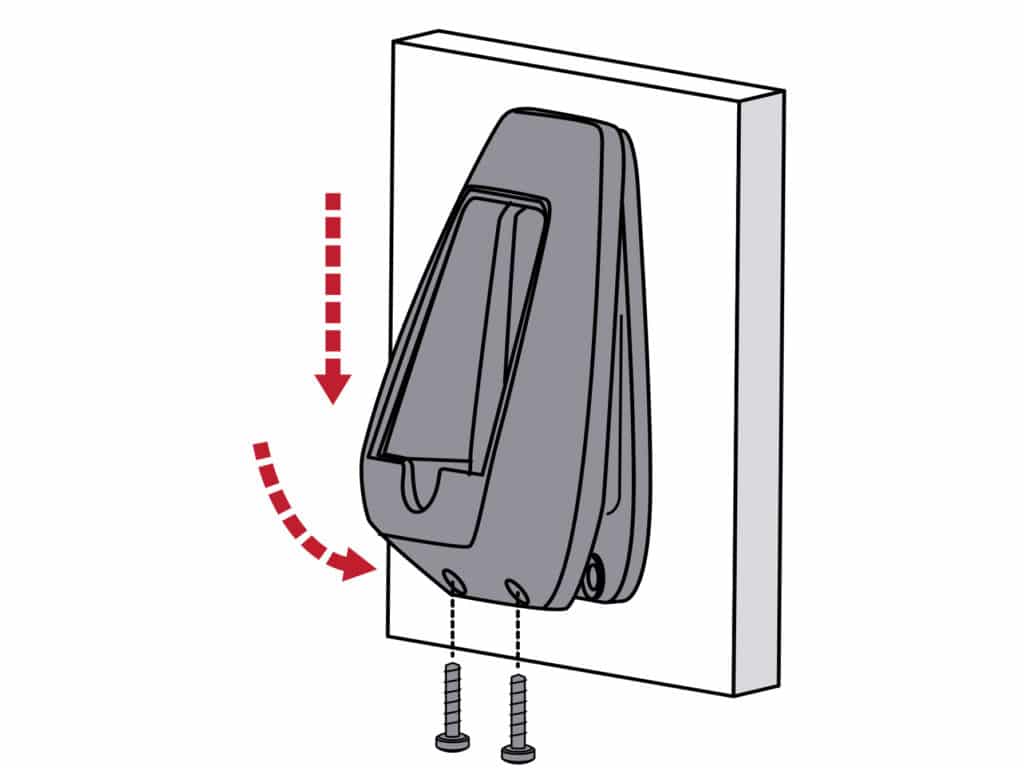
The faceplate for the Nest hides the mounting screws on the flange to offer a pleasing cosmetic touch on the helm or in a cabin. It also features a lip (aka fiddle) that helps prevent the phone from sliding out in bumpy seas. To install the faceplate, first insert the tab on the plate into the notch on the top of the mounting flange, then press the bottom of faceplate into the position and secure it with the two supplied 3 mm Phillips thread-forming screws, being careful not to overtighten and potentially crack the plastic on the flange or faceplate.
Read Next: More Weekend Workbook Projects
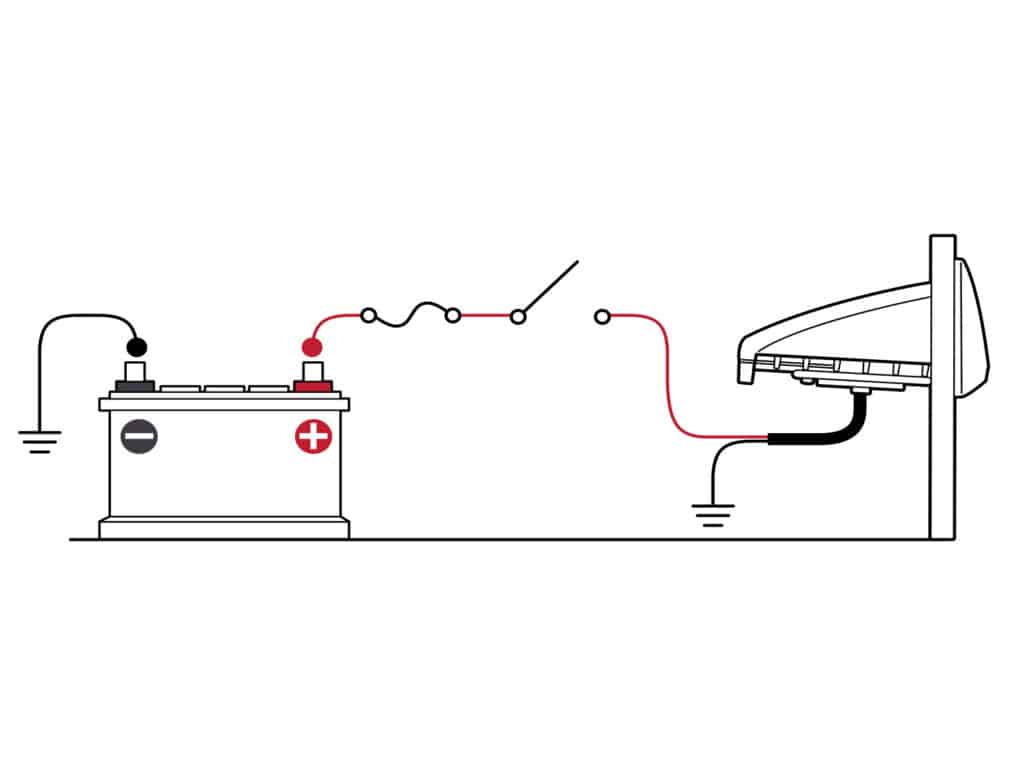
The Nest inductive charging disc requires 12- or 24-volt DC power, and it comes with an integral 10-inch-long pigtail with one positive wire and one ground wire that needs to be connected to an onboard
power source. Use a fuse (not included) rated according to input voltage and current (for 12-volt systems, use a 2-amp fuse), and make all connections waterproof and corrosion-resistant using crimp-on connectors with heat-shrink collars. Connect the Nest to onboard power through a switch or breaker that allows you to turn the Nest charger on or off.


