Boat names are as individual as boaters. When I wanted a custom look for my boat’s name, I found it wasn’t that expensive to do and it was a fun project. As a side benefit, the graphic artwork accompanying the letters disguised some annoying scratches on the hull. Can you scratch the graphics off? Sure, but it’s quick and inexpensive to have them replaced using original art files. And, when it came to applying registration decals, I stumbled onto a much more beautiful, economical and easy way to do it than by purchasing individual numbers and letters and sticking them on.
Our sign guy said he could create basic graphics for little additional cost, but I was lucky enough to have a buddy who made my evil-looking mackerel for the cost of a case of wine. After seeing the project, I only wish I’d made it a little larger. Our pair of graphics cost $175 — installed.
We also learned the same principles will let you “wrap” your boat, giving dull hull sides a new look at an economical price — and with help from the graphics cutter, you can have your boat name posted right on the hull wrap. Maybe even NASCAR it up a bit!
Getting Started
Skill Level: 1/5
Finish Time: 1 hour to install
Tools and Supplies
*Denatured alcohol
*Paper towels
*Plastic squeegee
*3M painter’s tape
Step 1
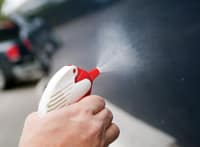
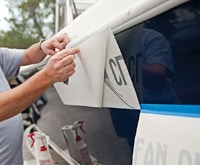
Choose a location for your graphics that will not interfere with dock lines, hardware or fenders — you don’t want the graphics to rub off. We set ours low to avoid rubbing the dock, but high enough that they wouldn’t be in constant contact with pressurized spray coming off the chines. Clean the area with denatured alcohol to remove wax for good adhesion.
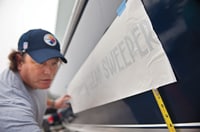
Step 2
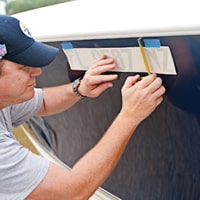
The digitally cut graphics are sandwiched between sacrificial wax papers to hold them together while you work with them. use a spot of tape to hold one end in the approximate position, measure the distance to the chine or rub rail and duplicate the distance on the other end. If you want your graphics to be level when the boat is floating, they may need to be angled on the trailer or hoist. Take a look at a photo of your boat in the water to get a feel for the ideal position when at sea.
Step 3
Once in position, tape the entire length of the upper side of the graphic paper to secure it. We cut our graphics in half, between the letters — not through one — to make them easier to work with.
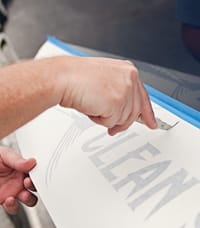
Step 4
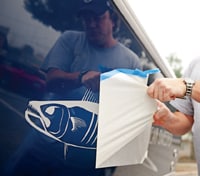
You can spray a light coating of water on the spot now — it eases the smoothing process if you haven’t practiced on such a project before. Then, peel back the protective, nonadhesive wax backing closest to the hull. Be careful to lay the graphic back down in its original position, avoiding wrinkles and keeping it from adhering to the hull.

Step 5
Press a nylon squeegee or spatula against the edge of the graphic near the middle. Pull it from one side of the decal to the other in smooth strokes to remove air and press the adhesive into place. Go slowly with even pressure, and don’t change directions or you’ll create bubbles and wrinkles by driving air back under the decal. Don’t remove the outer protective layer for at least 20 minutes — you want to let the water underneath dry out. Move to the second half of the graphic and repeat the process.
Step 6
After 20 minutes, the water underneath should be dry enough and the adhesive graphics firmly adhered to the hull. Carefully peel back the protective paper and discard it.
Step 7
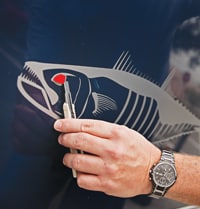
Add details to the graphic by sticking them to the end of an X-Acto knife or box cutter. Puncture any bubbles you find and gently press out the air. You have a new look.
Registration Numbers Made Easy It cost $22 to buy standard decals for our hull numbers, so when Robert Cloutier, the account executive at Signs Now in Winter Park, Florida, said he’d cut a custom set for $20, we jumped at it. A friend created the fish and dagger font for me, but, according to Cloutier, many sign shops can create most anything you like from stock fonts and graphics. He further recommends using premium vinyl from 3M or Avery. Choose products rated for more than five years of service life for outdoor use.