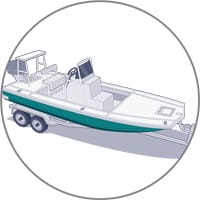
There are thousands of boats still in service with nonskid decks that incorporate a grit-type traction additive to the gelcoat or a marine paint rather than a diamond pattern formed into the deck mold. In fact, there are still boats being manufactured today that use this system. They all share a common characteristic — the grit wears down with use and the deck eventually becomes slippery when wet. Slippery decks can lead to accidents and injury and should be resurfaced.
The answer is to restore the decks using one of the systems available from marine paint manufacturers. You can bring the boat to a boatyard and pay a pretty penny to have the job done, or, if you are handy and have a weekend, you can do it yourself and put the savings toward using your boat.
In this Weekend Workbook installment we’ll look at two systems aimed at the DIY crowd, one from Interlux (yachtpaint.com) that is based on its durable two-part epoxy paints and the other a water-based acrylic polymer developed in New Zealand called KiwiGrip (kiwigrip.com). Both paints are available in a variety of colors to enhance the look of your boat.
Getting Started
Skill Level: 3/5
Finish Time: 2-4 days (includes drying time)
Tools and Supplies
*Interlux Epoxy Primecote 404/414
*Interlux Perfection
*Intergrip traction agent
*Interlux 202 Fiberglass Solvent Wash
*3M Scotch Blue masking tape
*Orbital sander with 60-, 120- and 220-grit pads
*Paint roller with solvent-resistant roller bodies
*Selection of round objects of various diameters to radius corners
*Fine-blade razor knife
*Solvent-resistant gloves
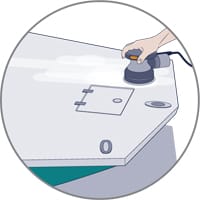
1. Prep the Surface
Wash the deck with a mild detergent to remove dirt and grease. Allow it to dry. Lightly sand the surface using a random orbit sander loaded with 60-grit to level and scuff the old surface. Finish with 120-grit, vacuum up any dust, and wipe down the surface with a rag and 202 Fiberglass Solvent Wash, replacing the cloth as it picks up residue.
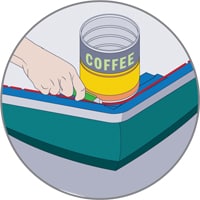
2. Tape
Carefully masking the area to be coated gives the finished job a professional look. Make clean, straight lines and curved corners and edges using a premium painter’s tape like 3M Blue. Use a variety of round objects to radius the corners. During a recent restoration I used small paint cans and various-size flat washers to round corners with a razor knife, and the finished job was a knockout.
3. Prime
Mix up a batch of Interlux Epoxy Primekote 404/414 per the directions on the can and apply using a roller with a solvent-resistant cover. Coat the old surface with a thin layer of primer and allow it to dry, noting that drying time can vary with temperature and humidity. Then lightly sand the surface using the orbital sander and 220-grit paper just enough to rough the surface.
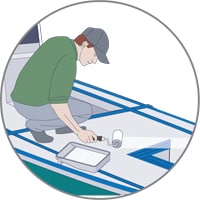
4. Apply Base Coat
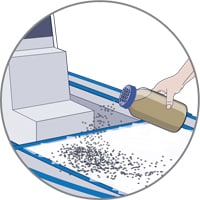
Pour Intergrip into a baker’s sifter or poke holes in the top of the can. Apply Interlux Perfection with a roller. While it is still wet, shake on enough grit to mask the gloss. (One pound covers 450 square feet.) The grit reacts with the paint, becoming larger than when applied. Allow it to dry and then vacuum up any loose grit.
5. Apply Top Coat
Roll on a final coat of Perfection and allow at least two days for the entire system to harden before use. The finished surface will be a durable nonskid that will enhance the look and safety of your boat.
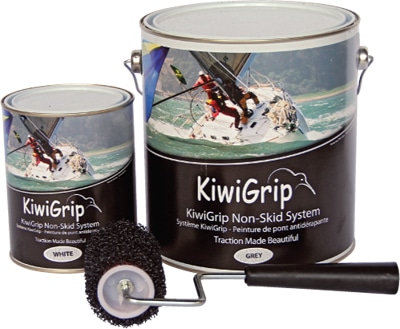
KiwiGrip System
The second option for the DIY boater is a unique product that has been used on racing sailboats and work boats in New Zealand and Australia for more than 15 years. It is a water-based acrylic polymer that comes ready to use in a one-gallon can and is 10 times thicker than paint — the consistency of pudding. A special open-cell roller body comes with the paint for adding the texture; no traction additive is necessary.
For most boats under 26 feet you can prep, tape and paint the entire deck in a day and it will be ready for use in 36 to 48 hours. KiwiGrip has excellent durability and can even fill minor imperfections in the deck surface. The product performs best when applied in a shady area or on a cloudy day because direct sunlight accelerates the drying process.
1. Surface Prep: Wash the deck with detergent and allow it to dry. Using an orbital sander and 60-grit paper, scuff the entire area to be painted to remove any gloss, vacuum up the residue, rinse and let dry.
2. Taping: Follow the same instructions noted in the main article.
3. Application: KiwiGrip can be applied with a trowel or a large, stiff nylon paintbrush. When you complete an area, go over it with the open-cell roller to apply the texture.
4. Finish: Allow the paint to set up for an hour or two, and remove the tape for a clean edge. If you wait until it dries completely the tape is more difficult to remove. Cleanup is with soap and water. Allow at least a day before using the deck.