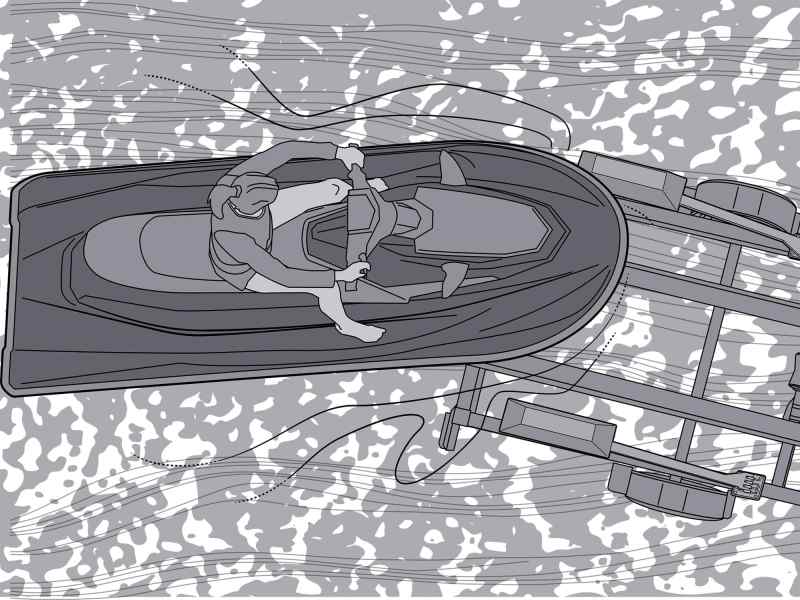
Lining up a boat or a personal watercraft while loading it on the trailer can pose challenges, especially if you need to submerge your trailer deeply, the water is too dirty to see the trailer underwater at the ramp, or wind or current pushes the hull sideways while loading. Over the years, a variety of devices have been used to help align hulls on trailers in these conditions, including posts and poles at the back of the trailer and vertical boards along the sides.
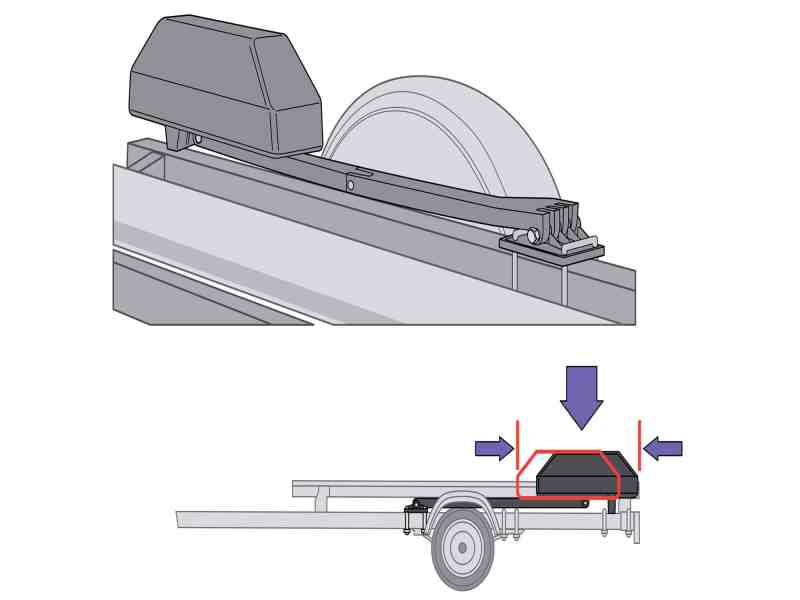
But now Taylor Made (a division of Lippert) has introduced a new system called EasyGuide. Made of durable injection-molded nylon, the system uses floats that raise to the surface on articulating arms when you back the trailer into the water. The contoured floats visually guide you and keep your boat centered as you drive or winch it onto the trailer. Designed for craft weighing 1,500 pounds or less, the system is easy to install and use.
EasyGuide comes in a one-size-fits-all kit and is best suited for single-axle trailers—the type typically found under many PWC and aluminum freshwater boats. The kit includes all the parts you need, except for U-bolts to mount the base brackets and float rests. You will need to buy the U-bolts separately in the proper width and length to fit your trailer frame. The articulating arms also offer 16 inches of fore and aft adjustability to position and align the floats with the back frame of most trailers. Here’s how they install on a single-axle trailer.
Skill Level: 1 out of 5
Finish Time: Approx. 1 hour
Tools and Supplies
- Taylor Made EasyGuide kit ($299.95; store.lci1.com/easyguide-by-taylor-made-2022106874)
- Four U-bolts as needed for 2-, 3- or 4-inch frames, with matching backing plates and locknuts
- Two 9/16-inch wrenches and one 7/16-inch wrench
- Phillips screwdriver
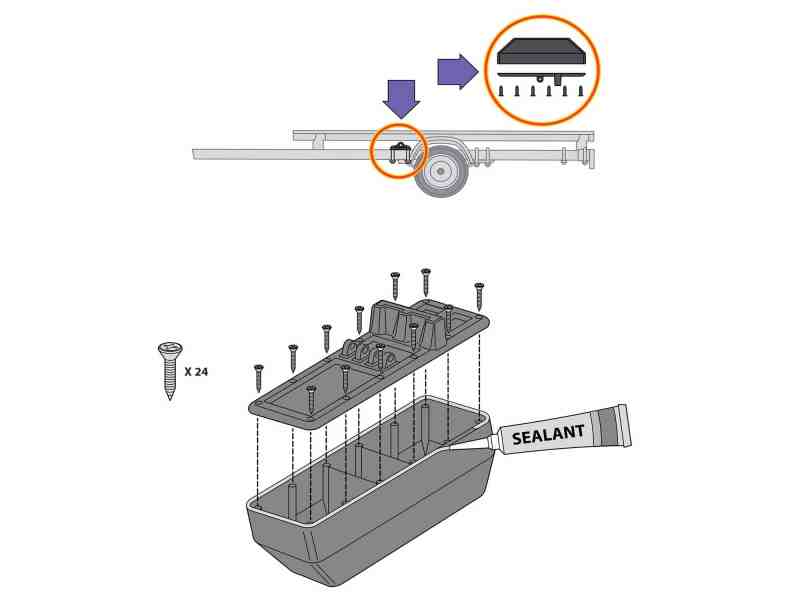
Assemble the Floats
After you unpack the kit, take apart the bottom and top parts of each float. You will need to reassemble them with the supplied hardware. But first place a bead of the supplied clear sealant around the interior perimeter of the bottom part, and then reassemble it with the top part using the supplied No. 12 screws (12 for each float). Put a dab of sealant in each screw hole before threading and tightening the screws with a Phillips screwdriver. Once assembled, set both floats aside to let the sealant cure.
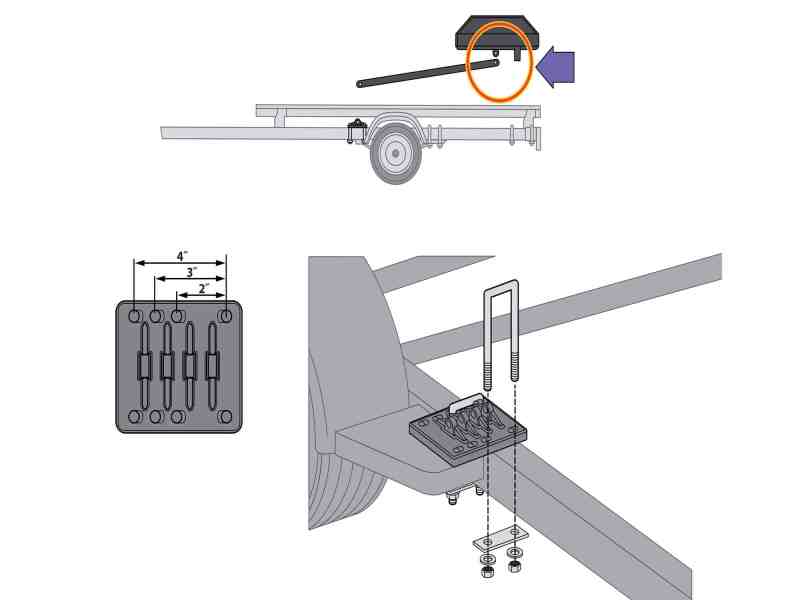
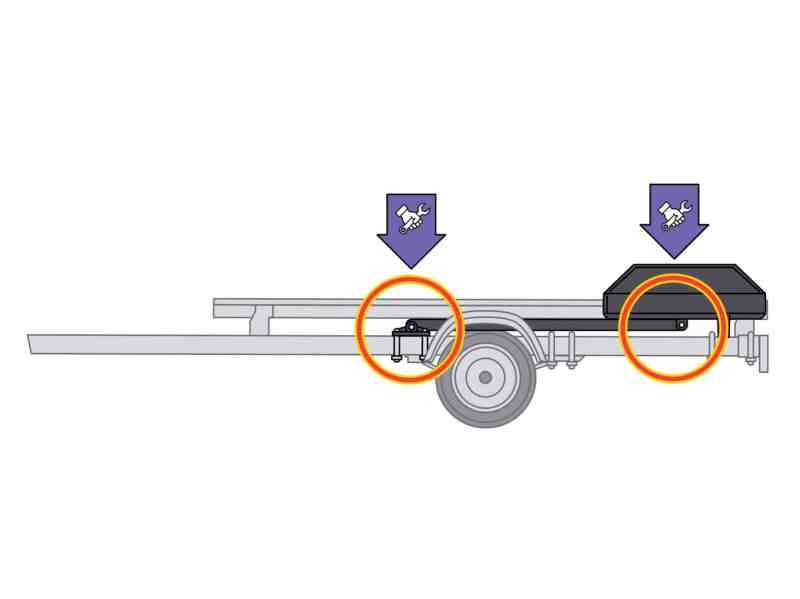
Install the Trailer Base Plate
The supplied pair of trailer base plates will fit 2-, 3- or 4-inch-wide trailer frames. For our installation, we used 2-inch-wide U-bolts to the fit the 2-inch-wide trailer frame and matched them with backing plates and locknuts—two sets for each plate. Position and bolt the plates to the top of the trailer frame just forward of the fender, but don’t completely tighten the hardware because you will later need to slide the plate back or forward slightly to adjust the position of the float on the trailer.
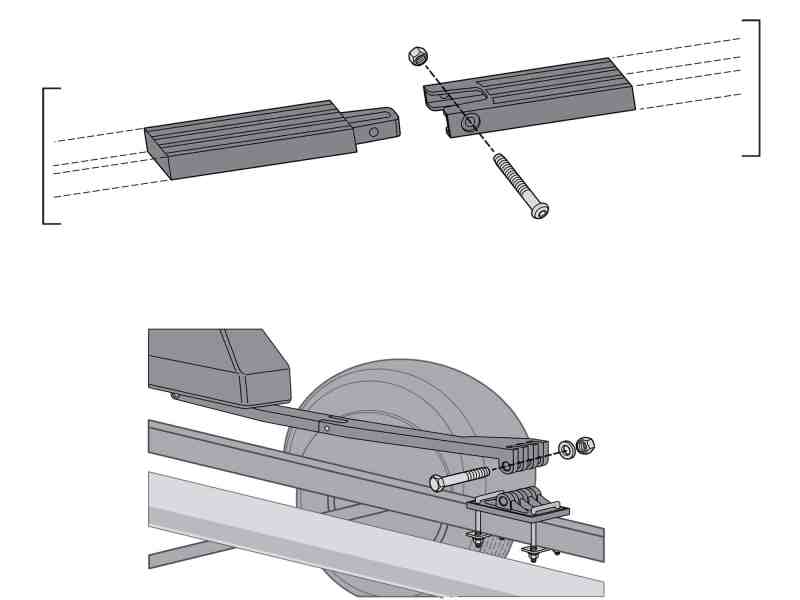
Connect the Arms
Assemble the two-piece arms, inserting the male tab into the female slot. Tap them together to tighten. Use the supplied 1/4-inch bolts and locknuts to secure the two pieces. Insert the tines on one end of the arm (with the flat side up) into the slots of the base plate. Next, insert the tines on the other side of the arm into the slots on the underside of the float. Use the suppled pivot bolts and locknuts to connect the arm to the plate at one end and to the float at the other. Loosely connect and do not tighten this hardware for now.
Position the Floats
The back edge of the floats need to align with the aft edge of the trailer’s rear cross member when the floats are resting in the down position. Slide each of the loosely connected base plates forward or backward slightly until each float is in this correct position on the trailer frame. Next, install the supplied float-rest pieces under each float with one U-bolt, a backing plate and two locknuts. (These U-bolt assemblies are not supplied.) Align the rests with the back portions of the floats, but do not tighten for now.
Tighten Hardware
With the assemblies aligned in the correct positions on each side of the trailer, you can now tighten the hardware, including the U-bolts and arm pivot pins. Do not overtighten any of the hardware to help prevent warping or cracking the plates, arms and floats. Test the functionality of the EasyGuide system at the launch ramp, and make any necessary adjustments to ensure smooth operation and alignment between the trailer and the boat hull, as outlined in the owner’s manual.


