Even if you don’t live where the water freezes, you should take steps to prep your sterndrive boat for the winter—even if it means you only put the boat away for the holiday season. The annual maintenance rituals will help your engine and drive live longer, while better familiarizing yourself with the workings of your boat. Here are nine critical steps you should take when winterizing your sterndrive.
Basic Checks
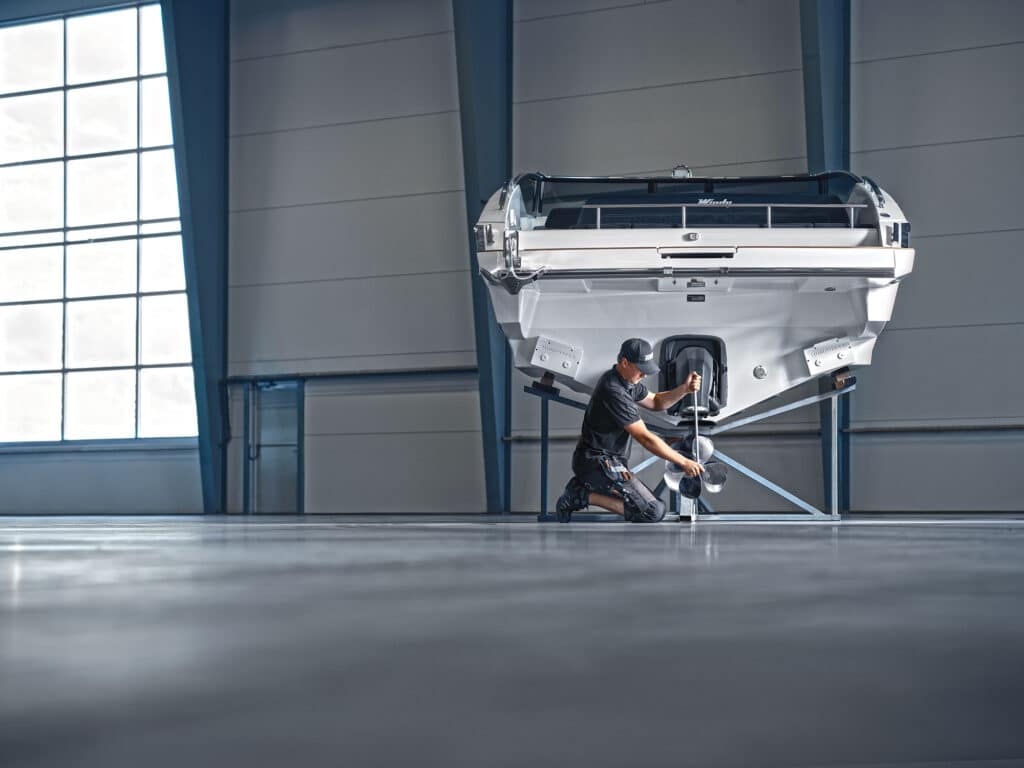
If your propeller is damaged, drop it off at your local prop shop for repair.
Check the drive skeg and anti-ventilation plate as well; if these are bent or missing chunks, time for some welding, repair and paint.
Scrape, wire brush or sand off any loose paint and corrosion, clean the affected areas, and use factory spray paint to cover it up.
Check the steering and power trim/tilt systems for slop and damage. Check fluid levels in both steering and power trim reservoirs and top off if necessary.
Fuel Service
Before shutting down the engine for the last time, ensure your boat’s fuel is capable of a long-term rest, especially if your fuel contains ethanol. Fill the fuel tank until it’s almost full, allowing room for expansion due to temperature and humidity changes. Next, change the water-separating fuel filter.
Then, treat the fuel with fuel conditioner and run the engine long enough to get the treated fuel through it (minimum 15 minutes). This way the entire fuel system from tank to injectors or carburetor is filled with stabilized fuel. Finally, “fog” the engine with fogging spray to coat the engine’s innards with lubricant/preservative.
Engine Oil
Besides the service intervals as specified in the engine manual, going into storage is the best time to change the engine oil and filter. Why? Because any moisture or contaminants will be drained from the engine, not sitting in it all winter. It may be tempting to utilize bargain oil: Don’t do it! Name-brand oil offers superior lubricity, corrosion protection and more.
Cooling System
Start by flushing the cooling system with clean fresh water, especially if your boat is used in salt or brackish water. Products like Salt-Away help. Next, drain the cooling system according to the factory manual. Be sure you’ve addressed all the drain points, especially on older engines that don’t have one main cooling system drain. Then fill the system with propylene glycol (often called “RV pink antifreeze”). Doing this will not only prevent freezing and resultant damage, it will also prevent the formation of rust in parts that are not aluminum, such as the engine block and exhaust manifolds.
Full Drive Service
It’s very important to remove the drive so you can inspect the bellows, universal joint, gimbal bearing, shift-cable bellows, water-intake hose and exhaust. Once it’s apart, the bellows can be replaced, as can any worn or damaged O-rings and gaskets, water-intake hose. The engine and drive alignment can be checked, and the U-joint lubed. Many, if not most, boat owners are not capable or prepared to do this.
Drive at a Minimum
Drain the upper and lower drive lubricant, and refill with fresh lube. If the drained lube looks milky (like coffee) or is very black and smelly, it’s time for a drive service; the milky lube means water is leaking in from a bad seal. Black, smelly lube means the lube is very old, or may indicate a failure is coming (bearing, gears, etc.). Remove the propeller and check/remove any fishline wound around it. Rotate the prop shaft slowly to check if it’s bent. Grease the shaft. Grease all zerk fittings you can find.
Damage Control. Check all anodes and replace them if they’re eroded to half their mass or more.


