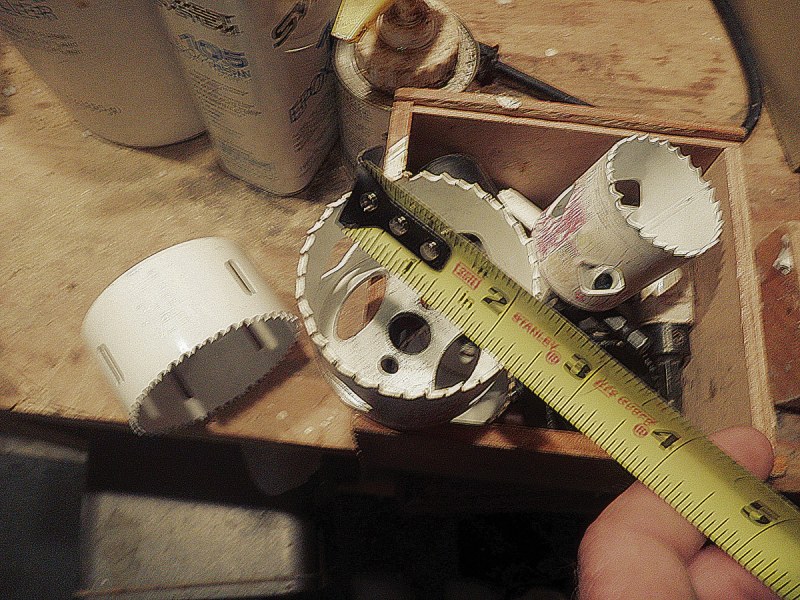
1. Select the appropriate size hole saw. Rod holders come in 2- and 2¼-inch diameters. Here I’m making a jig for 2¼-inch rod holders, so I select a 2¼-inch hole saw.
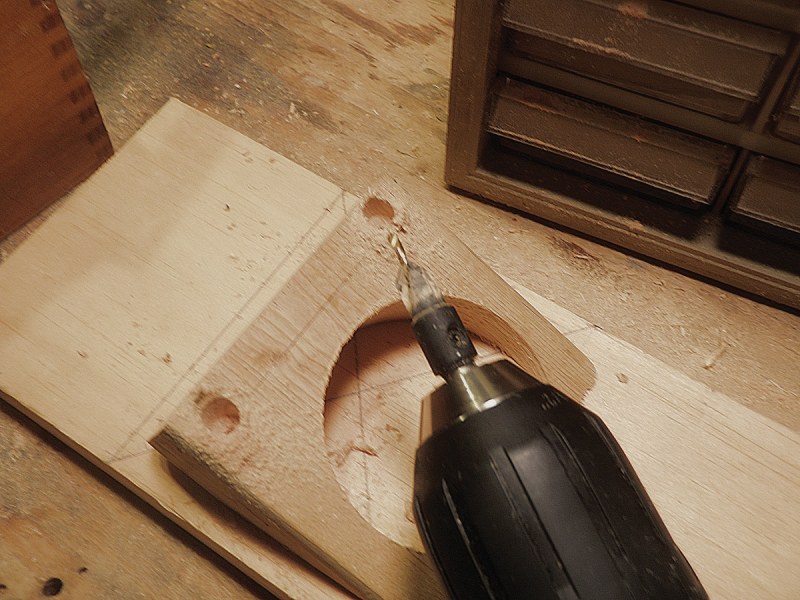
2. Select a two-by block of scrap material, mark a center, and cut the hole. I would normally use a drill press for this, but here I just used a drill. You want a clean, vertical-sided hole.
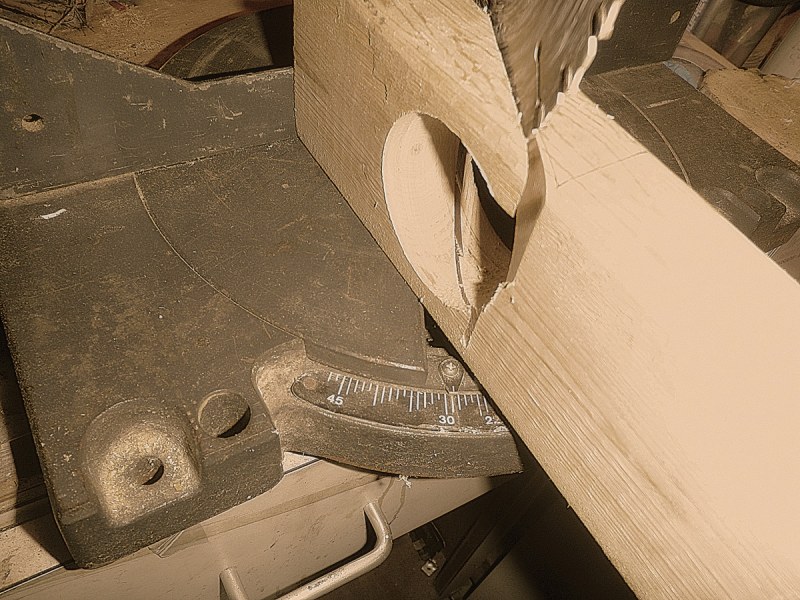
3. Rod holders come in 30, 15 and 0 degrees. Here I am making a jig for installing 30-degree holders. I set the miter saw angle at 30 degrees and clamp the stock with the hole in it on its side in the saw. (The miter saw was on hand; a band saw works better.) You could use a bevel gauge to mark the stock and cut carefully by hand, but I rarely do stuff by hand if there’s a machine available. You can see that my 7-inch miter saw isn’t big enough to quite get all of the circle at 30 degrees in 2-inch-thick stock. But we have enough of it, as will be shown.
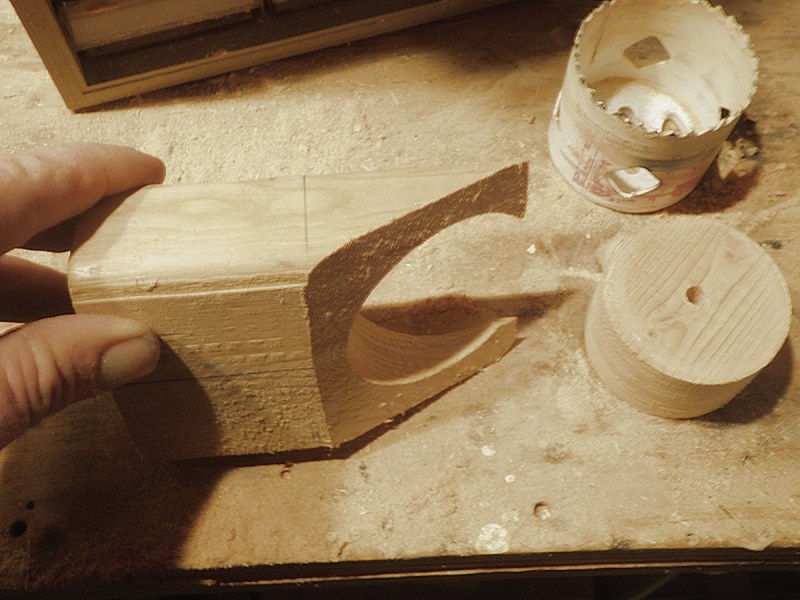
4. Trim the block to a manageable size, enough to leave room for driving screws through this “cutting block” into the other component that needs to be made and that we’ll call the “clamping block.” When fastened together, these two parts make the completed jig. I’ll trim this block at the marked line shown and then we will proceed.
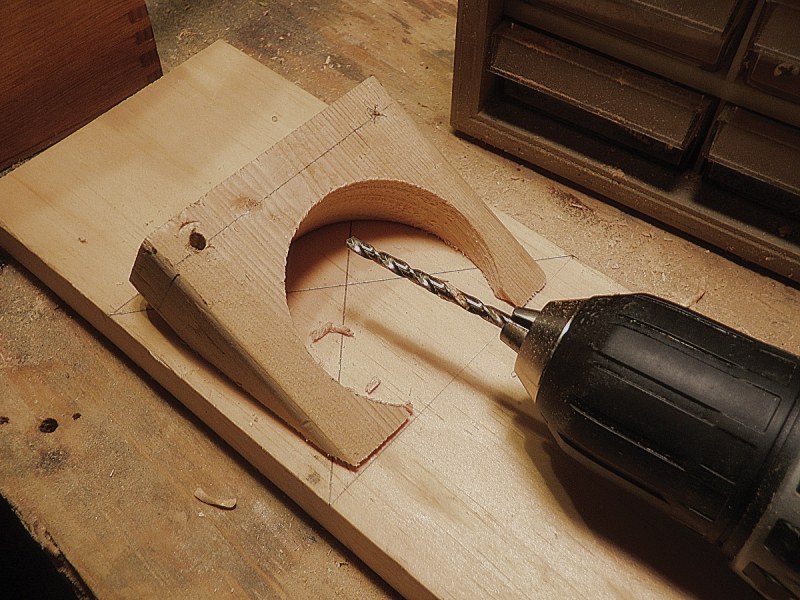
5. After trimming the piece, select a scrap of half-inch to three-quarter-inch-thick solid wood or plywood. Place the cutting block (the part with the hole in it) on top of the new scrap (clamping block) so that the angle is up; that is, so that the hole presents itself at 30 degrees, not vertically. Just turn the bloody thing upside down as shown! Measure and mark for center and then drill holes for screws — being careful you don’t drill into the cavity of the cutting block. If you look closely you can see where I squared up a pencil line from the bottom , forwardmost part of the hole on the outsides of the cutting block. Then I connected these lines across its top. So long as I drill above the line that I marked, and vertically, the screws won’t end up in the hole.
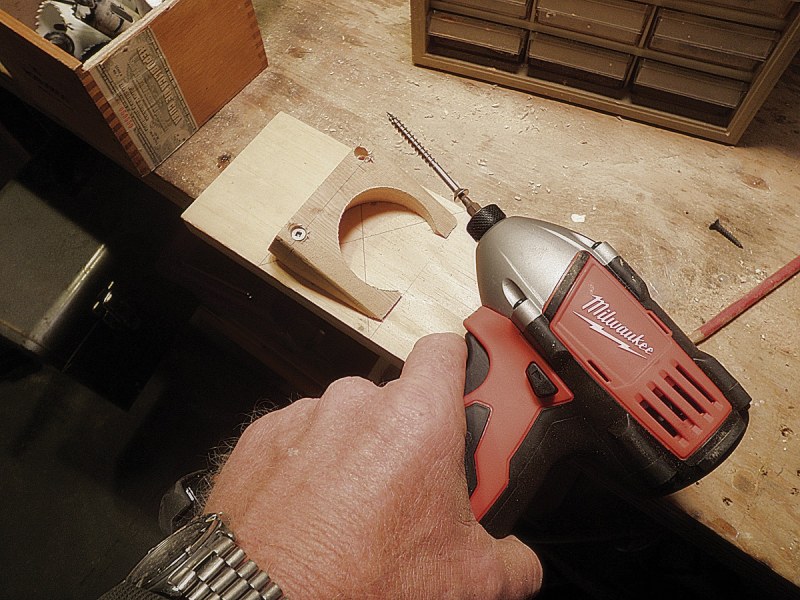
6. Countersink the holes for the screws.
7. I switch to my impact driver. If you have one, it provides much better control while driving screws than a drill motor does. If you don’t, a driver bit chucked in a drill is fine. You could easily drive the screws by hand as well. I used stainless square-drive screws, but galvanized or ceramic deck screws would work too. Be careful selecting the length of the screws. If they are long, place some scrap underneath so you don’t screw the fixture to your bench! You can file off the protruding tips later.
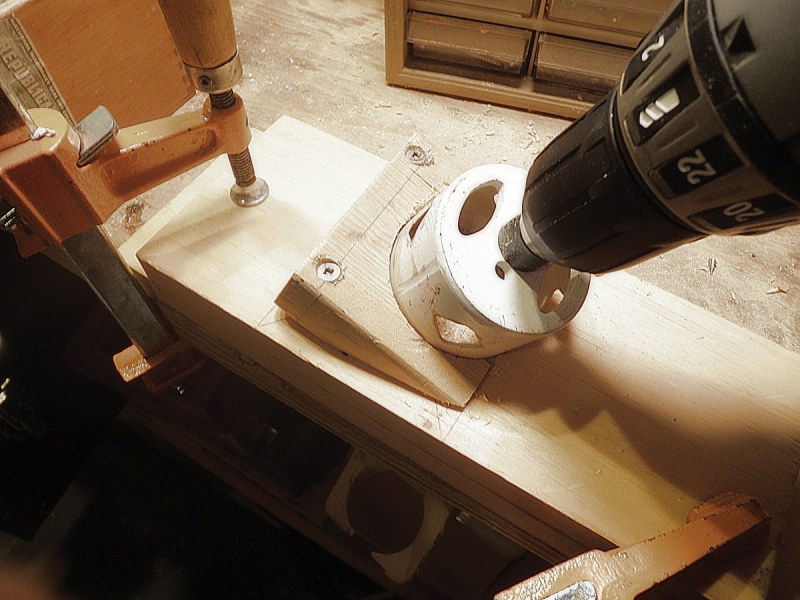
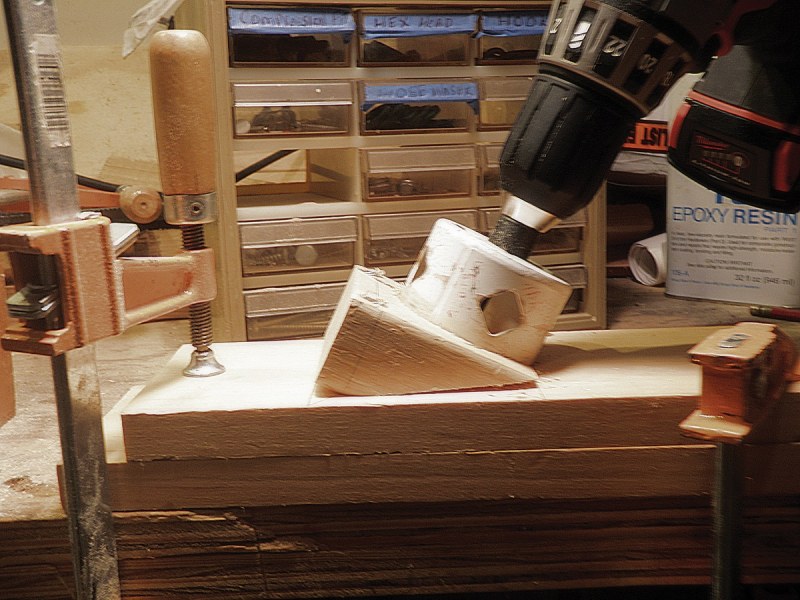
8. Once the cutting block is fastened securely to the clamping block, you’ll need to carry the angled hole through the clamping block. Here, I switch back to the drill motor with the hole saw. With the “hole block” as a guide, I cut through the clamping block, in effect making the same cut I would on the boat when installing rod holders. For the record, I call this the clamping block because this flat plate under the cutting block allows the jig to be clamped to the gunwale in position over the mounting location. The clamping block may have to be modified — cut and/or shaped to fit around obstructions like cleats and rail stanchions, and so that it can lie flat if there is a fuel fill or spray rail or whatever on the gunwale. This is why I don’t glue and screw the cutting block to the clamping block when making these jigs. Consider the clamping block “sacrificial” — to be modified as required to suit a particular mounting location.
9. Here is how it works on the boat. Like this — get it? I’ll run two more screws into the shallow end of the hole block to prevent the “rise” evident in the heel of the cutting block in this photo. Then add a coat of paint so it’ll last while being used in a marine environment. A jig like this can be made in various ways, with a variety of materials. My method is just a good baseline. The important thing is that using such a fixture ensures accurate cutting on the boat. It takes a lot longer to repair chewed-up fiberglass, and at much greater expense, than it does to cobble together a hole-cutting jig.
Many boaters express fear about cutting and drilling holes to add boat accessories. Usually, my response is “Don’t worry: Your boat is full of holes already.” If you want the GPS, the stereo, the swim step or the transducer, you’ve got to drill a hole. Adding rod holders for boats is no exception, but they require a twist.
Since rod holders are angled, the hole they fit through must be angled as well. When a spinning hole saw hits the surface at an angle, it wants to “walk” off to the side — chewing up the pretty fiberglass in the process. Worse, you could lose control of the saw and break your wrist because the drill will turn and buck as the saw bites in. So you have to control this sharp, madly spinning device while maintaining a constant angle so that the rod holder fits through the covering board or gunwale and its flange lies flush when installed.
Complete Guide To Installing Rodholders
The best way I have found to do this — and I have been installing rod holders for boats for over 30 years — is by the use of a simple jig that anyone can make. A crusty old salt named Bill, from Bill’s Boats, Port Washington, New York, showed it to me back in the 1970s. I have used various versions ever since. For this article, I cobbled up a quick one to provide you with a a step-by-step guide to building your own. It’s not the only way to make such a jig, but its basic premise of holding the saw at the correct angle, and in the right plane side to side, ensures a safe and secure rod holder installation. You don’t need to worry about your boat’s finish, and there’s no need to break out the medical kit.
It took me an hour to build the one shown here, complete with some cosmetic flaws. Even if you’ve never built rod holders for boats before, and you don’t have a shop full of tools at the ready, it’s no more than a pleasant evening’s task.
If you think building a jig is cheating, I suggest you speak to a pro. Any carpenter or boat rigger worth his tool chest will tell you he uses jigs and patterns at every opportunity. “By eye” is the method for hacks.
Quick Tip: If you can’t get a purchase for a clamp in the cockpit, pipe clamps can be used to bear against gunwale and chine to secure the jig.